HYDROSTATIC POWER TRAIN
4181384 First Edition 5-27
5
Disassembly and Inspection
See Figures 5-31 through 5-46.
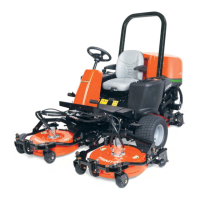
Figure 5-31
1. Scribe a line (1) along the side of hydraulic motor
sections (2) to mark the position of motor segments
before disassembly.
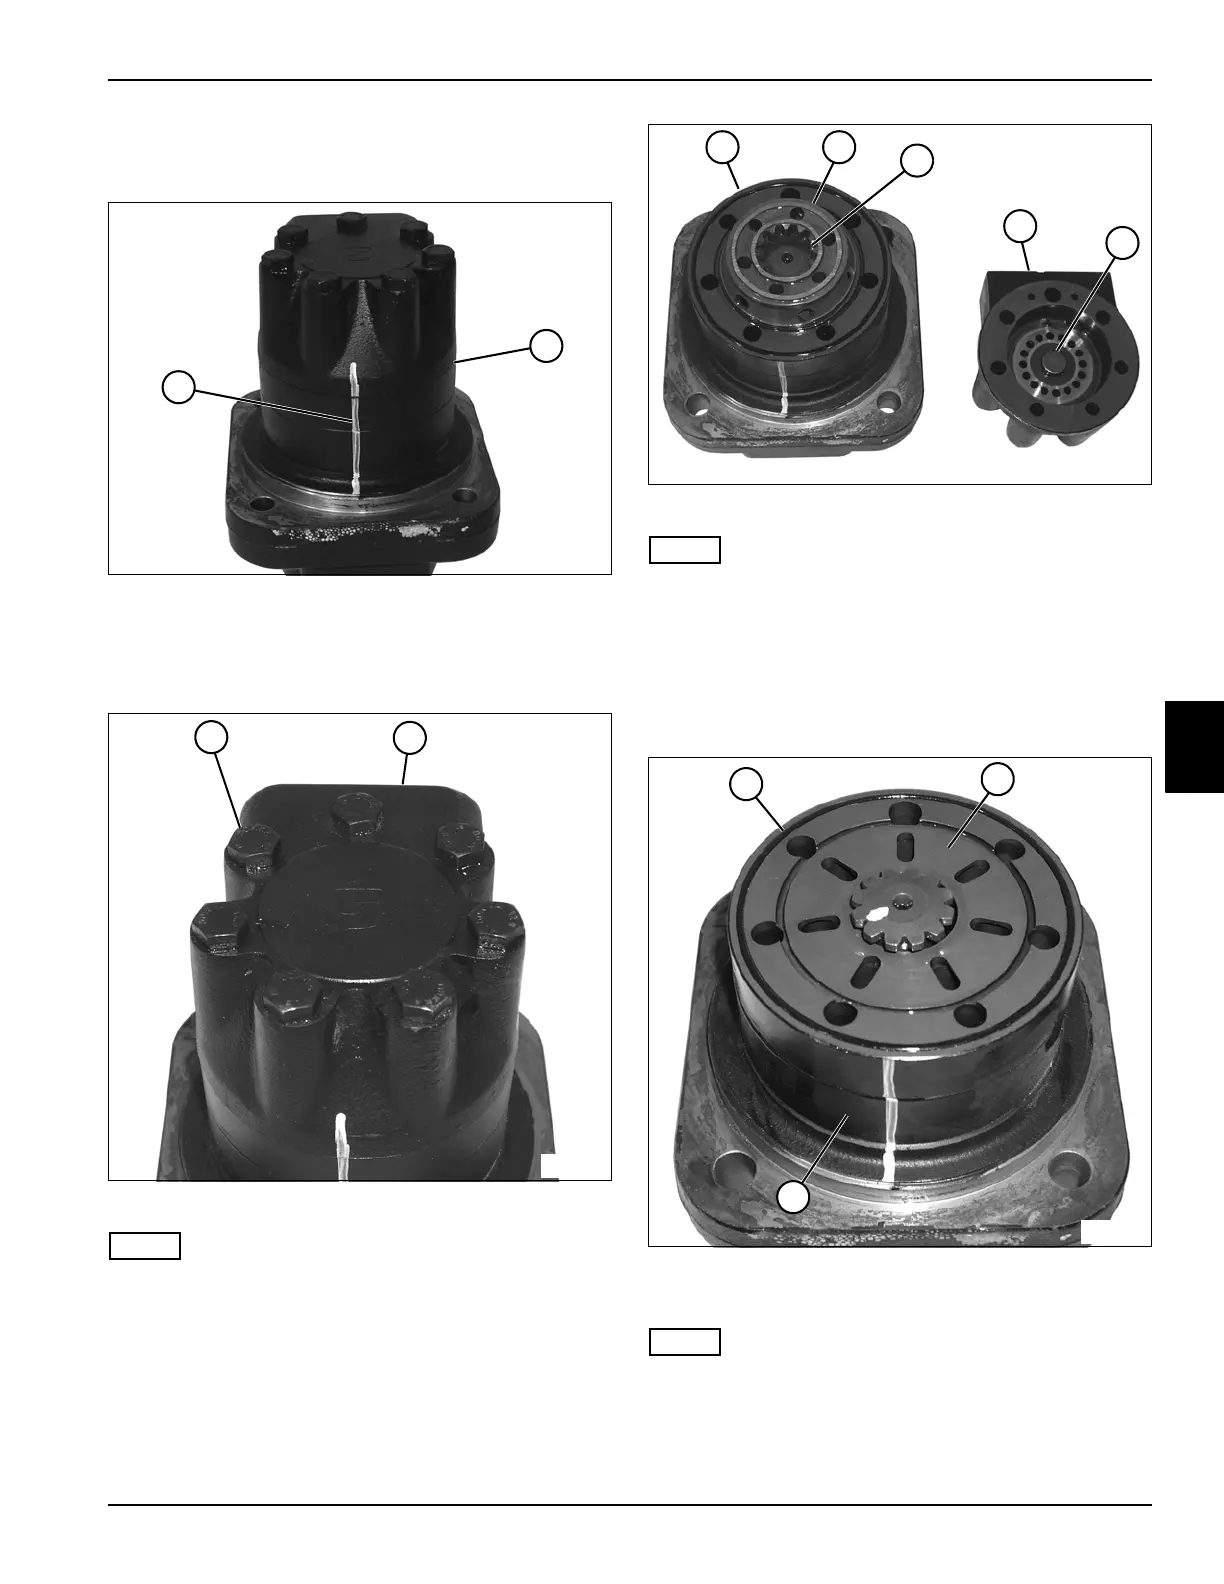
Figure 5-32
NOTE
Use caution when removing screws, as motor segments
will be free to move.
2. Remove seven screws (3) from the end cover (4).
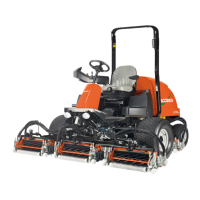
Figure 5-33
NOTE
The spacer (9) may remain with the disk valve (6) when
the valve housing is removed.
3. Remove the end cover assembly (8) and spacer (9)
from the disk valve (6) valve plate (5).
4. Remove the disk valve (6) from the valve drive (7)
and valve plate (5).
Figure 5-34
5. Remove the O-ring (10) from the valve plate (11).
NOTE
Record the orientation of the valve drive before removing
to ensure correct installation.
6. Remove the valve plate (11) from the gear wheel set
(12).
TN1309
1
2
TN1310
3
4
TN1311
5 6
8
9
7
TN1312
10
11
~
~
12