Page 34
ENGLISH
Jandy
®
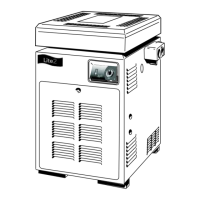
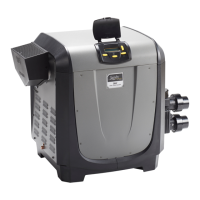
Legacy™ Model LRZE Pool/Spa Heater by Zodiac
®
|
Installation and Operation Manual
Improperinstallationormaintenancecancause
nauseaorasphyxiationfromcarbonmonoxidein
uegaseswhichcouldresultinsevereinjury,or
death.
Uneinstallationouunentretieninadéquatpeut
causerlanauséeoul’asphyxieenraisondu
monoxydedecarboneprésentdanslesgazde
combustionetmêmeentraînerdesblessures
gravesoulamort.
Zodiac Pool Systems, Inc. recommends that you
inspect the heater on a continual basis and especially
after abnormal weather conditions. The following
basic guidelines are suggested for your inspection:
1. Keep the top and surrounding area of the heater
clear of all debris.
2. Keep the area around and beneath the heater
clean and free of all combustible materials such
as paper, leaves, etc.
Donotstoreorusegasolineorotherammable
vapors,liquidsorchemicalsinthevicinityofthisor
anyotherappliance.
Nepasentreposerniutiliserd'essencenid'autres
vapeursouliquidesinammablesàproximitédecet
appareiloudetoutautreappareil.
Donotusethisheaterifanyparthasbeenunder
water.Immediatelycallaqualiedservicetechni-
ciantoinspecttheheaterandreplaceanypartof
thecontrolsystemandanygascontrolwhichhas
beenunderwater.
N'utilisezpascetappareils'ilaétéplongédans
l'eau,mêmepartiellement.Faitesinspecter
l'appareilparuntechnicienqualiéetremplacez
toutepartiedusystèmedecontrôleettoute
commandequiontétéplongésdansl'eau.
3. If the heater is equipped with a pressure relief
valve, check for corrosion in and around the
valve. Twice a year, with the lter pump on, lift
the release lever on the top of the valve to make
sure that water runs freely through it. If corrosion
is found, replace the pressure relief valve. When
replacing the valve, be sure that the pump is off.
Install the valve so that the discharge is directed
away from any area that may be damaged by water.
4. Be sure all combustion air and ventilation
openings are not blocked. Check for spider webs
and other debris inside the heater, in the vents on
all sides of the heater jacket and in the exhaust
outlet– especially after a long period of nonuse.
Inspections performed at least once a year by
a qualied technician are required to maintain your
heater's safe and efcient operation. The following
basic safety checks must be performed.
1. Inspect the venting system for blockage, leakage,
and corrosion.
2. Check for spider webs or other obstructions in
the main burner orices – especially at spring
start-up. Clean with wire brush if necessary.
3. Check for loose or broken wires and terminal
connections.
4. Inspect the electrical controls, specically the
following:
a. High limit controls.
b. Water pressure switch.
c. Power interface/Temperature control.
d. Ignition control.
e. Automatic gas valve.
f. Roll-out switch (fusible link).
g. Control circuit fuse.
h. Vent temperature limit.
5. Inspect the external surfaces of the heat
exchanger tubes for black carbon soot buildup by
placing a mirror between and under the burners
when the heater is ring. Remove any soot that
has collected on the tubes, and correct the cause.
Afterinstallationandrststart-up,checkthe
heatexchangerforblackcarbonsootbuildup
afterthefollowingperiodsofoperation:24
hours,7days,30days,90days,andonce
every6monthsthereafter.
6. Make sure that the pressure switch operates
properly by shutting the lter pump off and on
a few times. The burner should go off immedi-
ately after the pump stops. An ignition sequence
should start shortly after the pump is turned back
on.
7. Conduct a normal operating cycle and observe
that the sequence proceeds as intended.