154
Set the rotary dial inside the RV to OFF. Turn water pump OFF or turn the water supply
OFF.
1. Open hot water faucets to relieve pressure on the system.
2. Attach warning sign on all xtures stating “decalcication is in process”. (Warning
signs are included with decalcication tablets)
3. Open the exterior access door panel to the “service” position (door hanging by the
straps).
4. Turn water heater power OFF.
5. Drain water out of the water heater and remove
the inlet lter.
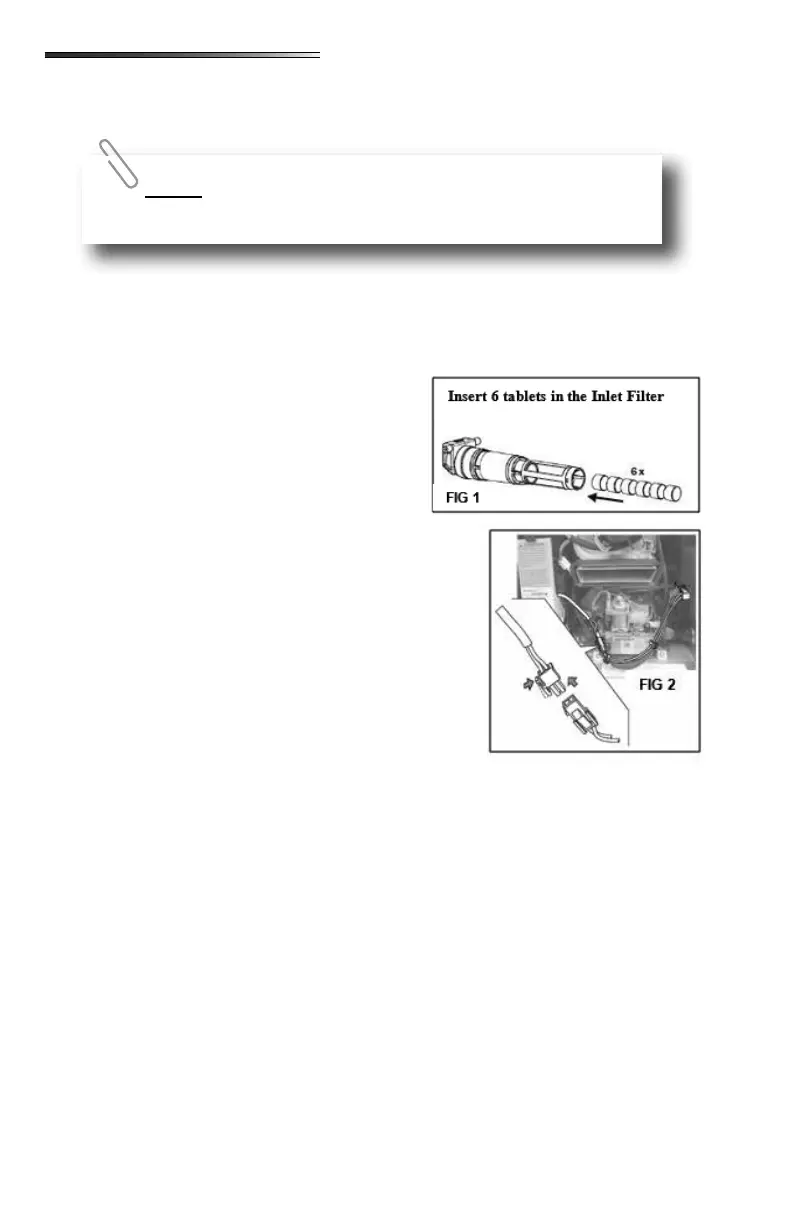
6. Place 6 decalcication tablets () in the wa-
ter inlet lter as shown in this drawing.
7. Re-install the water inlet lter and close the
drain chute.
8. Turn the water heater power switch ON.
9. Turn the water supply ON, or turn the water pump ON.
10. Fill the water system. Run water only as long as neces-
sary when lling the system.
11. Open all xtures: toilets, showers and faucets (includ-
ing outside shower).
12. Once water ows steadily from all xtures the system
is vented.
13. Close all xtures.
14. Tablets will dissolve in approximately 10 minutes and
will turn the water slightly red.
15. Turn the rotary dial control inside the RV to the “CLEAN” position. If decalcication
does not start, make sure power to the water heater is ON. The yellow status LED in
the center of the dial will ash slowly (1 sec on, 1 sec o) during decalcication. Rotary
dial be left on “CLEAN” until the process is completed.
16. Decalcication is complete when the yellow status LED ashes quickly on the rotary
dial control.
If you are using the electric antifreeze kit, it must be removed and
unplugged from the power supply before decalcication. (See Fig 2)