.,.,,.
,
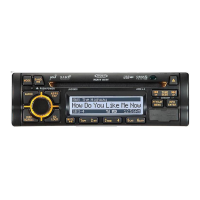
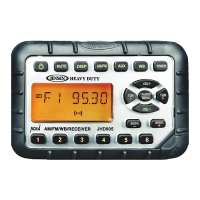
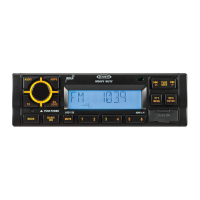
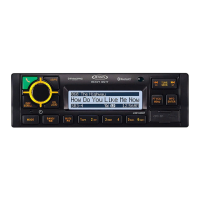
JHD36A
HEAVYDUTY
------------------------------------------------------------------------------------------------------------------------
rotary encoder ( 1) to adjust the Fader between the rear and front speakers from
"Rear 12"
to
"Front 12".
System
Menu
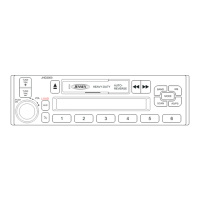
1.
Press
and hold the PTY/CAT/MENU button (2) for more than 2 seconds to enter the
system menu. The first menu item,
"Key Beep", will
appear on the display.
2.
Press
the TUNE/SEEK
I<<
I
>>I
(18, 19) button repeatedly to navigate the system menu.
3.
Press
the
INFO/ENTER button (16) to select the desired item.
4.
Press
the
INFO/ENTER button again to adjust the selected menu item.
The
following
items can be adjusted:
Key Beep (On
I
Off): Turn the audible beep
On/ Off (heard when functions/ buttons are
selected).
LCD Backlight
(1-1
0): Adjust LCD brightness.
LCD Contrast
(1-10):
Adjust LCD contrast.
•
Tuning Region (USA
I
EURO):
Set frequency spacing for various regions.
Power-Off
Clock (Off,
1-10): Brightness setting of clock when powered off
Clock Format (12Hour
I
24Hour): Select 12 or 24 hour display mode.
Set Clock (HH : MM):
Press
the
INFO/ENTER
button (16) to view the
clock
set screen.
Press
the INFO/ENTER
button to move to the next digit.
Press
the TUNE/SEEK
1<<
I
>>I
(18, 19) buttons to adjust the selected digit.
Rear Aux Enable (On/
Off): Turn
on
to
allow
the use of
auxiliary
audio output at the rear of
the radio chassis.
Preset-Only Tuning
(On/ Off)
Sirius XM Settings Menu (only appears when Sirius XM tuner is connected and in Sirius
XM mode)
Clock Autoset
(On/ Off):
Sets clock based on SXM data
Time
Zone1 (Atlantic
I
Eastern
I Central
I
Mountain
I Pacific
I
Alaska)
Daylight Saving Time (Yes/ No)
Set Lock Code:
Locked Channels: List of Channels (Locked
I Unlocked)
SXi Firmware Version
Weather Alert Configuration
•
•
Min Alert Level
(All
I
None
I
Warnings
I
Watches)
Auto-On
Enable (Yes/ No): Select
"Enabled"
to turn on the radio when
NOAA
alerts
are issued. This function only works when the
+
12V switched is on.
Alert Volume (Select Volume Level
0-40)
Clear SAME Codes <ENTER>
SAME Code
1:
_____
_
SAME Code 2:
_____
_
SAME Code 3:
_____
_
•
SAME Code 4:
_
____
_
SAME Code 5:
_____
_
SAME Code 6:
__
_
__
_
6
SAME Code
7:
_____
_
•
Battery Alarm
(On/ Off)
Battery Auto-Off
(On/ Off)
Bluetooth Setup
BT:
(On/
Off)
•
BT
HFP
Volume: (Select Volume Level
0-40)
Hands-free call volume
BT Device List <Enter>: View a list of devices paired with the unit
Lock
Connect
I
Disconnect
Delete
BT
Pair
<Enter to enable>
BT Auto Answer:
(On/ Off)
Reset System Defaults <ENTER>:
Press the
INFO/ENTER
button (16) to return the
EEPROM
to factory default set up values.
Equalizer
Press
the EQ/LOUD button (11) to choose one of the following pre-defined bass and treble
curves: USER > FLAT >
POP
>
CLASSICAL
>
ROCK
.
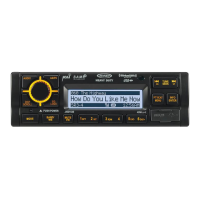
EQ:Rock
Loudness
Press and hold the EQ/LOUD button
(11)
to toggle loudness on/ off. When listening to music at
low volumes, this feature
will
boost the bass and treble ranges to compensate for the
characteristics of human hearing.
Auxiliary
Input
To
access an
auxiliary device:
1.
Connect the portable audio player to the
1/8"
AUX
IN
on the front panel (13)
2.
Press
the MODE button (4) to select
"Auxiliary"
mode.
3.
Press MODE
again to cancel
"Auxiliary"
mode and go to the next mode.
PA
Operation
Connect
PA
Microphone (JMICHFP)
with a
4-PIN
connector to the 4-PIN
socket on the
rear of the unit.
The unit
will automatically
switch to
PA
mode when the mic switch is pushed
"ON".
The
PA
output level can be adjusted using the rotary volume encoder
(1
).
With radio power off, the radio will
wake up when
PA
mic button is pressed to make an
announcement.
Please
note that it will take a few seconds before the radio "wakes
up"
and
PAis
active. Radio
will
return to the off state when the
PA
mic is released.