CONTROL SYSTEM
TC-15001-rev.3
6-27
6.4.8.4 Test Running by Controller
1) Turn ON the power supply for the indoor units.
The “
´OLJKW\HOORZRQWKHUHFHLYHUNLWRIWKHLQGRRUXQLWÀDVKHVVHFRQGV21 0.25 seconds
2))DQGWKHQWXUQV2)):KLOHWKHOLJKWLVÀDVKLQJWKHXQLWZLOOQRWRSHUDWHEHFDXVHLWLVLQLWLDOL]LQJ
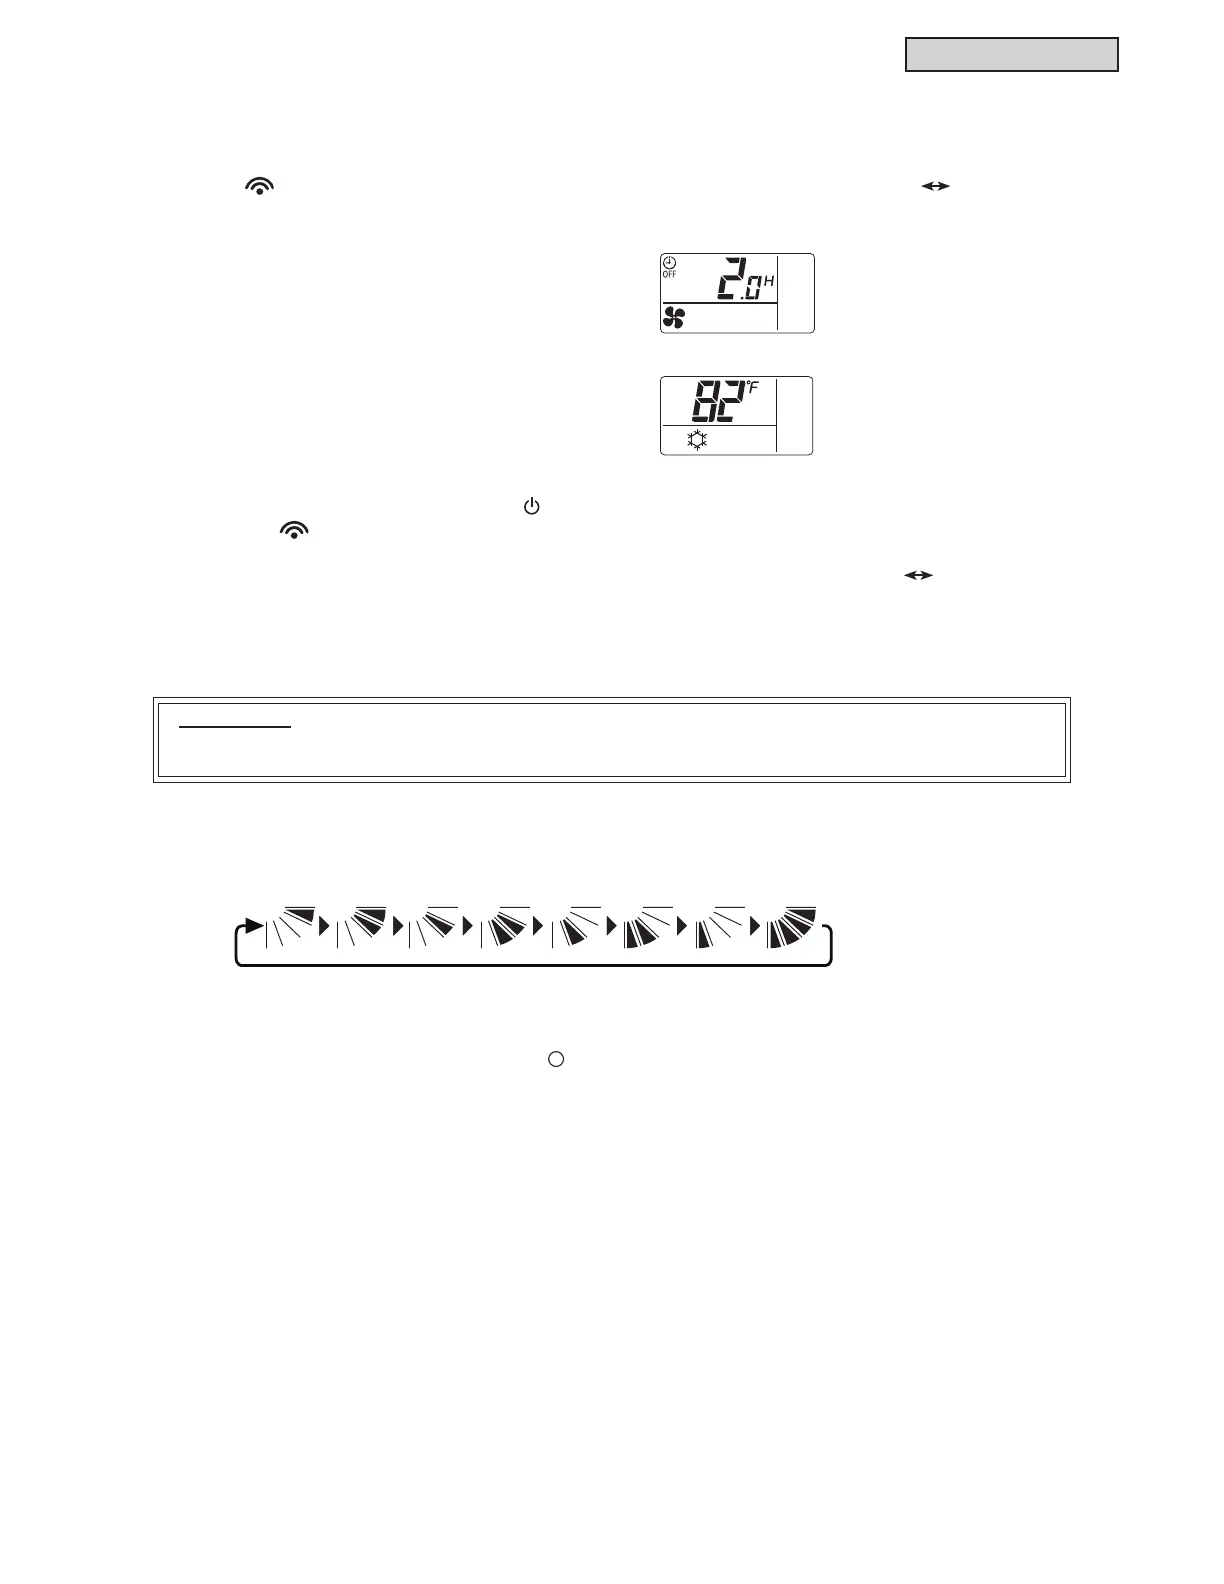
6HWWKH7HVW5XQPRGHE\SUHVVLQJWKH³/RXYHU´
EXWWRQDQG³2Q7LPHU´EXWWRQWKUHHVHFRQGVDW
2))7KH/&'VKRXOGEHDVVKRZQLQWKH¿JXUH
on the right.
6HWWKHRSHUDWLRQPRGHE\SUHVVLQJWKH³0RGH´
button.
Test Run Mode is
under suspension.
Test Run Mode is
under operating.
4) Operate the Test Run by pressing the “ 2Q´EXWWRQ:KHQWKHFRPPDQGVDUHUHFHLYHGE\WKHLQGRRU
unit, the “
´OLJKW\HOORZRIWKHUHFHLYHUNLWZLOOFRPHRQEULHÀ\&KHFNWKDWFRPPDQGVDUHUHFHLYHG
well and the mode selected by procedure 3 above is set correctly. In the Test Run mode, the red light (RUN)
RIWKHUHFHLYHUNLWLVWXUQHG21DQGWKHJUHHQOLJKW7,0(5ÀDVKHVVHFRQGV21
0.5 seconds
OFF). And then the timer off for two hours.
6) Stop the Test Run.
(1) Test Run is stopped automatically after two hours.
(2) Test Run is stopped by pressing the “
2II´EXWWRQ
$IWHUWKHWHVWUXQLV¿QLVKHGFKHFNWKDWWKHUHGOLJKW581DQGWKHJUHHQOLJKW7,0(5DUH
turned OFF.
5) Adjust the angle of the air louver as follows.
&KHFNWKDWFRPPDQGVDUHUHFHLYHGFRUUHFWO\XVLQJWKHOLJKWDQGEX]]HURIWKHUHFHLYHUNLW8VHWKH
wireless remote controller pointing the transmitter toward the receiver.
6HOHFWWKH)$1PRGHE\SUHVVLQJWKH³0RGH´EXWWRQ
6HWWKHORXYHUDQJOHE\SUHVVLQJWKH³/RXYHU´EXWWRQ
The louver direction is changed as follows.
ATTENTION:
The air louver has a mechanism for the auto-swing function. Do not forcefully move the louver by
hand.
1 Step 2 Step 7 Step
Auto Swing
3 Step 4 Step 5 Step 6 Step
 Loading...