DP321 User's Manual
- 6 -
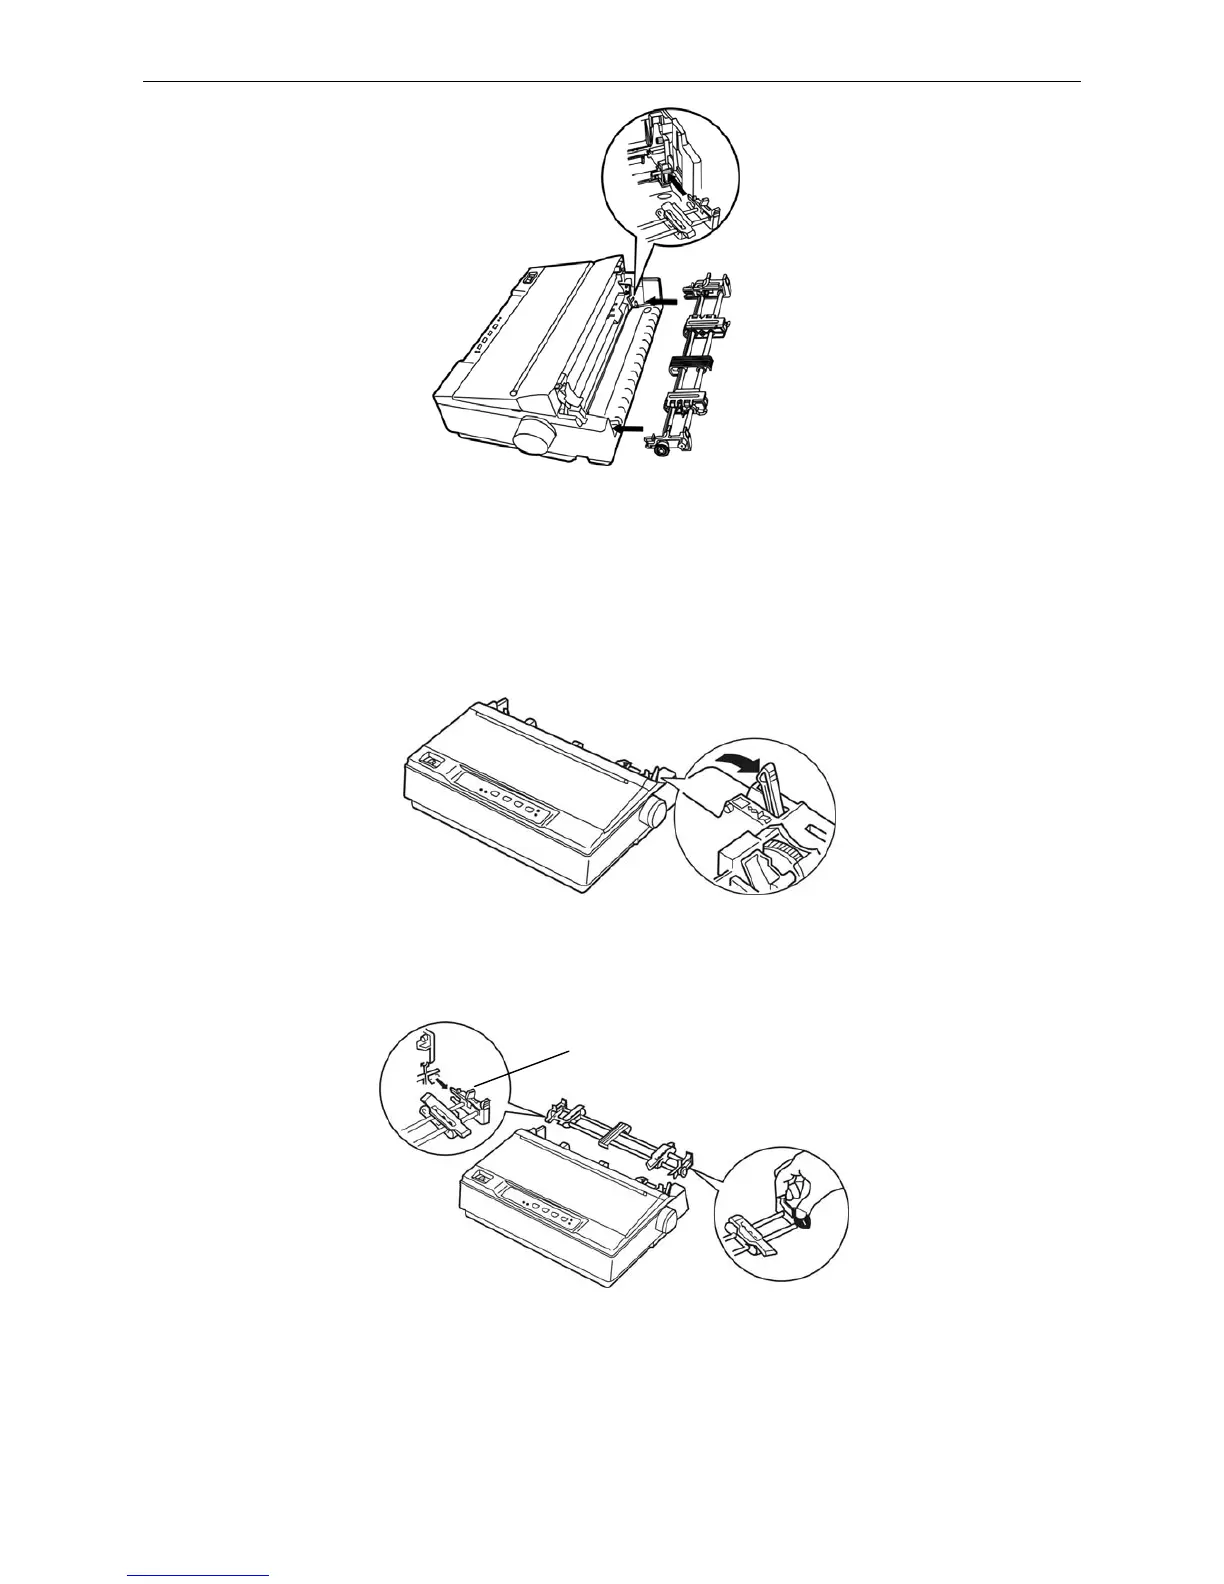
1.6.2 Installing the Pull Tractor
If the tractor has been installed in the push position (back of printer), take down the tractor, unpack the tear
cutter, and install the tractor in the pull position. The concrecte steps are as follows.
1. Make sure the printer is turned off, take down the paper guide, and dial the paper-select lever to the
tractor paper position according to follow figure.
2. Take down the push tractor, please follow these steps: Compact the locked piece of the tractor (shown as
the following figure), and pull out the tractor from the printer, take down the printer cover.
3. Compact the locked piece of the tear part (shown as the following figure), lift it upwards.
Locked piece
Figure 1-13 Install the push tractor
Figure 1-14 Set paper-select lever
Figure 1-15 Take down the push tractor