DP321 User's Manual
- 5 -
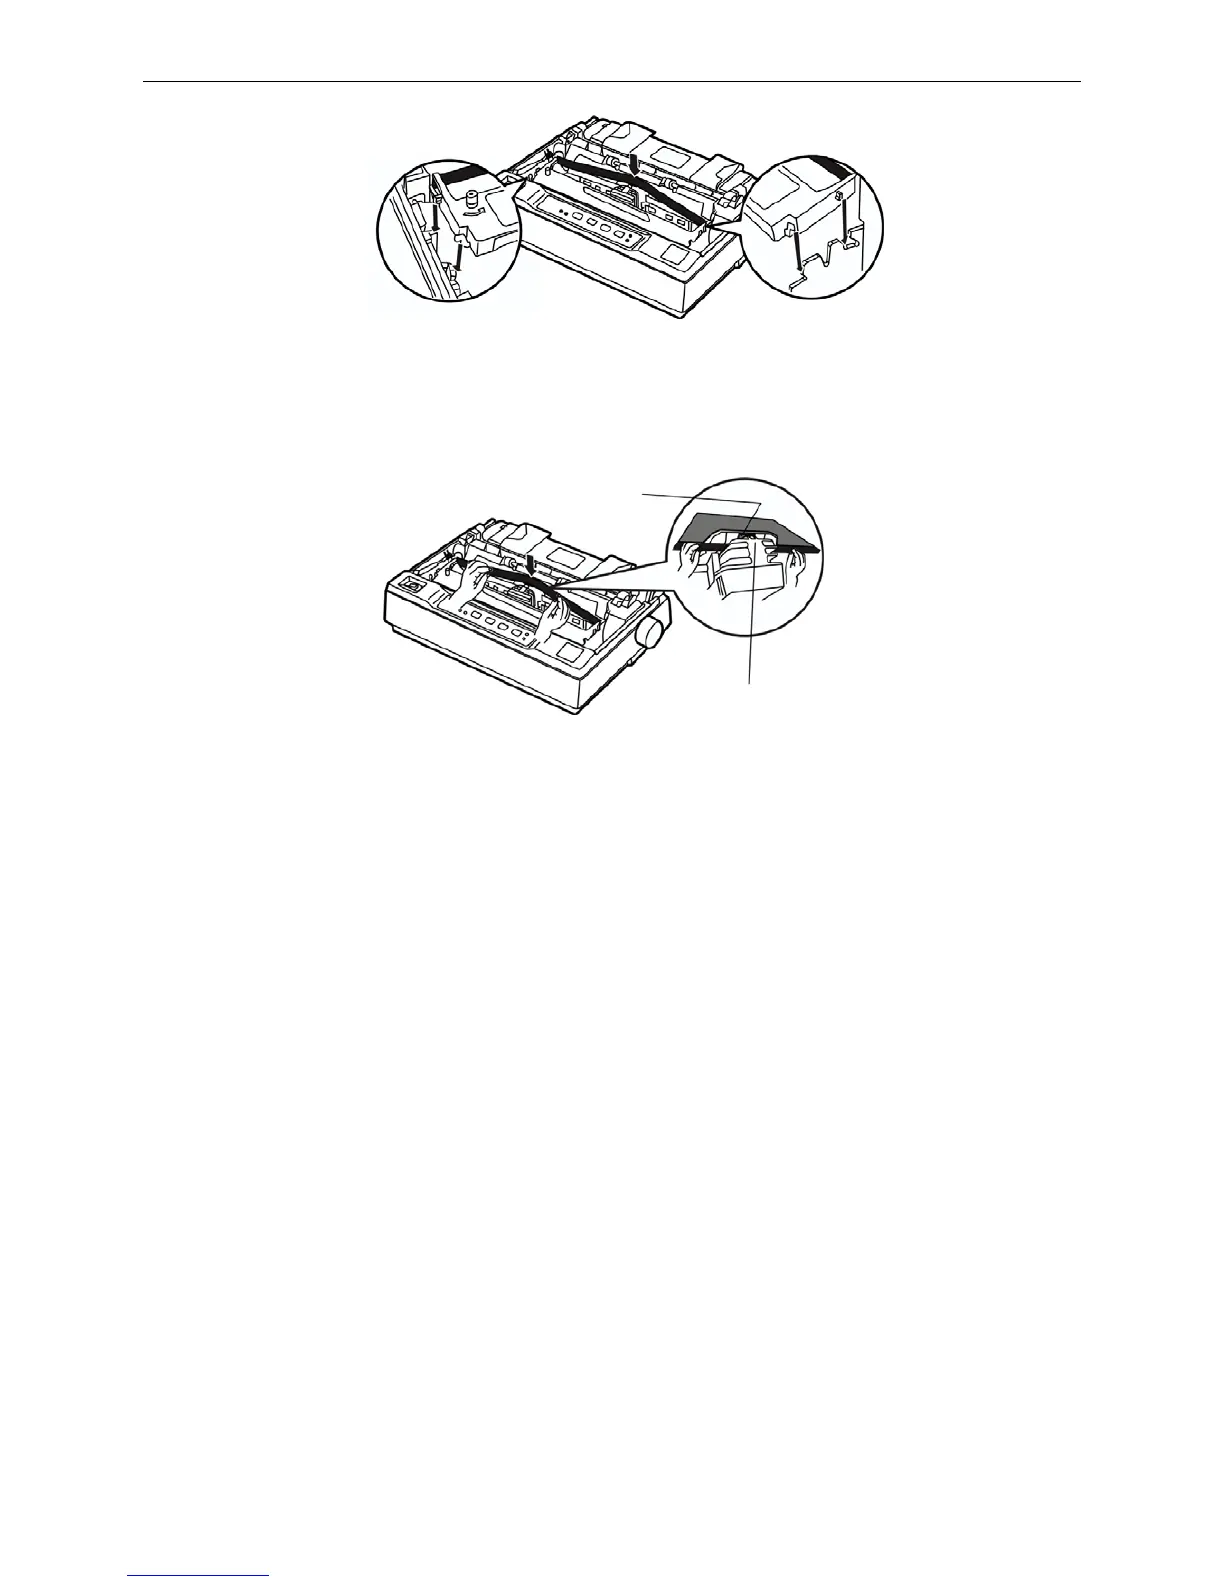
8. Use hands or other auxiliaries, to guide the ribbon between the print head and metal patch. Turn
the ribbon-tightening knob to feed the ribbon into place, it should not be twisted or creased.
9. Slide the print head from side to side several times to make sure it moves smoothly.
10. After installing the ribbon, pull the gap adjust lever to the original position, then reinstall the tear
part and close the printer cover.
NOTE: 1. When your printing becomes faint, you need to replace the ribbon cartridge.
Otherwise, the print quality will be affected and the printhead may be damaged.
2. To remove the old ribbon cartridge, first make sure the power is turned off, move the
printhead to the center of the printer. Then grasp the ribbon cartridge handle on
either side and lift it out of the printer. Install a new one follow the above steps.
3. Please use the Jolimark JMR108 ribbon cartridge, our company will not guarantee
to keep the printer in good repair, when it is damaged by unauthorized ribbon
cartridge.
1.6 Installing the Tractor
There are two positions for the tractor to be installed, one is push installation position (back of printer),
and the other is pull installation position (top of printer). The tractor that installed in the back of printer
is called push tractor, and the one installed in the top of printer is called pull tractor.
Generally, you can use push tractor when using standard tractor paper. Only in this way, can the
printer use tear function normally. If the print position requires high precision, such as printing on the
paper with forms, you are suggested use pull tractor.
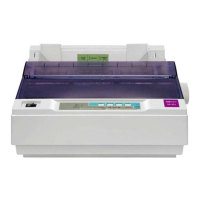
1.6.1 Installing the Push Tractor
Take the installing slots on both sides of tractor aim at the installation pin which is in the back of printer,
press forward till it locked into the position. (Shown as the following figure)
Metal patch
Print head
Figure 1-11 Install ribbon cartridge
Figure 1-12 Guide the ribbon between the print head and metal patch