30
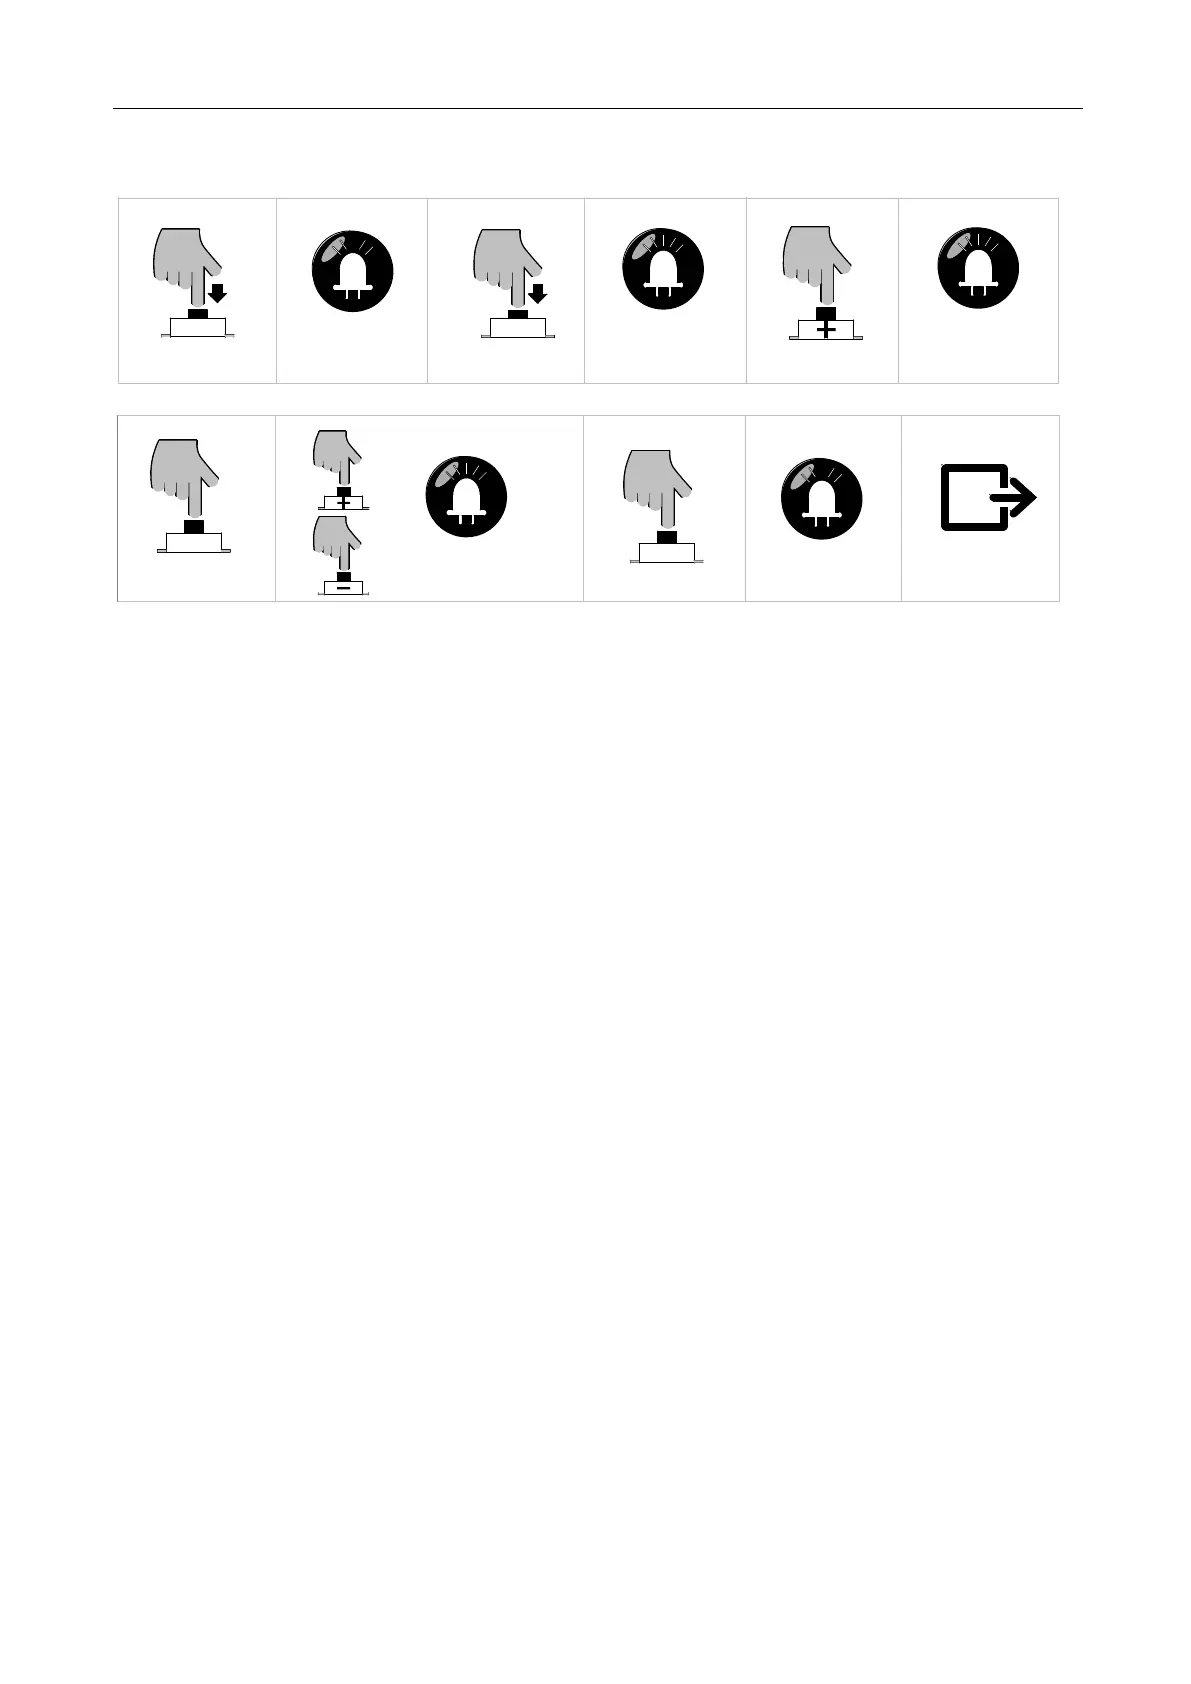
B. Operation Graphic Illustration
SET
LED
LED
PROG
LED
SET
LED
PROG
LED
Press "PROG" button for 3 sec
Press
“
PRO G
”
button again
L0 will flicker twice, L1 will be on
Press "SET" button once
Press “+” or “-” button to adjust the
parameters, LED will show the
corresponding value
L1-L5 will be on for one sec
Save and exit automatically
Press “+” button once
L2 will be on
L0 flicker once, L1 will be on
Press "SET" button once
for 3 sec
Figure 31
5.6.3 Start-up Delay Setting (L3)
The control board for this product is with low power consumption function under standby mode.
When the machine is stopped, the control board will automatically enter into low power consumption
standby mode. Meanwhile, in order to reduce the power consumption of external accessories under
standby mode, the control board will turn off the power for infrared sensor after entering into standby
mode. When the machine is about to operate, it’ll supply the power for accessories. In order to
ensure the reliability of the infrared sensor, it is requested that the control board performs delay
detection to the input signal of infrared sensor. When the gate opener receives the opening/closing
signal, it’ll start to work after a certain time (the settled delay time)
A. Operation Instruction:
1. Press and hold “PROG” button for 3 sec. to enter into basic menu. Indicator light L0 will flicker
once, then L1 will be always on.
2. Press “PROG” button again for 3 sec. to enter into advance menu. L0 will flicker twice, then
L1 will be always on.
3. Press “+” button twice, choose start-up delay setting. Indicator light L3 will be always on.
4. Press “SET” button once to enter into acceleration setting. Indicator lights L1-L3 will show the
current setting. (The default is L1)
5. Press “+” or “-” button to set the start-up delay time. Indicator lights L1-L3 will show the current