– 128 –
❼
❻
0.5mm
C
BA
Place the chamfered section
outside
Feed adjustment
pin
Motor cable
guide
⓰
⓮⓯
⓫
⓬
④
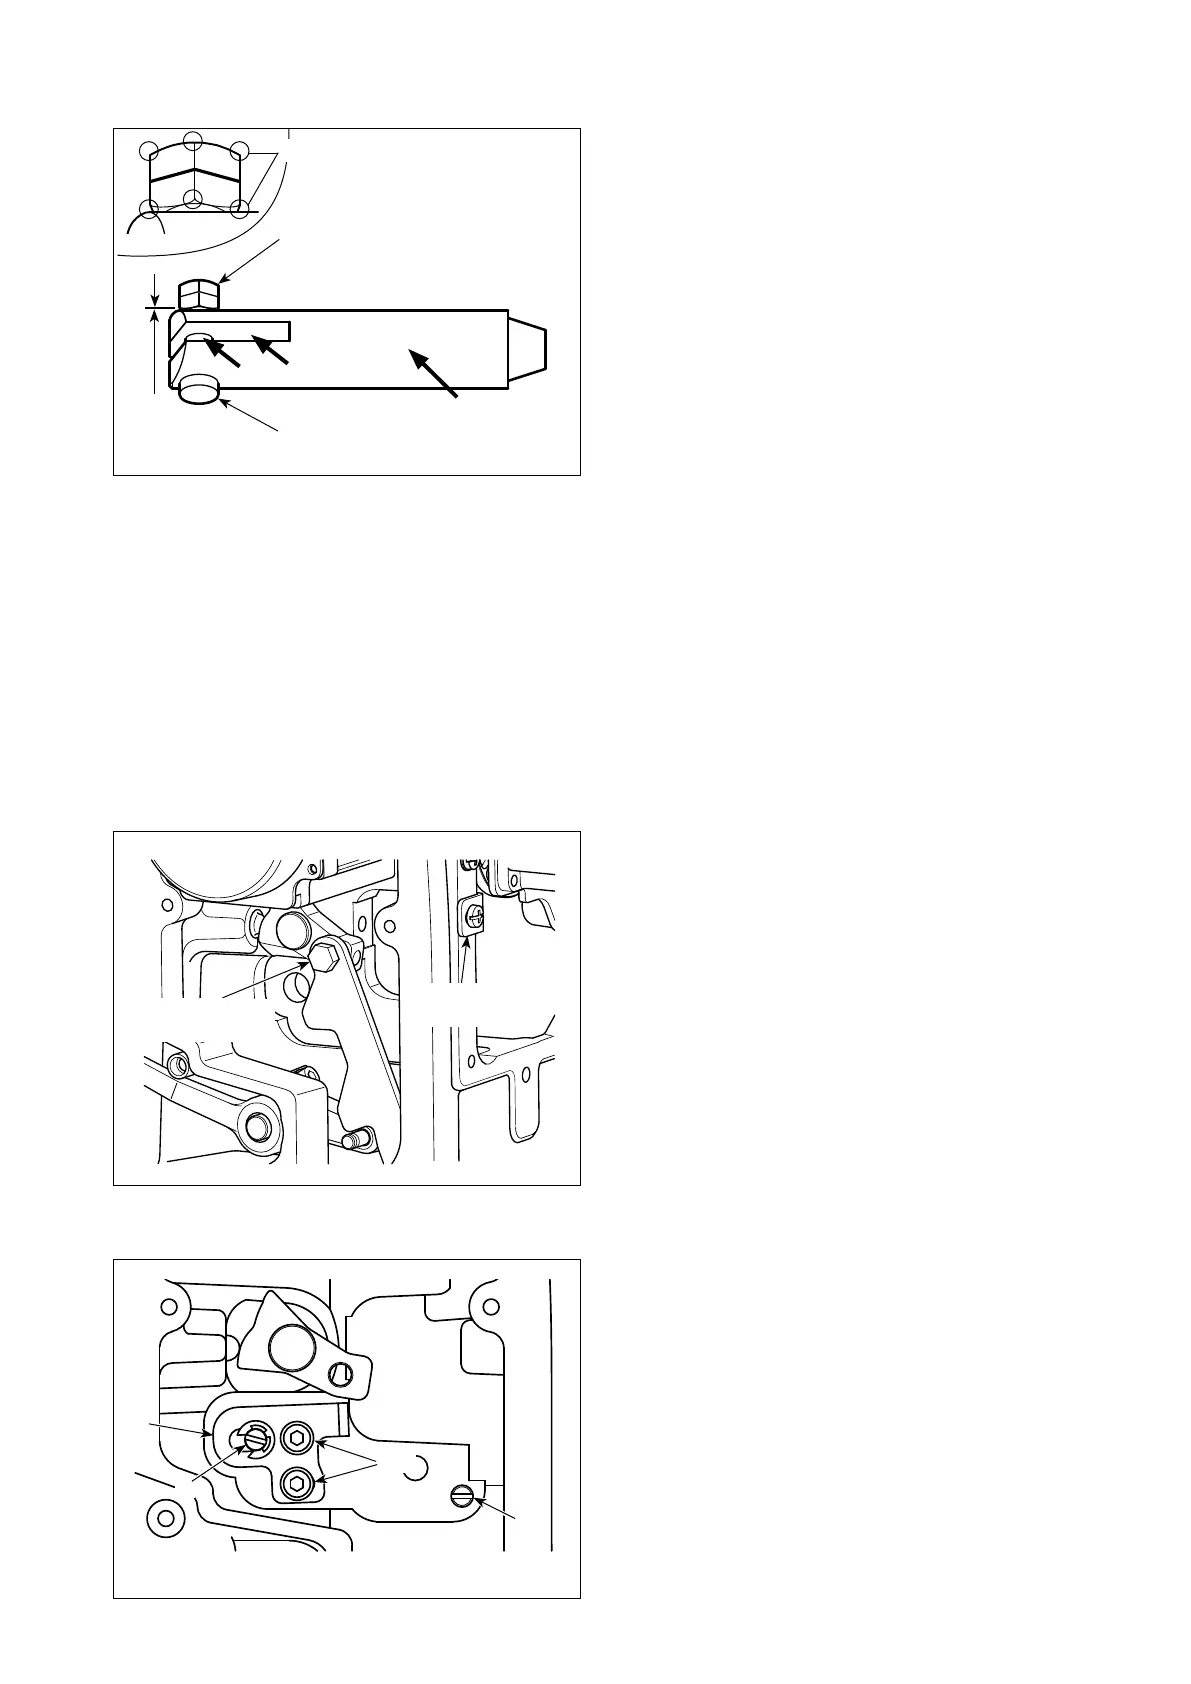
Subassembling the solenoid plunger pin
1)ApplyJUKIGreaseAtotheshaft sectionA of
plunger pin
❻
.
2) Holding the plunger while turning its forked
section to the left and its notch upward, pass
plunger pin
❻
from this side to the far side
accordingtotheorientationshowninthegure.
3)Tightenrstnut
❼
sothataclearanceof0.5mm
is provided between the plunger and nut
❼
.
4)Securingrstnut
❼
with a spanner so that it will
not move, tighten second nut
❼
.
[Tighteningtorque:4.4-5.5N·m(45–55kgf·cm)]
(Caution) Assemble nuts
❼
while turning their
chamfered sections outside.
5)ApplyJUKIGreaseAtotheforkedsectionBandperipheryCoftheplunger.
[2] Installing parts to the machine head
①
RemovingtheAKcover,pulleyandelectricalbox
RemovetheAKcover,pulleyandelectricalbox.
②
Removing the motor cable guide and feed adjustment pin
1
)
Removethemotorcableguide.
2
)
Loosenthefeedadjustmentpinsetscrew.
Removethefeedadjustmentpin.
At this time, remember the orientation of the
feed adjustment pin.The forward / reverse feed
adjustment will be easy when installing the pin in
theaforementionedorientation.
③
Installing the condensation stopper and condensation arm stopper
1
)
Secure condensation arm stopper
⓰
to the
positionshowninthegure.
2
)
Insert condensation stopper shaft
⓬
o f
condensation stopper
⓫
into the hole in the arm,
and temporarily secure condensation stopper
⓫
withM5hexagonsocketheadcapscrew
⓮
and
washer, small
⓯
.(Adjustmentistobecarried
outlater.)
Screwtobeused:M5hexagonsocketheadcap
screw, washer small

 Loading...


