–130–
⑦
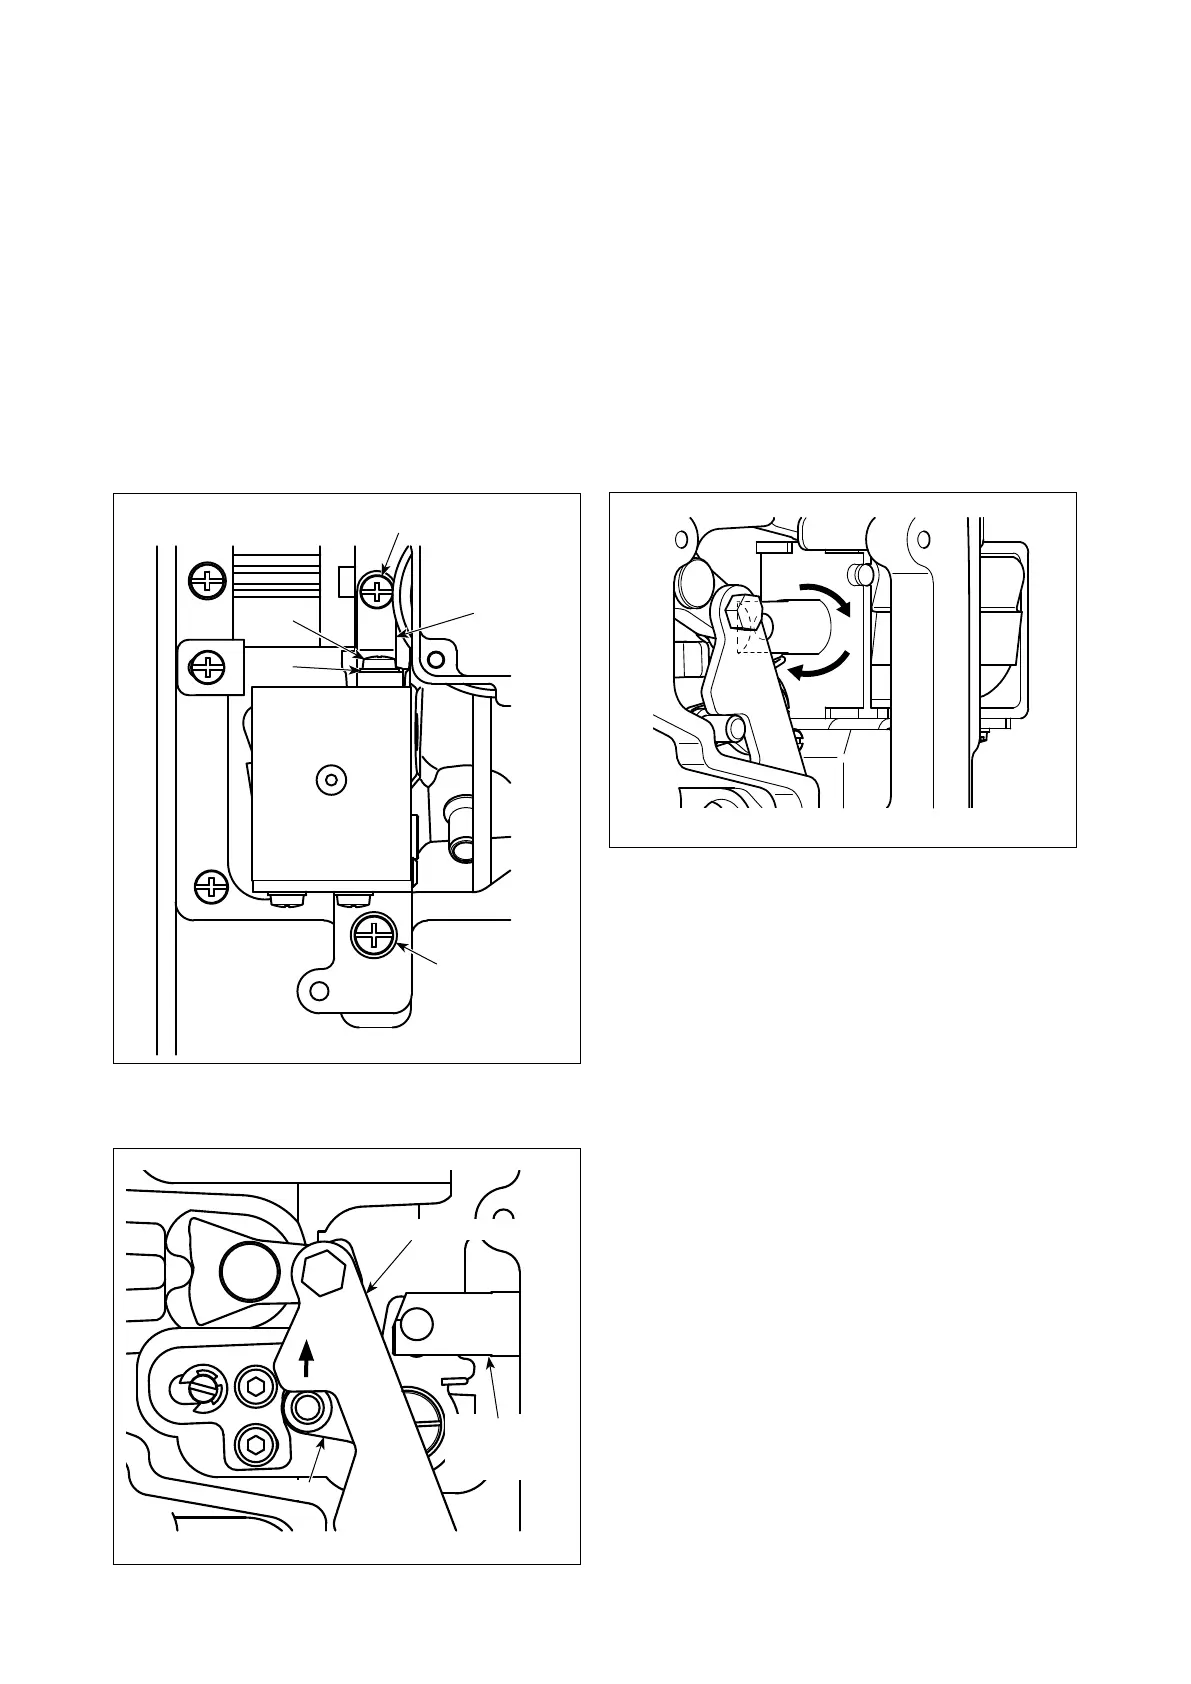
Assembling the condensation solenoid
1
)
Temporarily secure solenoid mounting plate
❷
to the arm with M5 pan head screw, short
❸
.
2)Temporarily secure sub-assembled condensation solenoid to the arm with M6 pan head screw
⓴
and
washer, large
.Then, temporarily securethe condensation solenoid tosolenoid mounting plate
❷
which has been temporarily xed in the aforementioned step 1) with M5 pan head screw,long
❹
and
washer
❺
.
3)Fixscrew
⓴
sothatitisbroughttothetopendoftheslot.Then,tightenscrew
❸
while pressing mounting
plate
❷
againstthecondensationsolenoid.Then,tightenscrew
❹
.
Atthistime,checkrsttomakesurethatthesolenoidplungerisallowedtorotateintheaxialdirection,to
smoothlyrotateandtoreturntoitsinitialpositionbythespring.Then,securelytightenthescrews.
[Tighteningtorque:1.9-2.9N·m(20-30kgf·cm)]
4) After tightening the screws, check to make sure that relevant parts normally operate and the screws are
securelytightened.
❹
❺
⓴,
❸
❷
⇦
❽
Feed adjusting rod
Solenoid
plunger
(Caution) If the solenoid plunger fails to rotate
in the axial direction or fails to operate
smoothly, the solenoid plunger has
been assembled off-center. In this
state, operation failure and abnormal
wear can occur. Re-install the solenoid
plunger correctly.
[3] Adjusting the condensation stopper
1)Setthestitchdialto"0.5".(FortheHtypemodel,
setitto"0.75".)
2)Pull the plunger in the directionof the arrow (or
move condensation arm
❽
in the direction of the
arrow) until condensation arm
❽
comes in light
contact
withthefeedadjustingrod.
(Caution)
Take care not to allow the feed adjustment
rod to move. If the feed adjustment rod
moves, the condensation pitch cannot be
adjusted as desired, resulting in thread
trimming failure or in longer remaining
length of thread after thread trimming.

 Loading...


