– 4 –
1
3
2
A
1-4. Connecting the count manual switch
1
3
2
A
1-3. Adjusting the contrast of the operation panel screen
Shade
Light
1. To prevent the operation panel from
breakage, do not touch the circuit board
pattern and the connector terminal.
2. Do not disassemble the operation pan-
el to prevent it from breakage.
1) Press in the direction of arrow mark the click of
section
A
of cord outlet cover
2
assembled in
the
rear of operation panel
1
and remove the
cover.
2) Turn
LCD screen display brightness adjustment
variable resistor
3
to adjust the br
ightness (con-
trast) of LCD screen.
3 2 1
CN105
+ 5V
SW
GND
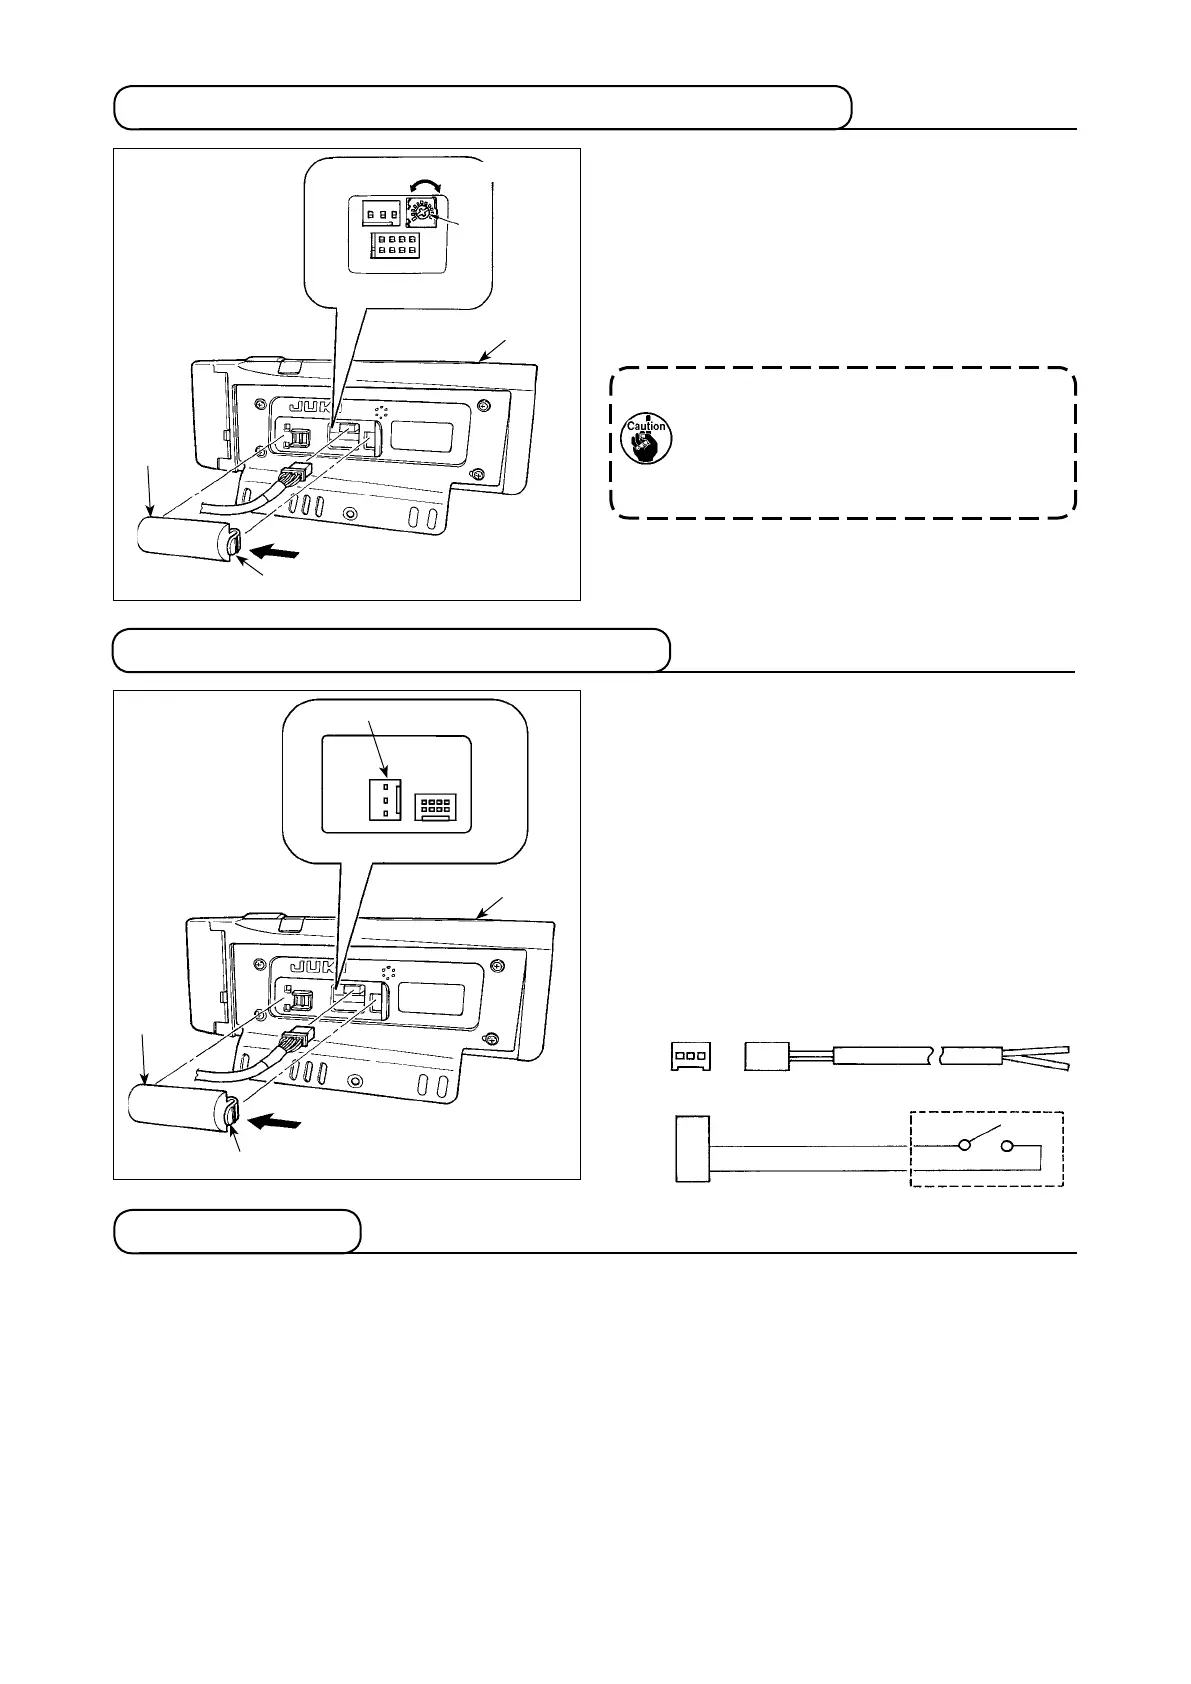
1) Press in the direction of arrow mark the click of
section
A
of cord outlet cover
2
assembled in
the rear of operation panel
1
and remove the
cover.
2) Connect optional junction cable connector to
connector CN105
3
of the count manual switch.
Note) Prepare the switch main unit by the
customers or ask JUKI business office
about it.
Optional relay cable A (asm.)
JUKI Part No. 40008168
1
2
3
1-5. USB port
1
Precautions to be taken when handling USB devices
• Do not leave the USB device or USB cable connected to the USB port while the sewing machine is in opera-
tion. The machi
ne vibration can damage the port section resulting in loss of data stored on the USB device or
breakage of the USB device or sewing machine.
• Do not insert/remove a USB device during reading/writing a program or sewing data.
It may cause data breakage or malfunction.
• When the storage space of a USB device is partitioned, only one partition is accessible.
• Some type of the USB device may not be properly recognized by this sewing machine.
•
JUKI does not compensate for loss of data stored on the USB device caused by using it with this sewing machine.
2
USB specications
• Conform to USB 1.1 standard
• Format supported _____
FAT 32
• Consumption current ___
The rated consumption current of the applicable USB devices is 500 mA at the maximum.