– 63 –
22. PERFORMING CONTINUOUS STITCHING
First, change the sewing mode to the continuous stitching before performing setting.
→
Refer to
20. CHANGING SEWING MODE, p.57
.
22-1 Selection of the continuous stitching data
1
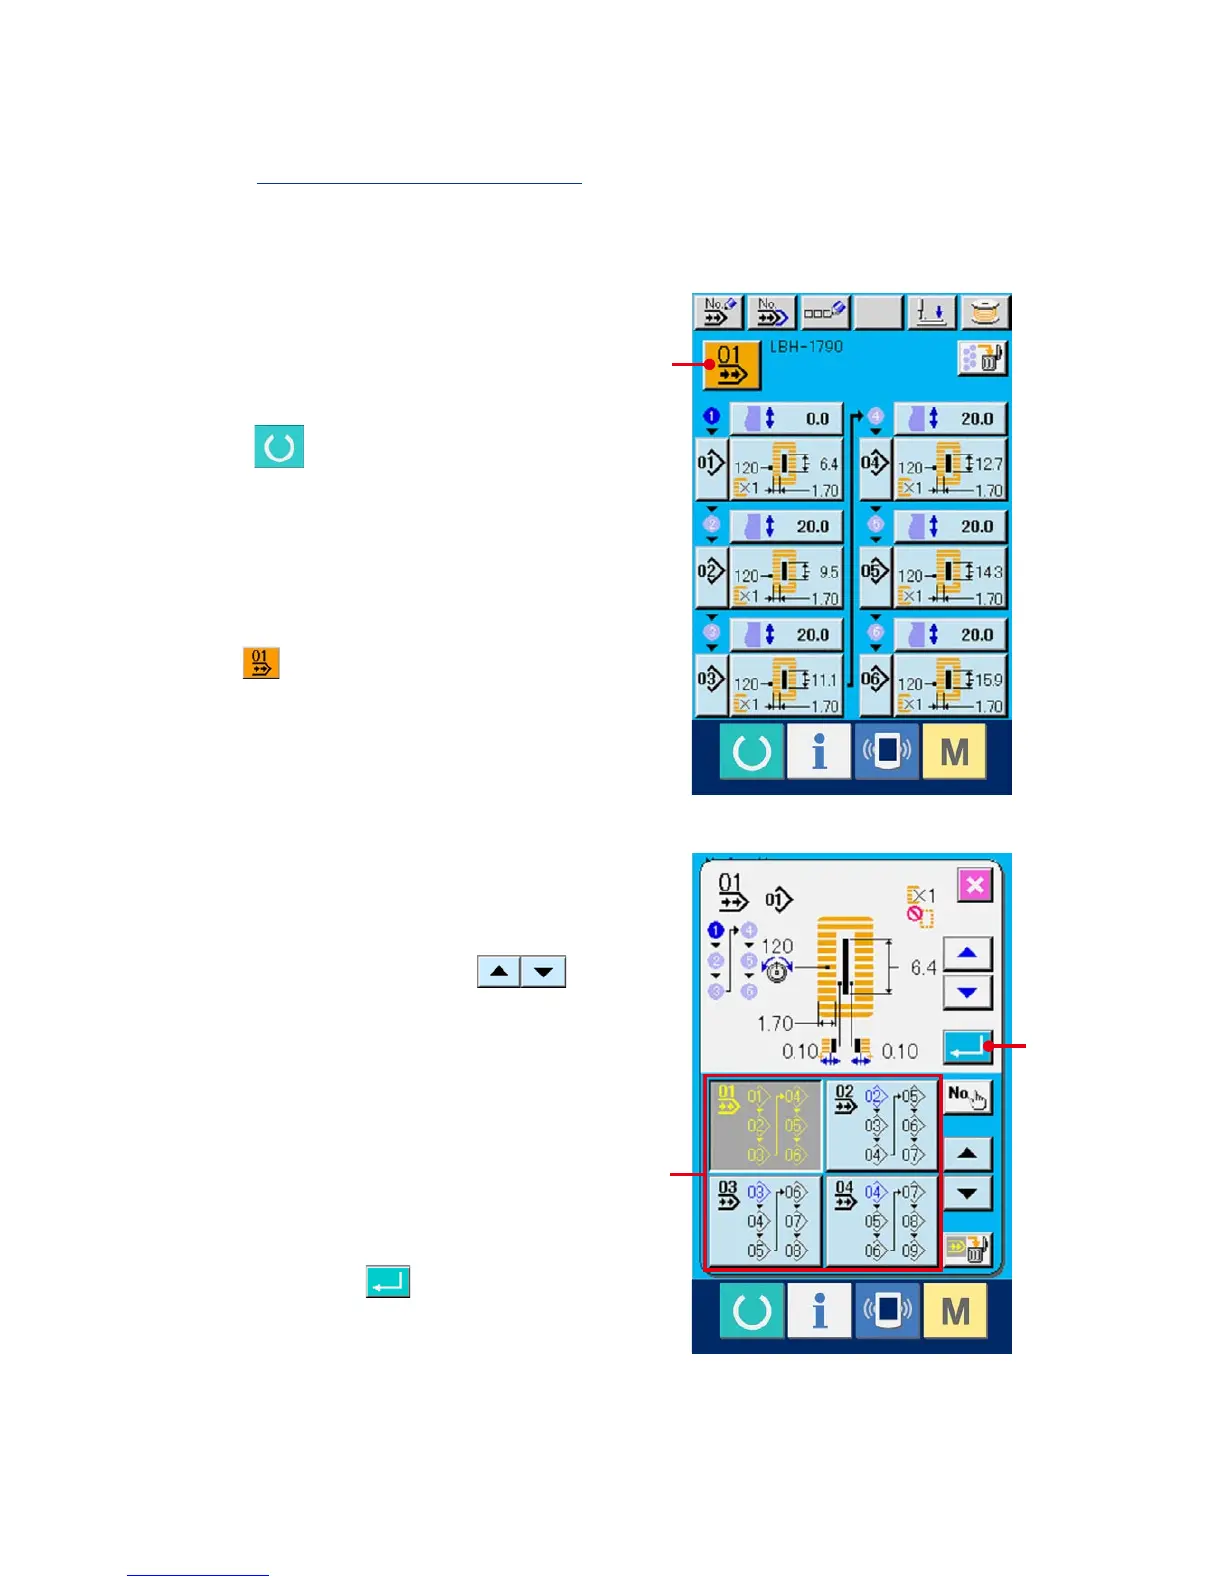
Display the data input screen.
Only in case of the data input screen (light blue),
it is possible to select continuous stitching data
No. In case of the sewing screen (green), press
READY switch and display the data input
screen (light blue).
2
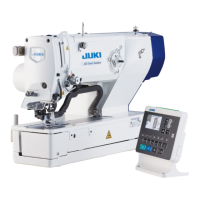
Call the continuous stitching data No.
selection screen.
When continuous stitching data No. selection
button (A) is pressed, the continuous
stitching data No. selection screen is displayed.
Continuous stitching data No. selected at present
and the contents are displayed in the upper part
of the screen and other continuous stitching
data No. buttons which have been registered are
displayed in the lower part of the screen.
3
Select the continuous stitching data No.
When UP/DOWN SCROOL button
is pressed, the registered continuous stitching
data No. buttons change over in order. Contents
registered to the continuous stitching data
are displayed in the buttons. Here, press the
continuous stitching data button (B) you desire to
select.
4
Determine the continuous stitching data No.
When ENTER button (C) is pressed, the
continuous stitching data No. selection screen is
closedandtheselectionhasbeennished.
C
B
A