5
Customising TV Settings
47
2. Press the
buttons to select PVR File System and then press the OK
button.
3. Press the buttons to select the following options, and then press
the
buttons or 0-9 buttons to adjust each option’s setting or the OK
button to select the options.
IP Config Press the buttons to select Auto Mode or
Manual Mode.
If Manual Mode is selected, use the
buttons
to select IP, Netmask, Gateway and DNS.
Then press the OK button, and use 0-9 buttons to
enter the values.
It also display MAC Address in IP Config menu.
Finally, press the OK button to connect the
setting.
Network Info Display the network information.
Network Test Press to test the network.
4. Press the MENU button to return to the main menu or press the EXIT button to exit the menu.
PVR File System (DTV Mode)
Allows you to select your preferences in the PVR File System.
1. Press the MENU button to display the main menu. Press the
buttons to select the System and then press the OK button.
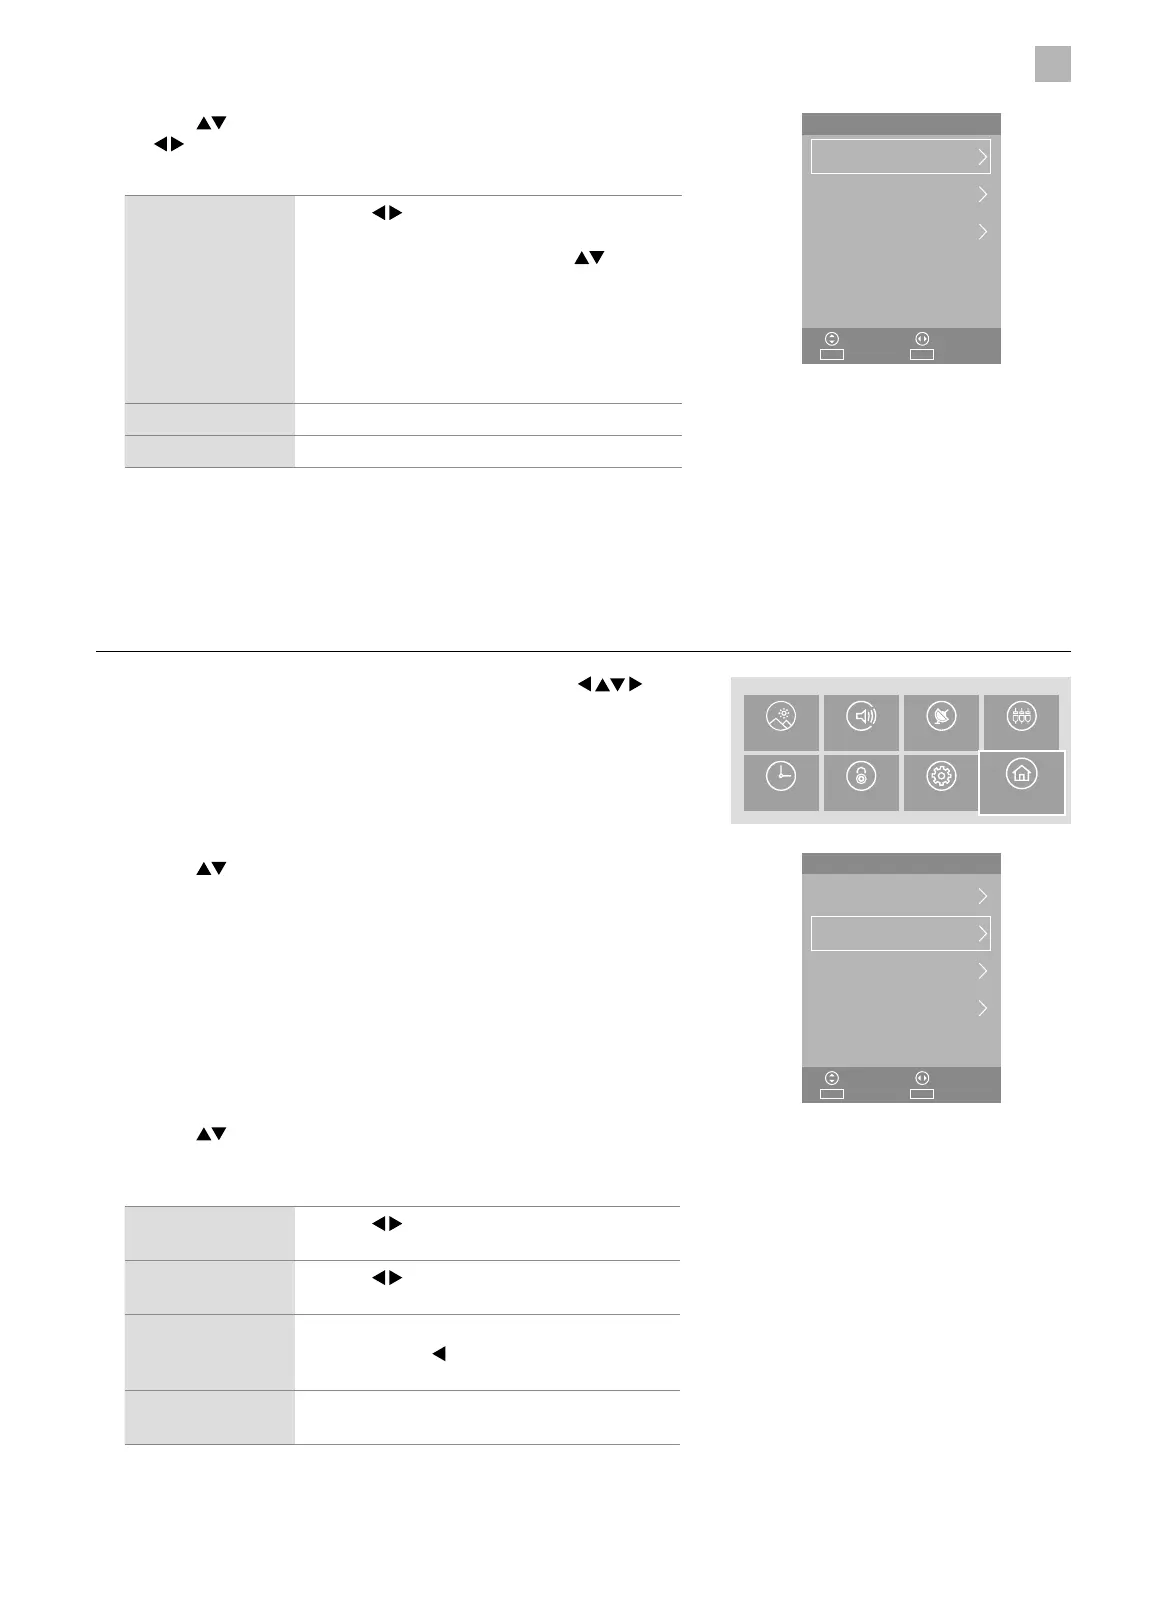
Network
IP Config
ExitEXITSelect
AdjustMove
OK
Network Info
Network Test
System
NETWORK
ExitEXITSelect
AdjustMove
OK
Software Update (USB)
PVR File System
Reset TV
PICTURE SOUND CHANNEL SOURCES
TIME LOCK SETTINGS
SYSTEM
3. Press the buttons to select the following PVR File System options
and then press the OK button. Press the MENU button to return to the
previous menu.
Select Disk Press the buttons to select the disk where
you want to store your recorded content.
Timeshift Size Press the
buttons to adjust your preferred
file size.
Format Start Press the OK button, a pop-up window will
display. Press the
button to select "Yes" and
then press the OK button to start formatting.
Speed Check This shows the transfer rate of your USB storage
device.
4. Press the MENU button to return to the main menu or press the EXIT
button to exit the menu.