Do you have a question about the Kaye LTR-150 and is the answer not in the manual?
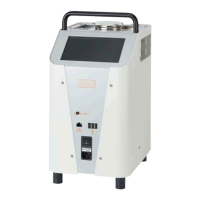
Lists primary physical parts of the calibrator unit, including tank, handle, housing, screen, switch, and ports.
Details airflow and connection interfaces on the unit, such as exhaust and probe connections.
Details the default dry block insert and its wells for thermocouples and probes.
Showcases various interchangeable inserts for specialized dry block calibration.
Mode for automated calibration via Kaye software.
Mode for manual configuration and calibration via touchscreen.
Provides phone numbers for North American and European support.
Outlines steps for scheduling and sending the unit for service.
Defines 'Warning' and 'Caution' labels for dangerous conditions and product damage risks.
Lists and explains hazard symbols found on the device and manual.
Provides overarching safety guidelines for operation and installation.
Explains the function of the thermal fuse for over-temperature protection.
Warns about potential hazardous gases from heated liquids.
Specific safety advice for using calibration liquids in the micro bath.
Safety precautions related to handling and using silicone oil.
Technical parameters for the dry block calibration function.
Technical parameters for the micro bath calibration function.
Technical parameters for the surface temperature calibration function.
Details unit dimensions, weight, power, and interface specifications.
Instructions for unpacking and verifying the LTR-150 components.
Guidelines for proper installation and operating environment for the calibrator.
Steps for safely connecting the calibrator to a power source.
Procedures for powering on the LTR-150 for the first time.
Lists the default configuration settings upon initial boot-up in Remote Control mode.
Instructions on how to exit Remote Control mode and access the Calibrator Setup screen.
How to modify the screen's brightness level via the settings menu.
Steps to select the desired language for the user interface.
How to adjust the device's date and time settings.
How to choose between Celsius, Fahrenheit, or Kelvin for temperature display.
How to set the number of decimal places for temperature values.
How to transition between Remote Control and Standalone operating modes.
Steps to safely power off the LTR-150 from both operating modes.
Guidance on choosing the correct function (Dry block, Micro bath, Surface).
Critical safety warning regarding hot surfaces and handling.
Step-by-step instructions for removing the dry block insert.
Step-by-step instructions for installing the dry block insert.
How to install the thermocouple fixture for dry block use.
How to place sensors and probes using the thermocouple fixture.
Steps to remove thermocouples and the fixture.
Describes the parts of the optional micro bath kit.
How to place and close the tub insert for the micro bath.
The purpose and use of the transport cover for the micro bath.
Details the roles of the work cover in micro bath operations.
Explains the function of the sensor cage and magnetic stirrer for uniform heating.
Specifies the type of silicone oil for optimal accuracy.
Critical warning about exceeding the maximum fill level in the micro bath.
Explains how thermal expansion, sensor displacement, and stirring affect the liquid level.
Key advice for using silicone oil safely and maintaining its quality.
Detailed instructions for assembling the micro bath components.
Procedures for disassembling and cleaning the micro bath.
How to insert and use the surface temperature calibration insert.
Procedures for removing and cleaning the surface temperature insert.
How to set the calibrator's function via the touchscreen.
Guide to selecting the desired calibration function from the list.
Steps to save the selected calibration function and return to the main screen.
How the LTR-150 works with other Kaye validation systems.
Recommendations for optimizing accuracy and performance during calibration.
Steps to ensure inserts and functions are set before starting automatic calibration.
Guidance on connecting IRTD, reference probes, and test sensors for calibration.
What to check on the screen to confirm proper setup for automatic calibration.
How to start the calibration process using the Kaye software.
Explains the meaning of status, control, and regulation indicators during auto calibration.
How to read the set point and reference value graphs.
How to zoom and scroll through calibration graphs.
Safe practices after calibration is complete, including cooling and sensor removal.
Overview of using the LTR-150 as a standalone calibrator.
How test tasks are used for defining and standardizing test conditions.
Identifies key icons and features on the Standalone Main Screen.
Accessing the screen for changing calibrator settings.
Accessing saved measurement logs and reports.
Switching back to the Remote Control screen for automatic calibration.
Accessing saved or creating new test tasks.
Turning off the calibrator.
Displays information about the currently selected test task.
Turning the audible alarm on or off.
Initiating or ending a testing process.
Accessing parameter fields for configuration.
Returning to the previous window without saving changes.
Confirming and saving selected values or settings.
Processing an entry and displaying the relevant screen.
Copying a selected entry.
Creating a new entry for a selection list.
Deleting a selected entry from a list.
Searching within a selection list.
Sorting a selection list alphabetically in ascending order.
Sorting a selection list alphabetically in descending order.
Copying a selected entry to display on the relevant screen.
How to configure the calibrator for dry block, micro bath, or surface functions.
Easily changing set points, function, or alarm settings directly from the configuration range.
Creating and managing test tasks for recurring calibration processes.
Options for sorting, copying, deleting, or configuring test tasks.
How to change the name of a test task using the virtual keyboard.
How to associate a calibrator function with a specific test task.
Enabling or disabling data acquisition and naming the file.
Setting up audible alarms for specific conditions.
Defining parameters for one or more test points within a task.
How to move test points up or down in the list.
Copying an existing test point.
Inputting temperature, dwell time, and gradient for a new test point.
Deleting a selected test point from a task.
Modifying temperature, dwell time, and gradient of a test point.
Calculating steps between temperatures and updating dependent parameters.
Inputting the starting and ending temperatures for a test.
Setting a fixed step width and adjusting the number of steps accordingly.
Setting the number of times test points are repeated.
Setting the total number of steps in a test sequence.
Setting the duration for each temperature step.
Approaching test points in a single direction (first to last).
Approaching test points in both directions (first to last and back).
Defining the rate of temperature change between steps.
Critical safety warning regarding hot surfaces and handling.
Verifying installation, connections, and sensor security before starting.
Note that parameter fields are locked during testing.
How to start the manual calibration test using the start/stop slider.
How to view the real-time reference value against the target test point.
How to zoom and scroll through the live calibration trend graph.
How to close the live trend display.
Explains the different pieces of information shown on the calibrator's display.
Steps to manually stop an ongoing test.
How to choose how to view or export logged data.
Steps for powering down the unit after a test is completed.
Procedures for cooling the calibrator and cleaning it after use.
Procedures for cleaning and maintaining the dry block components.
Procedures for cleaning and maintaining the micro bath components and oil.
Procedures for cleaning and maintaining the surface temperature insert.
Instructions for cleaning the external surfaces and ventilation grills.
A table detailing potential problems, causes, and corrective actions.
Details the warranty coverage and period for the LTR-150.
Steps to follow if the unit malfunctions within the warranty period.
Contact details for customer support in the USA.
Contact details for customer support in India.
Contact details for customer support in Brazil.
Contact details for customer support in Europe, Asia, and the Middle East.
Contact details for customer support in China.
| Brand | Kaye |
|---|---|
| Model | LTR-150 |
| Category | Measuring Instruments |
| Language | English |