8
LIST OF FIGURES
List of Figures
Figure 1: Maximum load and derating depending on the switching frequency ...............................29
Figure 2: Overload characteristic ....................................................................................................30
Figure 3: Built-in version with optional mounting kit ........................................................................ 31
Figure 4: Flat rear version with optional mounting kit......................................................................32
Figure 5: Mounting distances .......................................................................................................... 33
Figure 6: Control cabinet ventilation................................................................................................33
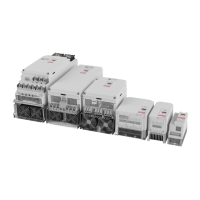
Figure 7: Overview of the COMBIVERT G6 ....................................................................................34
Figure 8: Input circuit / drive controller type .....................................................................................35
Figure 9: Line terminal strip X1A ..................................................................................................... 36
Figure 10: Connection of the mains supply .......................................................................................37
Figure 11: Connection at DC voltage supply.....................................................................................37
Figure 12: Terminal block X1B DC connection..................................................................................38
Figure 13: Terminal block X1B motor connection..............................................................................40
Figure 14: Wiring of the motor...........................................................................................................40
Figure 15: Terminal block X1B connection of a braking resistor .......................................................41
Figure 16: Wiring of an intrinsically safe braking resistor ..................................................................41
Figure 17: Temperature detection terminals T1, T2 ..........................................................................43
Figure 18: Terminal block X1C temperature detection ......................................................................43
Figure 19: Wiring examples of the temperature input .......................................................................44
Figure 20: G6 housing C with optional mounting kit..........................................................................49
Figure 21: Use of the ferrite rings in the mounting kit .......................................................................50
 Loading...