To prepare the DMM6500 for DC current accuracy verification:
1. Set up the DMM6500 for DC current and the range being tested. Make sure relative offset is
disabled.
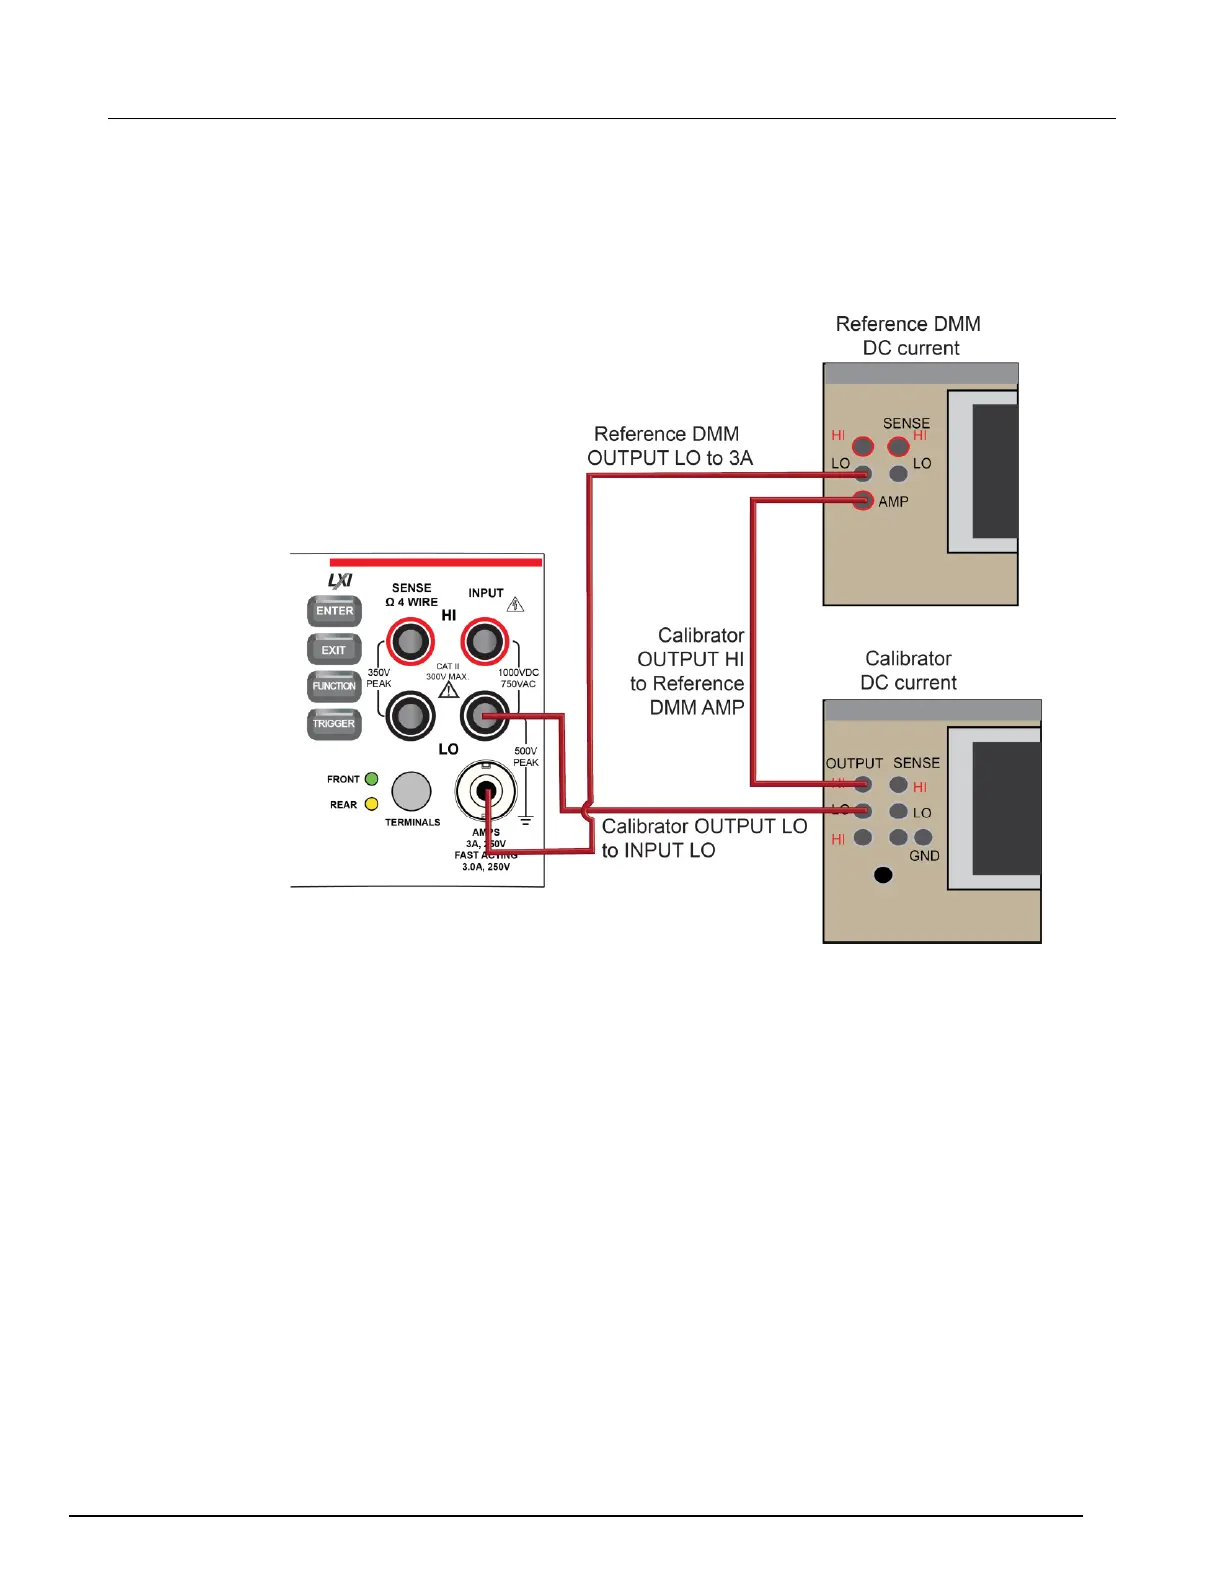
2. Connect the calibrator, DMM6500, and reference DMM as shown in the following figure.
Figure 12: Connection for DC current
To verify DMM6500 accuracy for each range:
1. Set the calibrator to source zero current.
2. Set the reference DMM to DC Current and select the appropriate range to be verified. Use the
Model 8508A 200 µA range to verify the DMM6500 10 µA and 100 µA ranges. Use the Model
8508A 2 mA, 20 mA, and 200 mA ranges to verify the DMM6500 1 mA, 10 mA, and 100 mA
ranges, respectively.
3. On the calibrator, select the OPR/STBY key. Make sure that the front panel displays OPERATE.
4. On the DMM6500, press the MENU key.
5. Select Calculations. The Calculation Settings screen is displayed.
6. Select the button next to Rel and select On to enable the relative offset function.
7. Set the Rel Value to 0 to zero system offset values.
8. On the reference DMM, zero the range for system offset.
9. Set the calibrator to source the current for the range you are verifying (listed in the 1 mA
verification table in Test limit calculation for 10 µA to 100 mA ranges).

 Loading...