16
Assemble units as described herein only. To do otherwise
may result in instability. All screws, nuts and bolts must be
tightened securely and must be checked periodically after
assembly. Failure to assemble properly, or to secure parts
may result in assembly failure and personal injury.
Tributaire™ Collection - Lecterns
Assembly Instructions
3
cable
actuator
assembly
release cable
(barrel end)
support
platform
mounting
bracket
opening
cable
actuator
#10-24
lock nut
actuator
plate
platform
Detail F - (underside view)
release cable
(barrel end)
support platform
mounting bracket
opening
Detail G - (underside view)
actuator mounting
plate
#10-24
lock nut
cable actuator
assembly
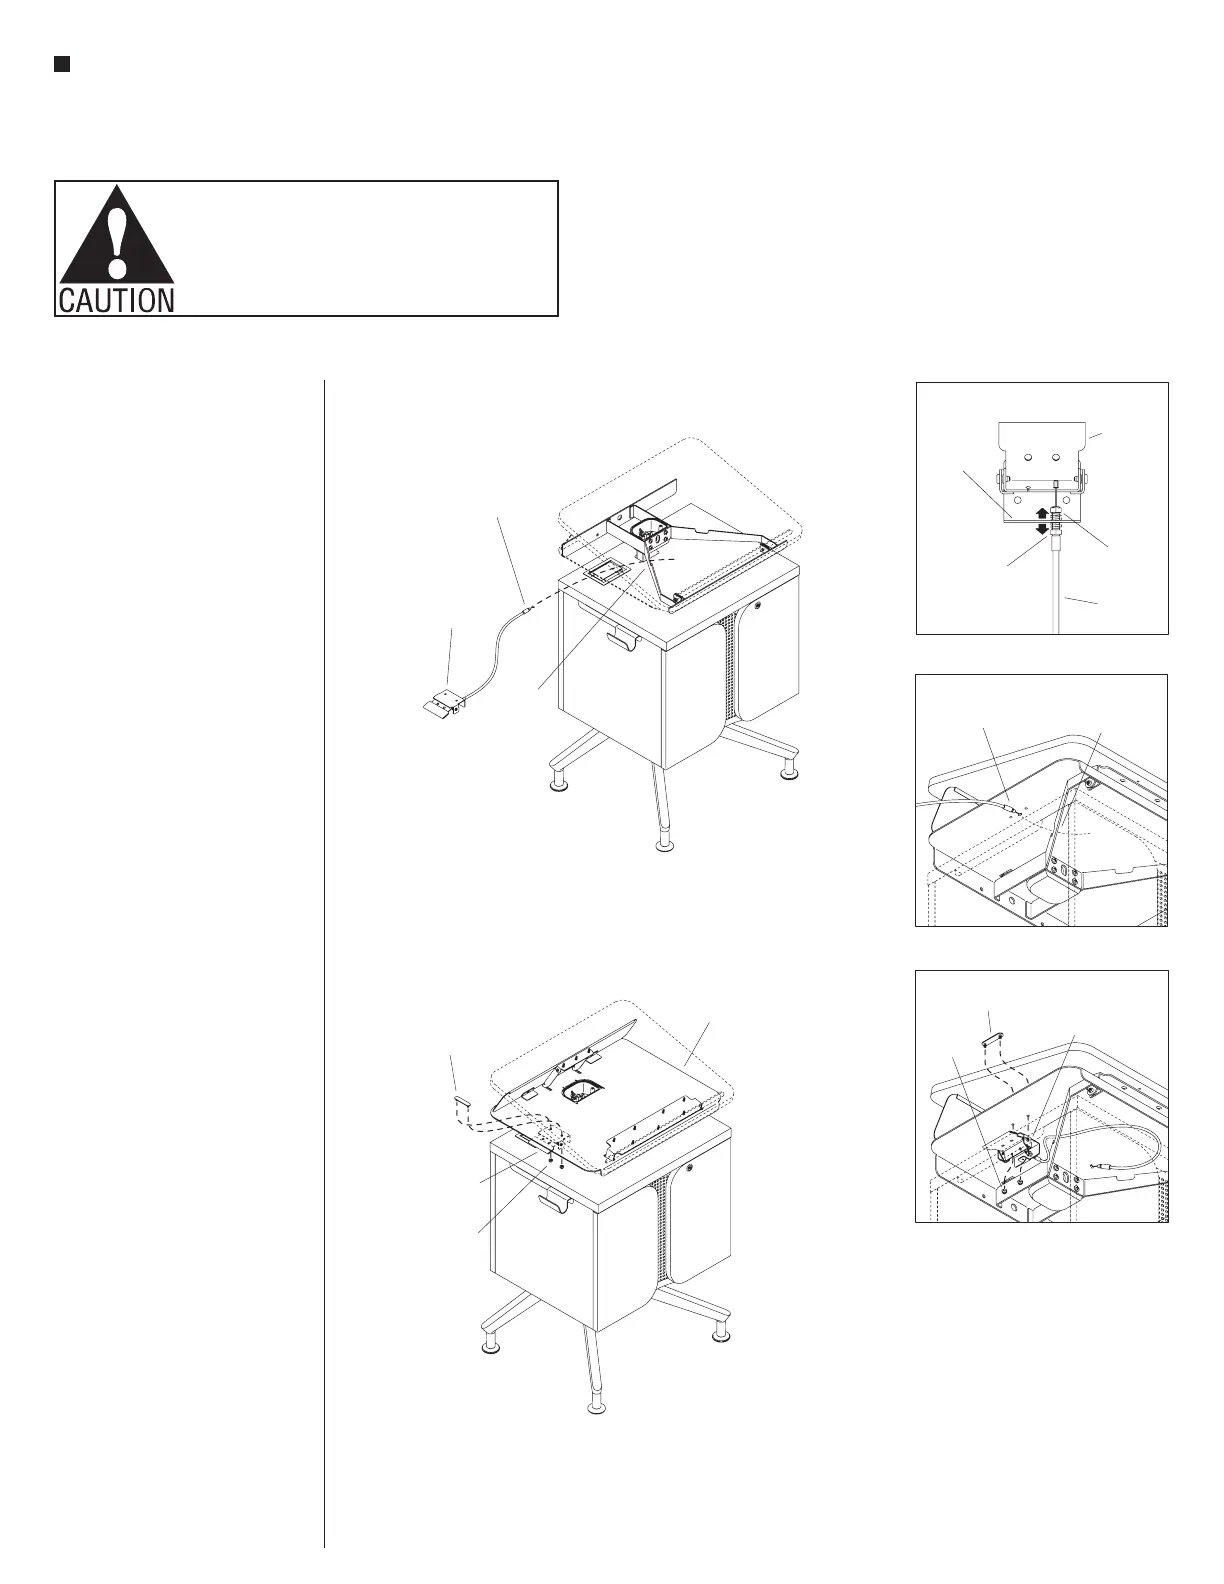
Cable Actuator Installation
1. Locate the cable actuator assembly
with release cable attached and
oriented it as shown in Detail E. At
the actuator bracket, twist the top
M8 nut up onto the top threads of the
release cable housing (hex end), only
enough to hold the top of the cable
housing in place on the actuator
bracket. Then, thread the bottom M8
nut all the way down on the cable
housing threads (Detail E).
2. Guide the barrel end of the cable into
the opening on the support platform
mounting bracket, close to the
mounting head (Figure 3 & Detail F).
3. Position the actuator mounting plate
with the studs face-down, then move
it into position between the raised
worktop, and the worktop support
platform as illustrated. Press the
studs of the actuator mounting
plate through the mounting holes
in the support platform, then move
the cable actuator assembly into
position, placing the actuator
assembly mounting holes onto the
studs of the mounting plate. Using
two #10-24 lock nuts, secure the
actuator assembly to the underside of
the worktop support platform using a
7
/
16
” socket and wrench (Figure 4 &
Detail G).
E
release
cable
(hex end)
height
actuator
handle
actuator
bracket
bottom
M8 nut
top
M8 nut