24
Assemble units as described herein only. To do otherwise
may result in instability. All screws, nuts and bolts must be
tightened securely and must be checked periodically after
assembly. Failure to assemble properly, or to secure parts
may result in assembly failure and personal injury.
Tributaire™ Collection - Lecterns - Connections to Power Source
Assembly Instructions
Connections to Power Source -
Power Modules with 3-Prong Plug
Note: Although the figures
throughout this “Connections to
Power Source” instructions illustrate
a pneumatic-adjustable height
lectern with storage, the instructions
apply to all Tributaire lecterns
with storage and Mini-Tap power
modules. Your configuration may
vary.
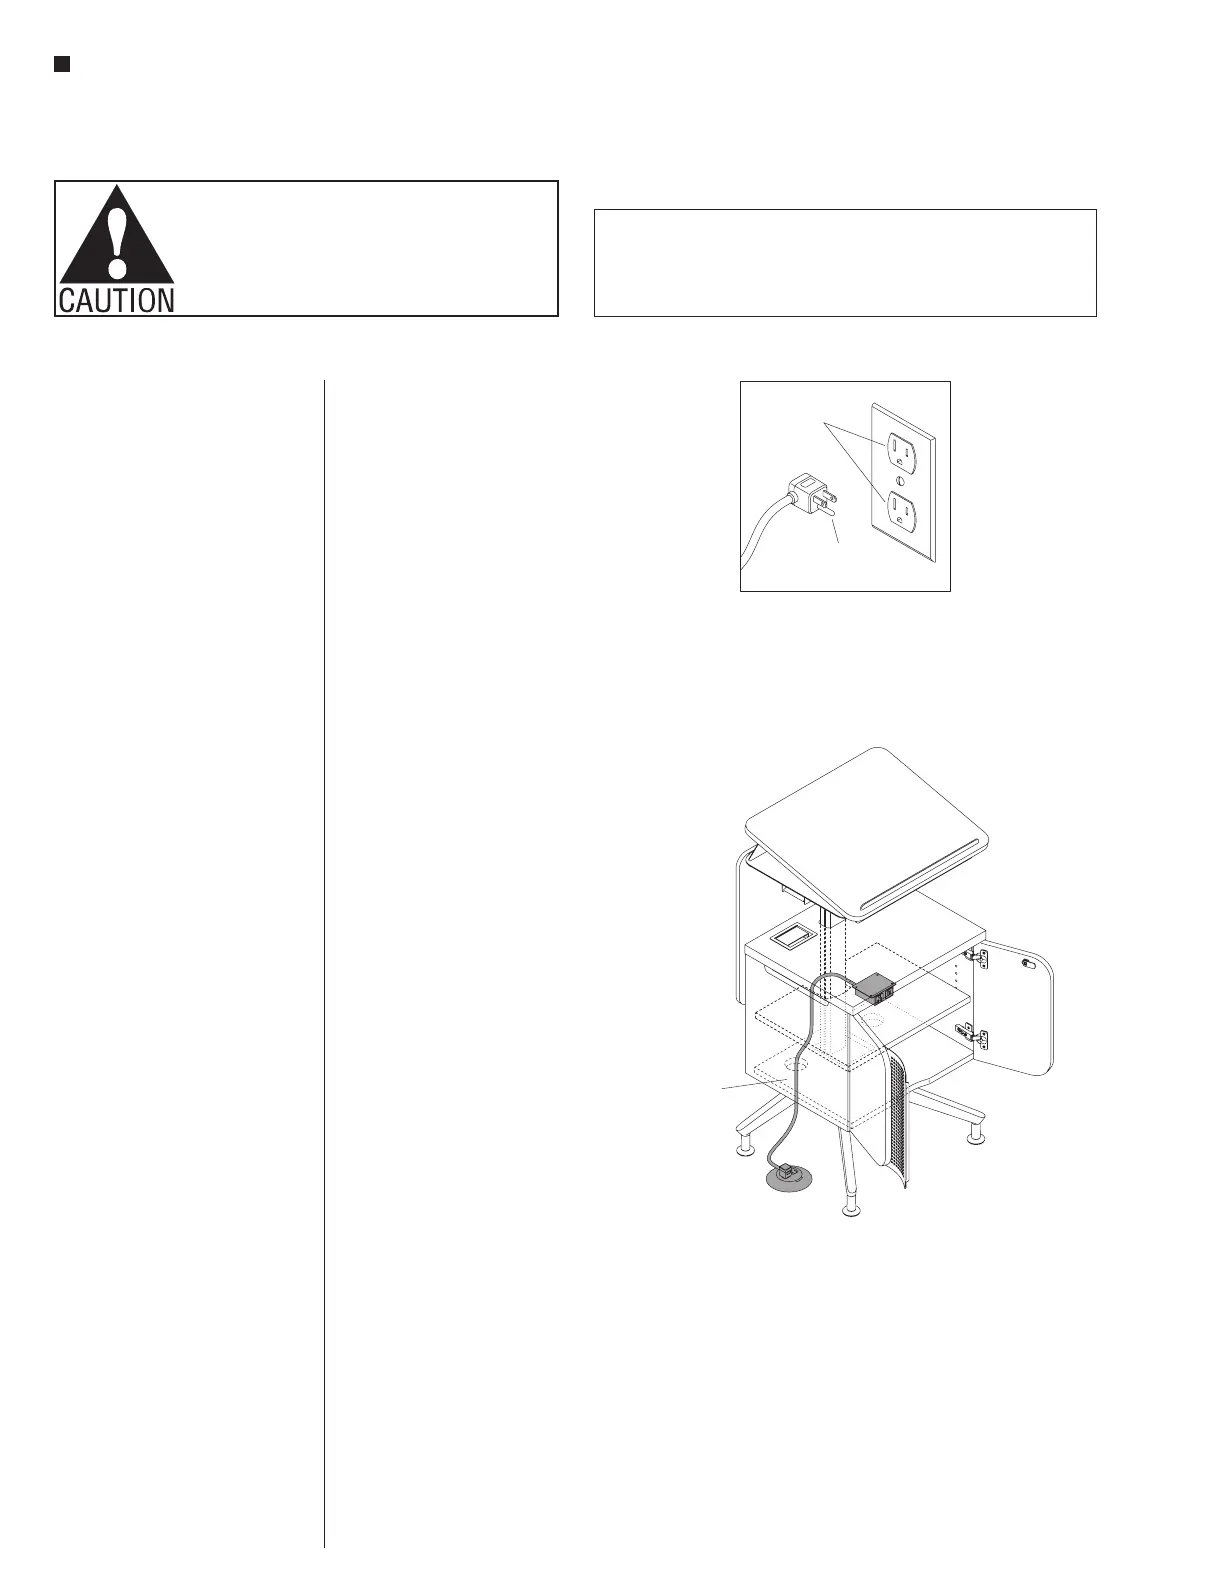
1. Place lecterns at their final location
and lock the two front, user side
casters in place on each lectern.
(Figure 1).
2. Plug the power module into an
outlet only after all other components
have been installed (Figure 1 &
Detail A).
This product is for use on a nominal 120-volt circuit and has a grounding plug
that looks like the plug illustrated in Detail A. Make sure that the product is
connected to an outlet having the same configuration as the plug. No adapter
should be used with this product.
GROUNDING INSTRUCTIONS
Mini-Tap
with 3-prong
plug
grounding
pin
grounded
outlet