5
Assemble units as described herein only. To do otherwise
may result in instability. All screws, nuts and bolts must be
tightened securely and must be checked periodically after
assembly. Failure to assemble properly, or to secure parts
may result in assembly failure and personal injury.
Tributaire™ Collection - Lecterns
Assembly Instructions
Base Assembly Overview
Note: If the lectern being assembled
will have a storage cabinet, proceed
to “Storage Cabinet Installation
Overview” instructions on this page,
otherwise proceed to “Worktop
Support Platform Overview”
instructions on page 15.
base
assembly
lower lectern
cabinet mount
plate
upper lectern
cabinet mount
plate
storage
cabinet
C
storage
cabinet
lower lectern
cabinet mount
plate
#10-16 x /”
5
8
Phillips truss
head screw
B
storage
cabinet
upper
lectern
cabinet
mount
plate
#10-16 x /”
5
8
Phillips truss
head screw
M8 x 1.25
locking nut
base
assembly
lectern upright
(pneumatic-adjustable
height)
2
A
M8 x251.
locking nut
base
assembly
cylinder
threaded
stem
Storage Cabinet Installation
Overview
Note: If a storage cabinet is being
assembled to the lectern, go to the
following sections below based
on the upright present on your
lectern: Go to page 5 for
pneumatic-adjustable height lecterns,
page 7 for screw-adjustable height
lecterns, or page 9 for fixed-height
lecterns.
Pneumatic-Adjustable Height
Lectern - Storage Cabinet
Installation
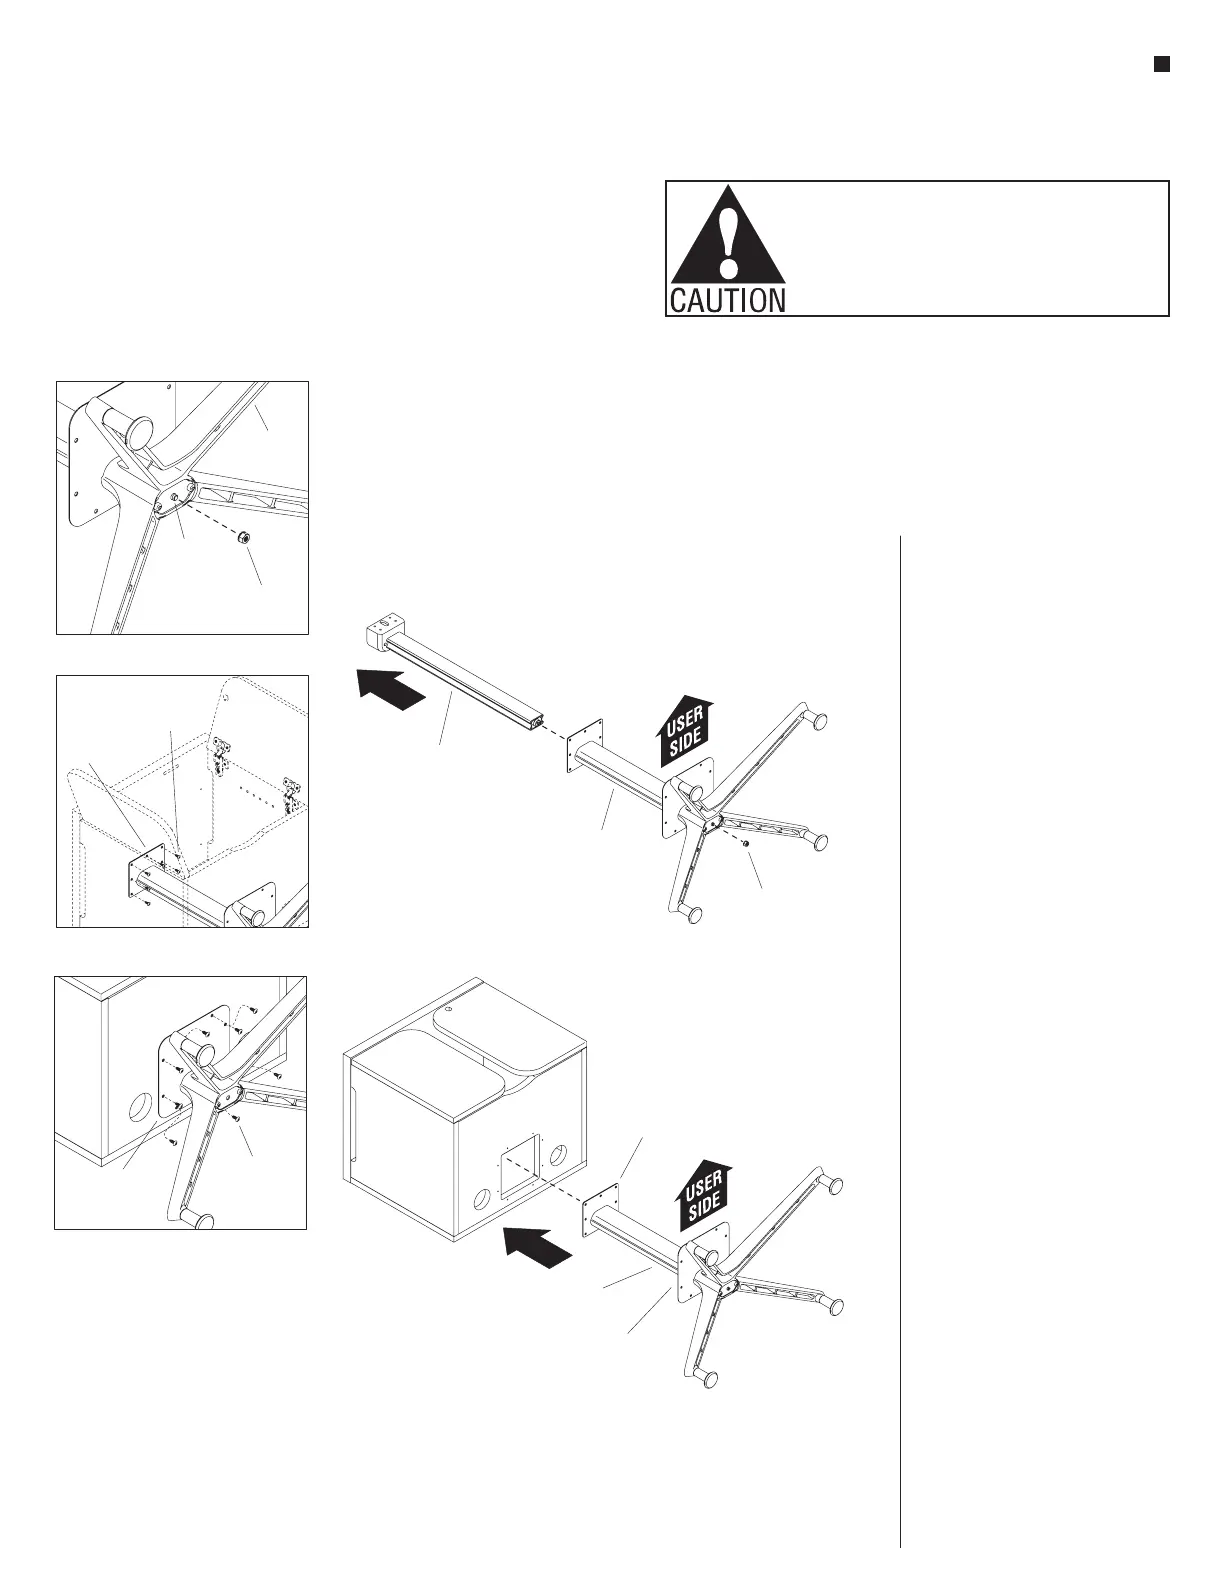
1. Carefully place the base assembly
onto it’s back, non-user side, on a
soft, protective surface (Figure 2).
2. At the underside of the base
assembly, remove the M8 x 1.25
locking nut securing the lectern
upright to the base assembly
(Figure 2 & Detail A).
3. Pull out and remove the lectern
upright from the base assembly.
Set the lectern upright aside to be
re-installed at a later step (Figure 2).
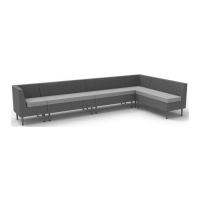
4. Carefully place the storage cabinet
onto it’s back on a soft protective
surface and open the storage cabinet
doors to gain access inside. Align
the opening on the underside of
the cabinet with the top of the base
assembly, then insert the upper
lectern cabinet mounting plate into
the storage cabinet until the bottom
of the cabinet rests on top of the
lower lectern cabinet mount plate
(Figure 3 & Detail B).
5. Inside the cabinet, align the
mounting holes of the upper lectern
cabinet mount plate to the mounting
holes on the underside of the storage
cabinet top, then secure together
using seven #10-16 x
5
/
8
” Phillips
truss head screws (Detail B).
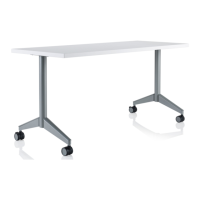
6. Align the mounting holes on the
lower lectern cabinet mount plate
with the mounting holes on the
underside of the storage cabinet,
then secure together using eight
#10-16 x
5
/
8
” Phillips truss head
screws (Detail C).