19
Assemble units as described herein only. To do otherwise
may result in instability. All screws, nuts and bolts must be
tightened securely and must be checked periodically after
assembly. Failure to assemble properly, or to secure parts
may result in assembly failure and personal injury.
Tributaire™ Collection - Lecterns
Assembly Instructions
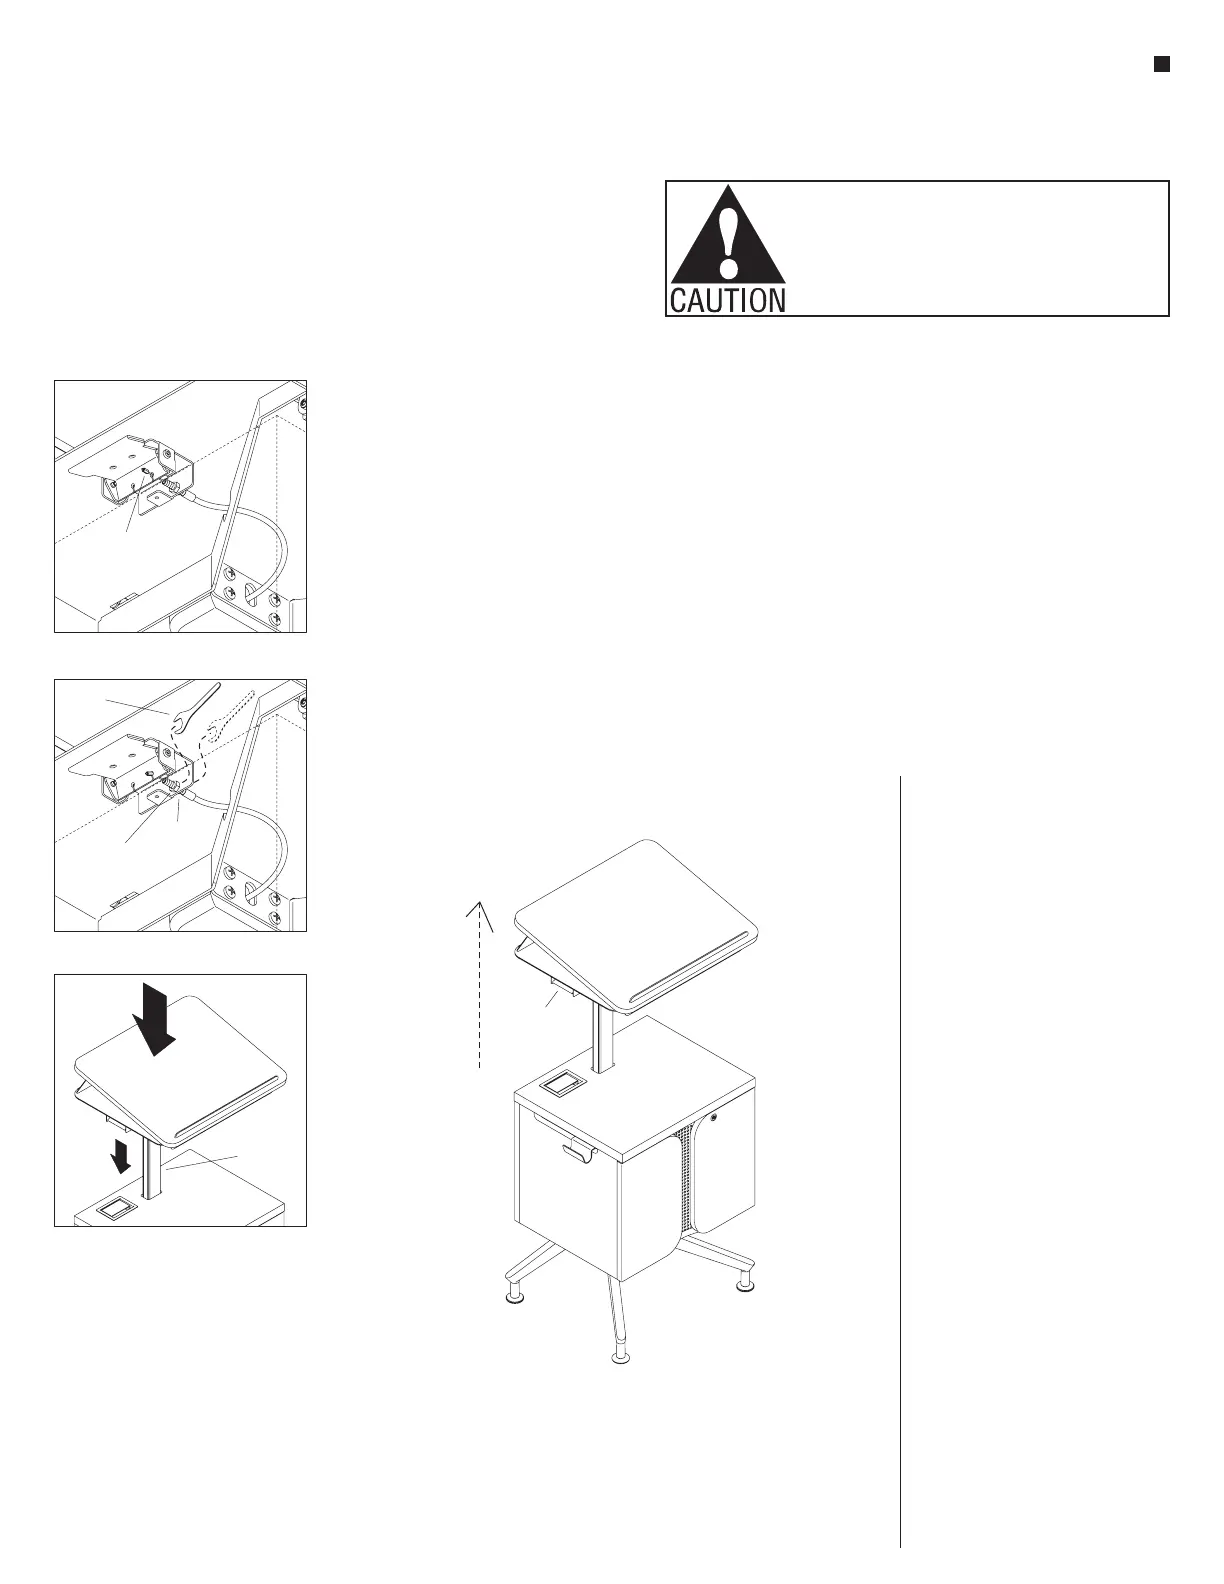
Detail P - (underside view)
loose hex end
on height actuator
bracket
Detail Q - (underside view)
7
/”
16
wrench
top
M8 nut
bottom
M8 nut
worktop
upright
7
height
actuator
handle
worktop
Lectern Use Test – No Adjustment
Needed Test
Note: The lectern should be in the
lowered position at this time. If not,
fully depress the height actuator
handle and press down on the lectern
worktop, then release the handle.
1. With the lectern in the lowered
position, locate and fully depress
the height actuator handle and the
lectern should automatically raise.
Let go of the actuator handle after
the worktop raises a few inches
(Figure 7). Fully depress the height
actuator handle again and press
down on the lectern worktop,
lowering it a few inches, then release
the handle and the worktop should
stay. Without activating the handle,
press down on the worktop at
mid-height location and it should
not lower. If these operations work as
described, no adjustment is needed.
Lectern Height Actuator Cable
Adjustment
2. If depressing the height actuator
handle does not allow the lectern
worktop to raise automatically from
the lowered position, the cable
hex end is adjusted too loose, and
requires more tension. Go to
step 3 below. If the worktop is raised
and can be pressed down without
depressing the height actuator, the
cable tension is adjusted too tight.
Go to step 4 below.
3. Begin loose cable adjustment by
inspecting the hex end of the cable
in the actuator handle slot, in the
conical indent to identify that the
cable is not seated properly
(Detail P). Loosen the top M8 nut
using the
7
/
16
” wrench provided
and twist the nut up. Pull down on
the black cable housing enough
to assure that the hex cable end is
seated correctly into the conical
indent of the actuator bracket. Then
twist the bottom M8 nut up, finger
tight to the actuator bracket and
use the
7
/
16
” wrench to turn the nut
one-quarter to one-half of a turn
more. Twist the top M8 nut back
down to finger tight. Then using the
7
/
16
” wrench, tighten the top M8 nut
down one-quarter to one-half of a
turn more (Detail Q). Check to assure
the cable is tight, or repeat the above
process.
4. Begin tight cable adjustments by
loosening the bottom M8 nut
one-quarter to one-half of a turn
using the
7
/
16
” wrench, then turn the
top M8 nut one-quarter to one-half
of a turn down to tighten (Detail Q).
Press the height actuator handle to
raise and stop the lectern, and test
if the worktop lowers with pressure
when the actuator handle is not
pressed (Detail R). If it does not
lower without the handle pressed, no
more adjustment is required, but if
it does lower, repeat step 4 above as
needed.