18
Assemble units as described herein only. To do otherwise
may result in instability. All screws, nuts and bolts must be
tightened securely and must be checked periodically after
assembly. Failure to assemble properly, or to secure parts
may result in assembly failure and personal injury.
Tributaire™ Collection - Lecterns
Assembly Instructions
release
cable
(hex end)
height
actuator
handle
actuator
bracket
ange
actuator
bracket
bottom
M8 nut
black cable
housing
Detail M - (underside view)
7
/”
16
wrench
height actuator
handle slot
with indent
bottom
M8 nut
N
release
cable
(hex end)
height
actuator
handle
actuator
bracket
ange
actuator
bracket
top
M8 nut
Detail O - (underside view)
7
/”
16
wrench
height actuator
handle slot
with indent
top
M8 nut
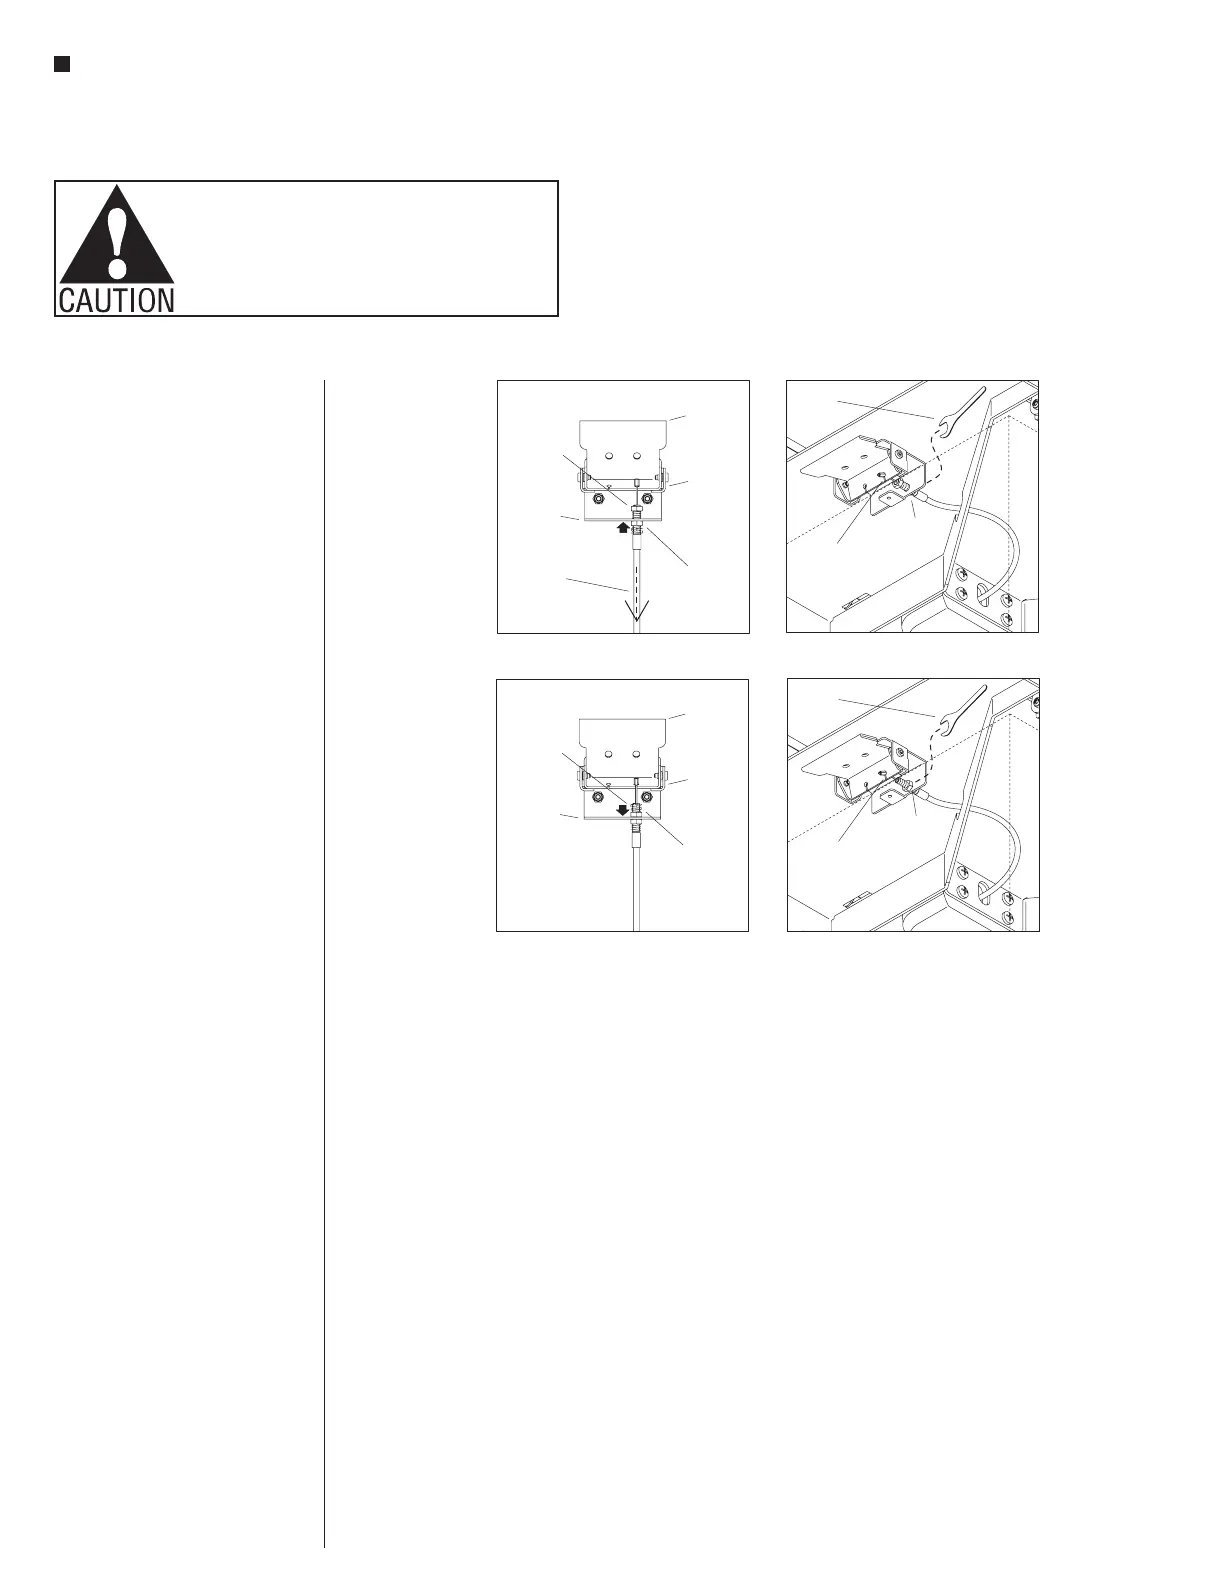
Cable Actuator Installation (cont.)
9. At the installed cable actuator
assembly, gently pull on the black
cable housing to assure the hex
end is nested snugly in the actuator
handle, and the actuator handle is
also pulled tight to the top flanges
of the actuator bracket. Then twist
the bottom M8 nut up the threads to
be finger-tight against the actuator
bracket, and assure the cable’s
hex end is snug and nested in the
conical indent of the handle
(Detail L).
10. After the bottom M8 nut is finger
tight to the actuator bracket, tighten
the bottom nut an additional
one-quarter
to one-half of a
turn using the
7
/
16
” wrench
provided (Detail M).
Note: If the bottom nut is tightened
too much, the lectern may raise. If
this happens, press the lectern top
down and loosen the bottom nut
slightly until the lectern does not
raise.
11. Next, twist the top M8 nut down the
threads, finger tight to the actuator
bracket. Using the
7
/
16
” wrench
provided, tighten the top nut
one-quarter
to one-half of a turn to
secure (Details N & O).
 Loading...


