6-8
n
KitchenAid 2013 Stainless Steel Tall Tub Dishwasher
TESTING
For Service Technician Use Only
DANGER
Electrical Shock Hazard
Only authorized technicians should perform
diagnostic voltage measurements.
After performing voltage measurements,
disconnect power before servicing.
Failure to follow these instructions can result in
death or electrical shock.
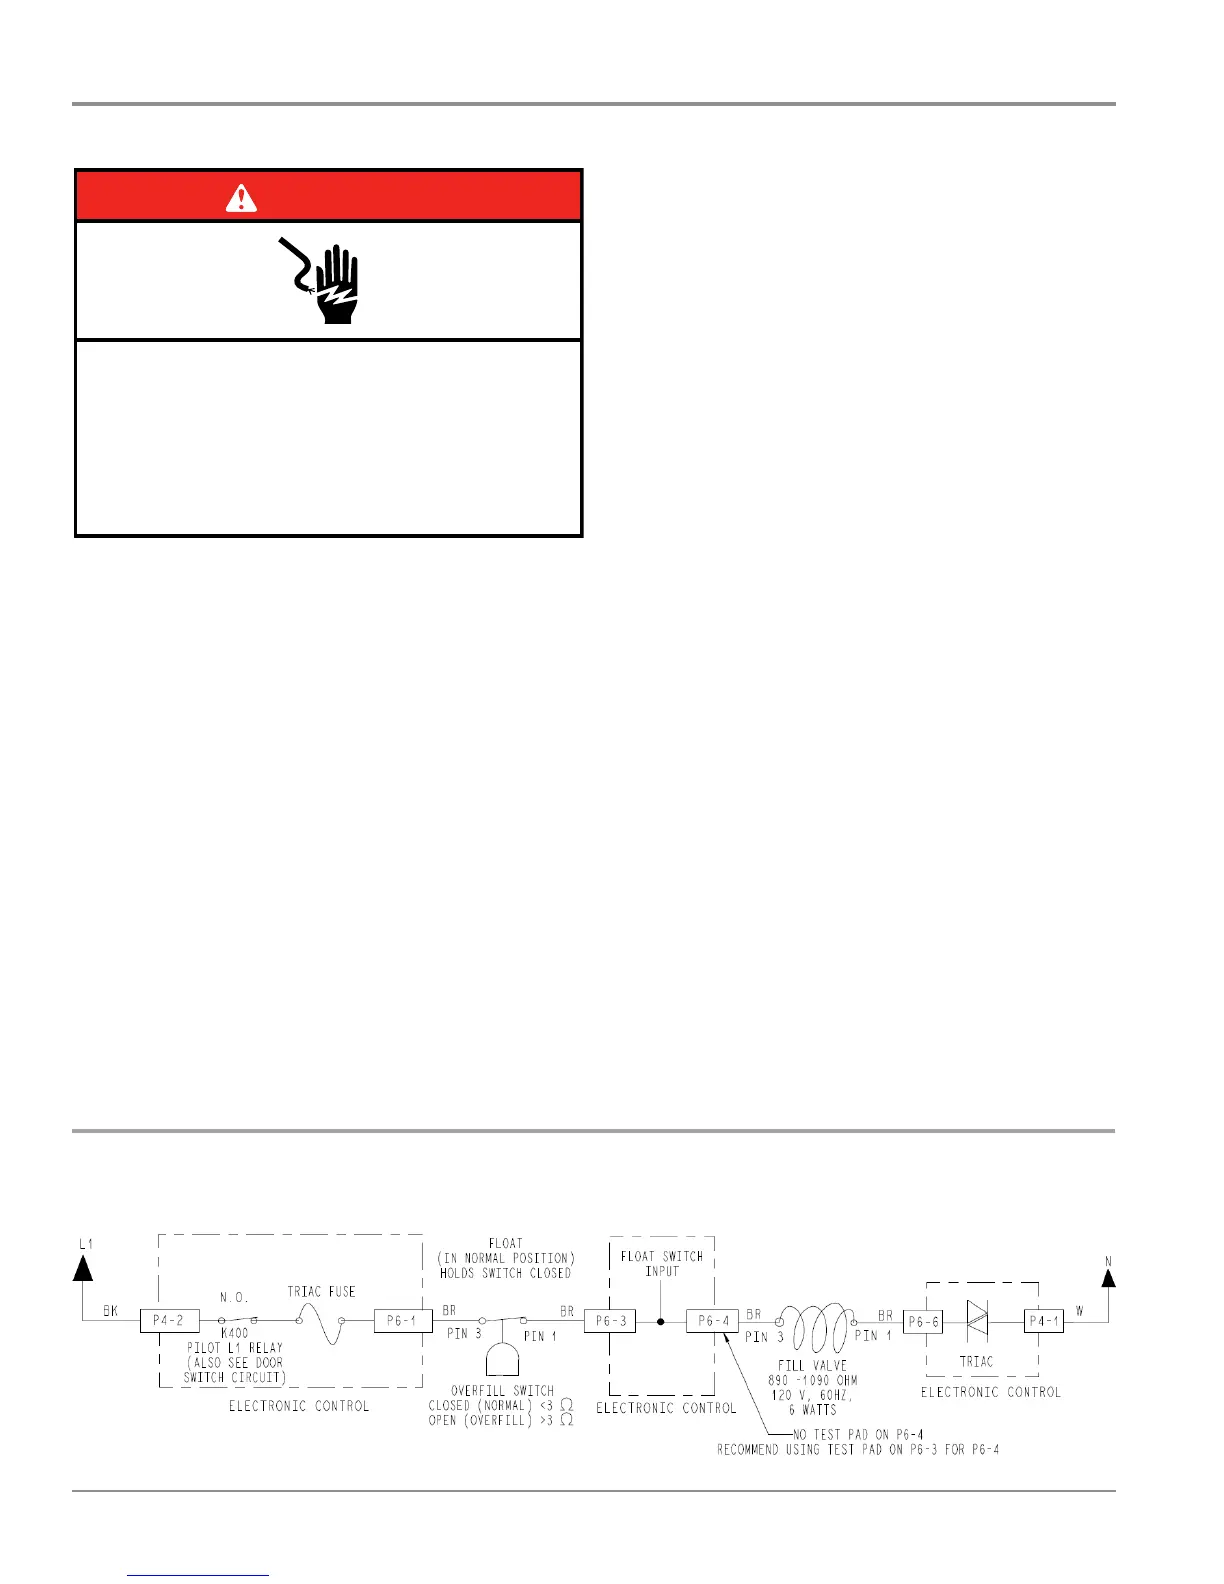
Fill Circuit
This test will check the wiring and components in the ll
circuit. The following items are part of the ll circuit.
■ Harness/Connecon
■ Overll Switch
■ Fill Valve
■ Control Board
Test Procedure
1. Verify water supply is turned on and supply line is
adequate. Check for water siphoning out of the unit (drain
loop or improper drain connecon). Check for debris in
water line or ll valve inlet screen. Check for proper oat
switch operaon. Repair as necessary.
2. Are all the loads controlled by TRIACS not working?
¾ YES – check for open door switch, TRIAC fuse, or pilot
relay.
¾ NO – just the Fill Valve. Go to step 3.
3. Unplug dishwasher or disconnect power.
Strip Circuit – Fill Valve
4. Remove outer door panel to access control board.
5. Unplug connector P6 from control board.
6. Check the ll valve and harness—using an ohmmeter,
measure the resistance between P6-4 and P6-6.
¾ If the resistance is between 890-1090 ohms, the ll
valve and harness are good. Go to step 7.
¾ If outside the range, replace the ll valve.
¾ If an open circuit is detected, check connecons and
harness connuity between control and ll valve. If
good, replace the ll valve.
7. Check the oat (overll) switch—using an ohmmeter,
measure the resistance between P6-1 and P6-3 with the
oat switch closed/oat down.
¾ If 3 ohms or less is measured, go to step 8.
¾ If an open circuit or high resistance is measured, check
connecons and harness connuity between the
control and oat switch. If harness is good, replace
switch and retest.
8. Using an ohmmeter; measure the resistance between
P6-1 and P6-3 with the oat switch open/oat up.
¾ If reading is innite, go to step 9.
¾ If 3 ohms or less is measured, or oat/overll switch is
damaged, replace switch and retest.
9. Reconnect P6 to control board.
10. Plug in dishwasher or reconnect power.
11. Check for AC voltage from the Control. Start the Diagnosc
Cycle and at the proper interval measure for AC out of the
control between P6-4 to P6-6 using a voltmeter set to AC.
IMPORTANT: The Fill Valve must be connected to the
control board to measure voltage accurately!!!
¾ If no AC voltage is measured, replace the control board
and retest.
¾ If 120V AC is measured and ll valve is energized, go to
step 12.
12. Perform Diagnosc Cycle to verify repair.
13. Unplug dishwasher or disconnect power.
14. Reassemble all parts and panels.
15. Plug in dishwasher or reconnect power.