TESTING
KitchenAid 2013 Stainless Steel Tall Tub Dishwasher
n
6-11
For Service Technician Use Only
DANGER
Electrical Shock Hazard
Only authorized technicians should perform
diagnostic voltage measurements.
After performing voltage measurements,
disconnect power before servicing.
Failure to follow these instructions can result in
death or electrical shock.
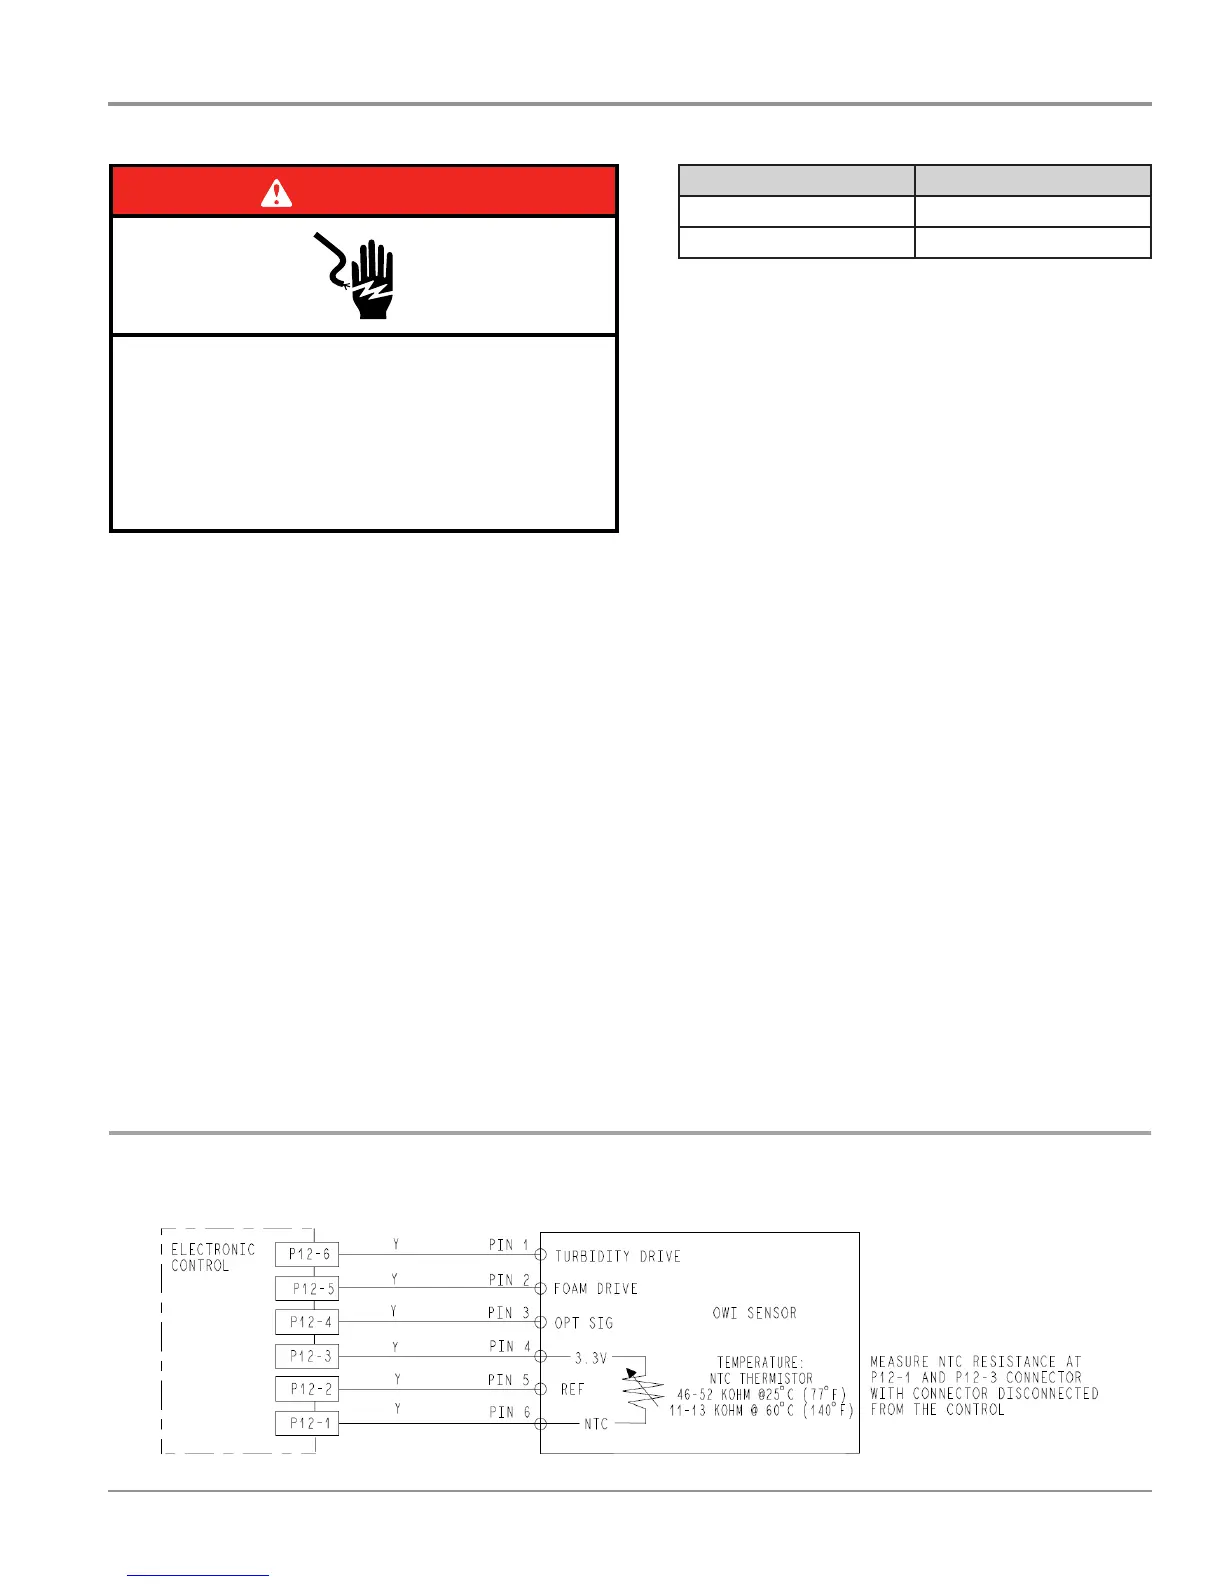
Water Sensing with O.W.I. Sensor
This test will check the wiring to the OWI (Opcal Water
Indicator), which incorporates the temperature thermistor
and the OWI itself. The following items are part of the water
sensing circuit.
■ Harness/Connecon
■ O.W.I. Sensor (with temperature thermistor)
■ Control Board
Test Procedure
1. Check the operaon of the temperature thermistor in the
Service Diagnosc Cycle.
2. Unplug dishwasher or disconnect power.
3. Remove outer door panel to access control board.
4. Disconnect P12 from the Control Board.
5. Using an ohmmeter, measure resistance between P12,
pins 1 and 3. The following table provides approximate
room and hot water temperatures and their associated
resistance values.
Strip Circuit – Water Sensing
TEMP °F (°C) RES RANGE k ohms
77° F (25° C) 46 – 52k ohms
140° F (60° C) 11 – 13k ohms
NOTE: All thermistor resistance measurements must be
made while dishwasher is unplugged or disconnected
from power and connector P12 removed from control.
¾ If the thermistor resistance is OK , the thermistor is
good. Go to step 6.
¾ If the thermistor resistance does not agree with the
table, replace the O.W.I. Sensor.
¾ If an open circuit is detected, check connecons and
harness connuity between control and O.W.I. If good,
replace the O.W.I. Sensor.
6. Using an ohmmeter, check P12 -1 to cabinet ground and
P12-3 to cabinet ground.
¾ If no short is indicated, go to step 7.
¾ If either pin indicates connuity to ground (short),
repair or replace wiring harness and retest.
7. Reconnect P12 to control board.
8. With a voltmeter set to DC, connect the black lead to P12-
2 and the red lead to P12-3.
9. Plug in dishwasher or reconnect power.
10. Start the Diagnosc Cycle and at the proper interval
measure for DC out of the control between P12-2 and
P12-3.
¾ If 3.3V DC is measured the control is funconing. go to
step 11.
¾ If no DC voltage is measured, replace the control board
and retest.
11. Perform Diagnosc Cycle to verify repair.
12. Reassemble all parts and panels.
13. Plug in dishwasher or reconnect power.