DIAGNOSTICS & TROUBLESHOOTING
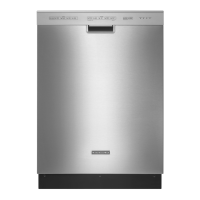
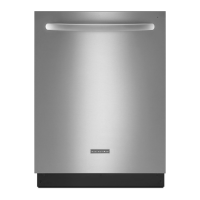
KitchenAid 2013 Stainless Steel Tall Tub Dishwasher
n
5-5
For Service Technician Use Only
Service Diagnosc Cycle Notes
1. To invoke the diagnoscs cycle, perform the following key
presses while in standby.
• Press any 3 keys in the sequence 1-2-3, 1-2-3, 1-2-3
with no more than 1 second between key presses.
• The Service Diagnosc Cycle will start when the door
is closed.
• To rapid advance 1 interval at a me, press the START/
RESUME key. Rapid Advancing may skip sensor checks
as some checks require two complete intervals.
NOTE: While in the Diagnosc cycle, the START/
RESUME feature is turned o (i.e., auto resume aer
door interrupts) START/RESUME key serves as interval
advance key.
• Invoking Service Diagnoscs clears all status and last
ran informaon from memory and restores defaults.
It also forces the next cycle to be a sensor calibraon
cycle.
• Last Ran Cycle and Opons returned to default
(Normal Cycle with Heated Dry Opon).
• Last Ran Delay returns to lowest delay increment.
• Calibraon Cycle may force an extra rinse to occur
prior to nal rinse (to assure clear water), then
calibrates the OWI and the Fill amount during the
nal rinse.
• Operang state returns to standby upon compleng
or terminang the service diagnoscs cycle.
2. Tun on all LED’s immediately upon receiving the entry
sequence (even if door is open) and throughout this rst
interval as a display test.
3. Diverter will be on connuously in Interval 14. In all other
diverter intervals, diverter will only be on unl it reaches
the intended posion for that interval.
4. Press HI TEMP key in this interval to clear customer error
history.
5. Thermistor (Temperature Sensor) checks — turn Clean
LED on if thermistor is in its normal temperature range
(32° F to 167° F); turn Sanized LED on if Fill temperature
is above 85° F.
6. O.W.I. (Opcal Soil Sensor/Opcal Water Indicator) checks
• OWI Sensor for the presence of water during the 5
second pause in Interval 16 and turns on the Clean
LED in Interval 15 if water detected.
• OWI Sensor for presence of bulk soil during Pause
Interval 13 and turns on the Clean LED in Interval 12 if
bulk soil detected.
• Drain unl OWI sensor sees the presence of air or a
maximum of 1:52 during Intervals 5 and turns on the
Clean LED in Interval 4 if air detected.
7. DC fan motor is on during upper rack washing intervals.
8. Turn o all LED’s during pause prior to displaying error
codes.
9. Pause to allow for cold rst Fill detecon.
10. Lower Spray Arm (LSA) models idened by nger-shaped
sensor in tub, protruding from boom le side of sump.
Check for LSA motor and sensor during Interval 10 per detail
below or look for error code (F9E4) at end of service cycle.
Interval 10 (4 Min. Lower Wash) Diagnostic Details:
NOTE: Lower Spray Arm (LSA) motor and sensor status
indicaon given during 3rd and 4th minute of Interval 10.
(Only available on certain models.)
Minute 1: LSA Rotates CCW
Minute 2: LSA Rotates CW
Minute 3: LSA Rotates CCW
¾ Clean LED lit to indicate LSA motor status good.
Minute 4: LSA Rotates CW
¾ Clean LED lit to indicate LSA sensor status good.
NOTE: Inoperable LSA motor will also cause LSA sensor to
indicate bad status (F9E4). See error code table to diagnose.
Interval 3: LSA moves to home posion aer drain completes.
Home posion = LSA roughly 5 clockwise from 12 O’clock.
Diagnosc Guide
Before servicing, check the following:
■ If applicable, make sure there is power at the wall outlet.
■ Has a household fuse blown or circuit breaker tripped?
■ Is the water supply turned on?
■ Are the drain hoses unobstructed?
■ All tests/checks should be made with a VOM (volt-
ohm-milliammeter) or DVM (digital-voltmeter) having a
sensivity of 20,000 Ω per volt DC or greater.
■ Resistance checks must be made with dishwasher
unplugged or power disconnected.
■ IMPORTANT: Avoid using large diameter probes when
checking harness connectors as the probes may damage
the connectors upon inseron.
■ Check all harnesses and connecons before replacing
components. Look for connectors not fully seated, broken
or loose wires and terminals, pin inseron, or wires not
pressed into connectors far enough to engage metal barbs.
■ A potenal cause of a control not funconing is corrosion
or contaminaon on connecons. Use an ohmmeter to
check for connuity across suspected connecons.

 Loading...


