6.4. LOADER INSTALLATION
6.4.1. Before installing loader to tractor, install quick attach to
loader if Factory has not pre-installed it.
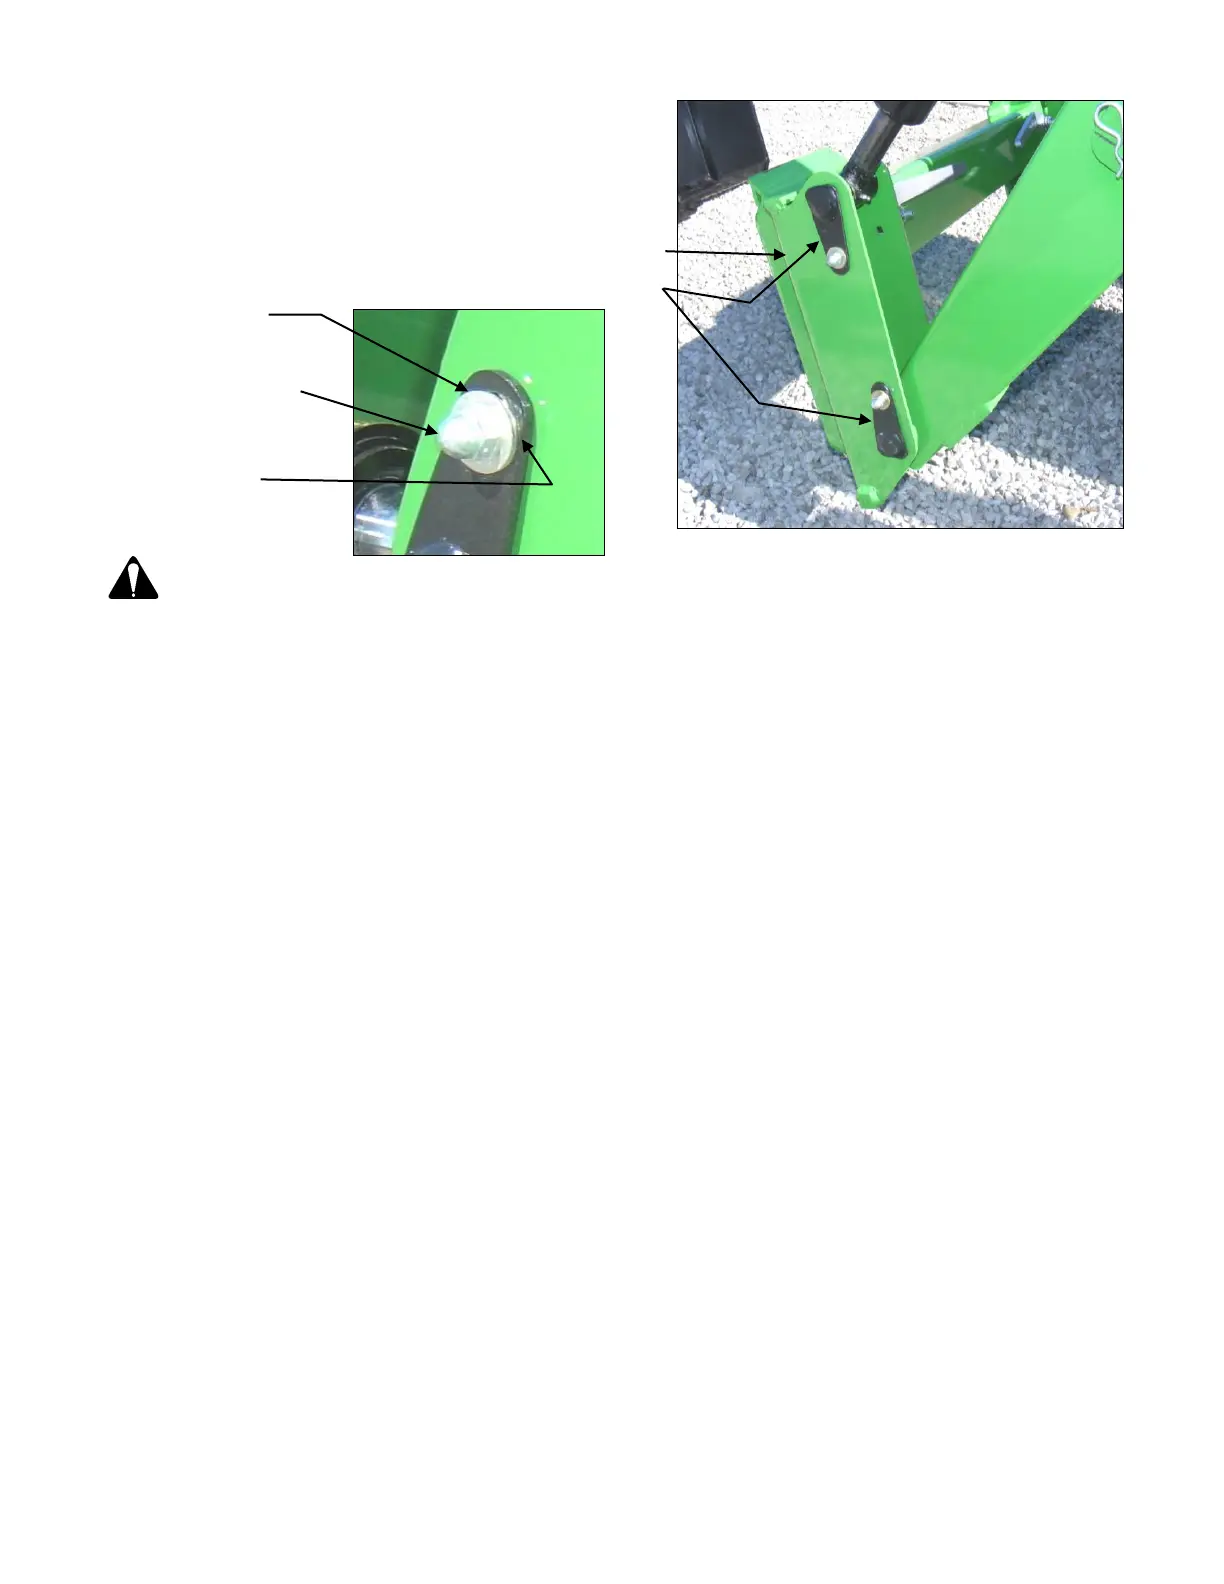
6.4.2. Secure quick attach to loader with 1” x 4.44” pins, 4
places. Secure each pin using carriage bolt, hardened
flatwasher, and stover locknut.
Quick Attach
Pin 1" x 4.44", 4 places
Flatwasher 3/8"
Hardened, 4 places
Acorn Locknut 3/8"-
16NC, 4 places
Carriage Bolt 3/8"-
16NC x 1"
Grade 5, 4 places (not
visible in photo)
CAUTION: Lift and support all loader components safely.
IMPORTANT: Do not extend tilt cylinders without quick attach pinned to loader. Failure to follow these
instructions could cause loader damage and void warranty.
6.4.3. Before installing loader to tractor, use a hoist to install quick attach bucket on loader quick attach. See
Quick Attach Operation Instructions Section 13.
6.4.4. Following these instructions will add stability to loader package and will allow easier handling of loader with
hoist.
6.4.5. Verify that all mounting kit hardware has been torqued as specified before installing loader.
A. Identify hardware size and grade.
B. Refer to Torque Chart, page 67 and find correct torque for your hardware size and grade.
C. Torque hardware to this specification unless otherwise specified.
IMPORTANT NOTE: To prevent mounting kit hardware from loosening during loader operation always
torque mounting kit hardware to specified torque.
6.4.6. Support the loader by using a hoist. Refer to Section 11 — Mounting the Loader, starting on page 39. Install
loader to mounting brackets previously installed on tractor.