A-61635 December 2010 4-55
Selecting TIFF as your file format:
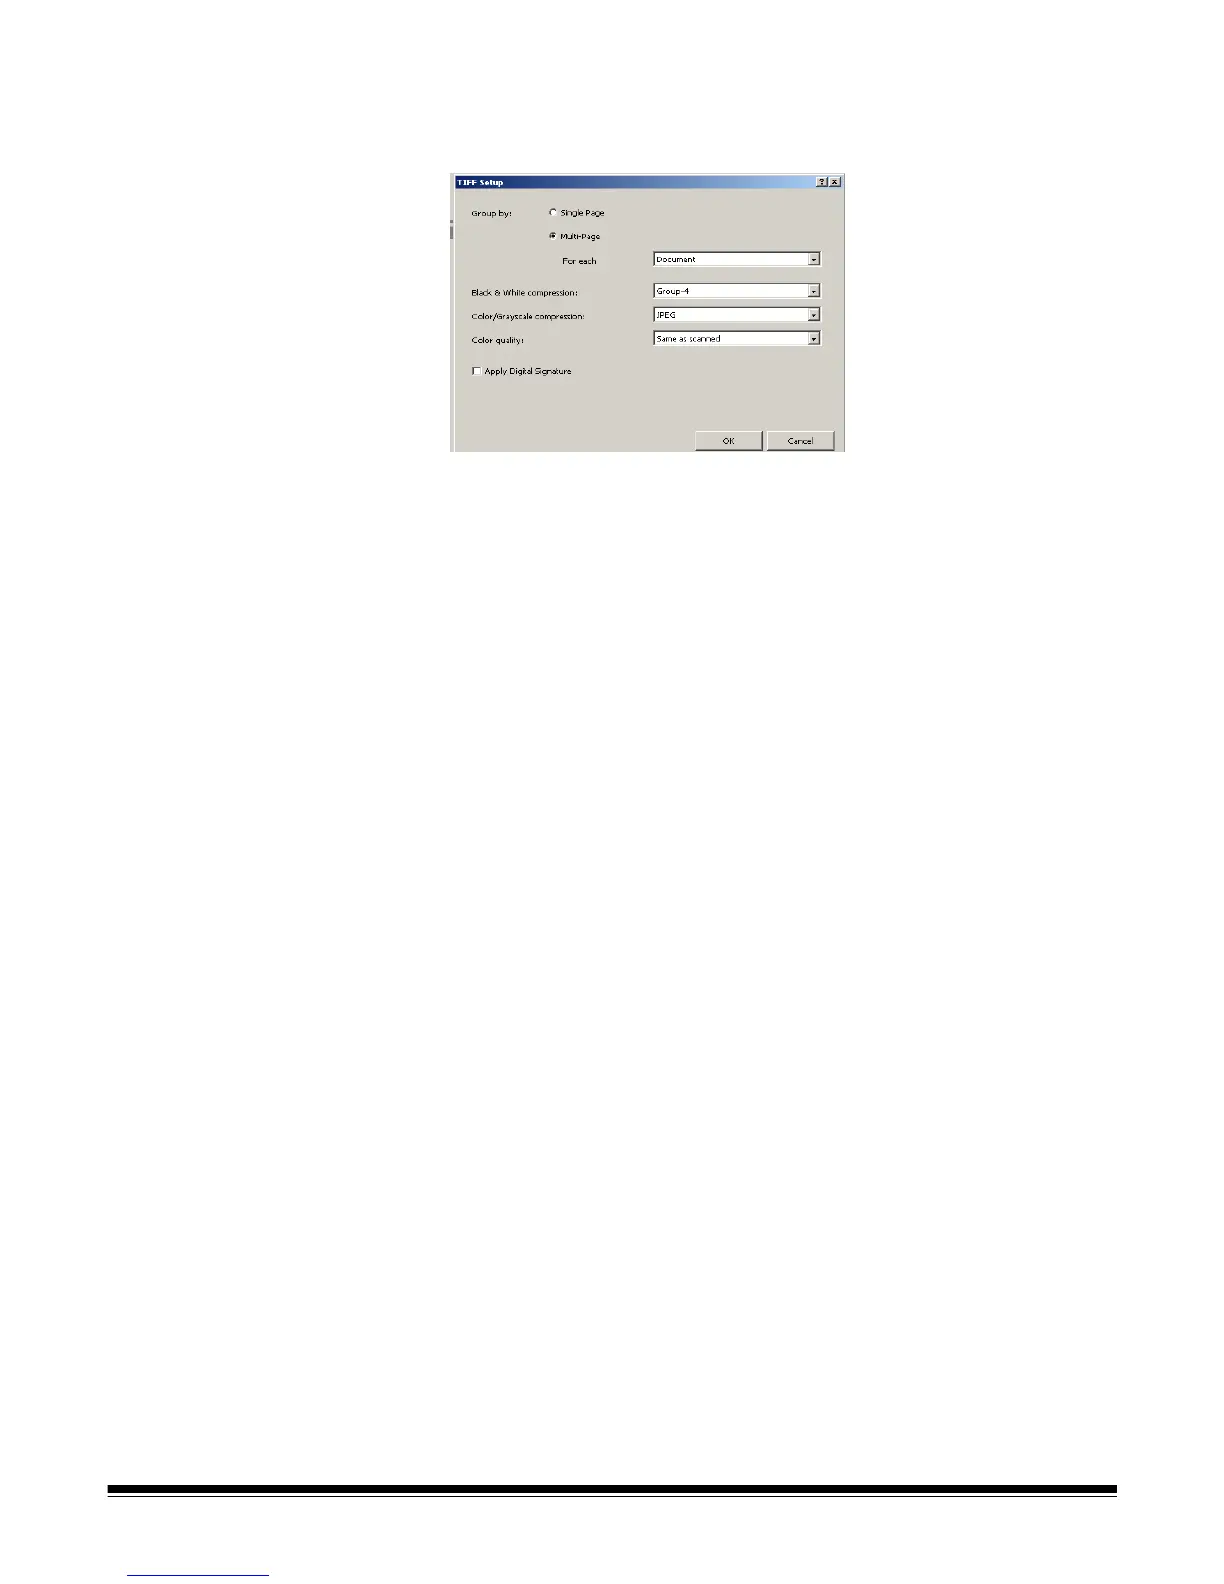
If you select TIFF as your file format to process your output, the TIFF Setup
dialog box will be displayed.
1. Select either Single-Page or Multi-Page as the way to group your image
files in output. Every input (scanned) image file will be a separate output
file.
• If you select Single-Page, every image you scan is a separate image
file in output. Therefore, if you scan a page, you will have two separate
image files in output (one for the front and one for the back). If you are
scanning dual stream, you will have four image files in output.
• If you select Multi-Page, the For each drop-down list becomes
available.
- For each: Page — every image for every page scanned becomes one
file. When you open the file, there will be two images, one for the front
and one for the back. If you are scanning dual stream, you will have four
images.
- For each: Document — every page scanned into one document will
become the contents of one file. There may be several (or many)
images in one file.
- For each: Batch — all images scanned into the batch will become one
output file. There may be many images in the output file.
2. If your output includes black and white images, the Black & White
compression option is available. Select Group-4 or (none) from the drop-
down list.
3. If your output includes color or grayscale images, the Color/Grayscale
compression and Color quality options are available.
• Color/Grayscale compression: select JPEG (TIFF 6), or (none).
• Color quality: select one of the following settings from the drop-down
list: Same as scanned, Draft, Good, Better, Best, or Superior. Same
as scanned is recommended.
4. If you want to have a digital signature, click Apply Digital Signature.
Checking this option provides the recipient with some confidence that the
image data has not been changed.
5. When finished, click OK.