5
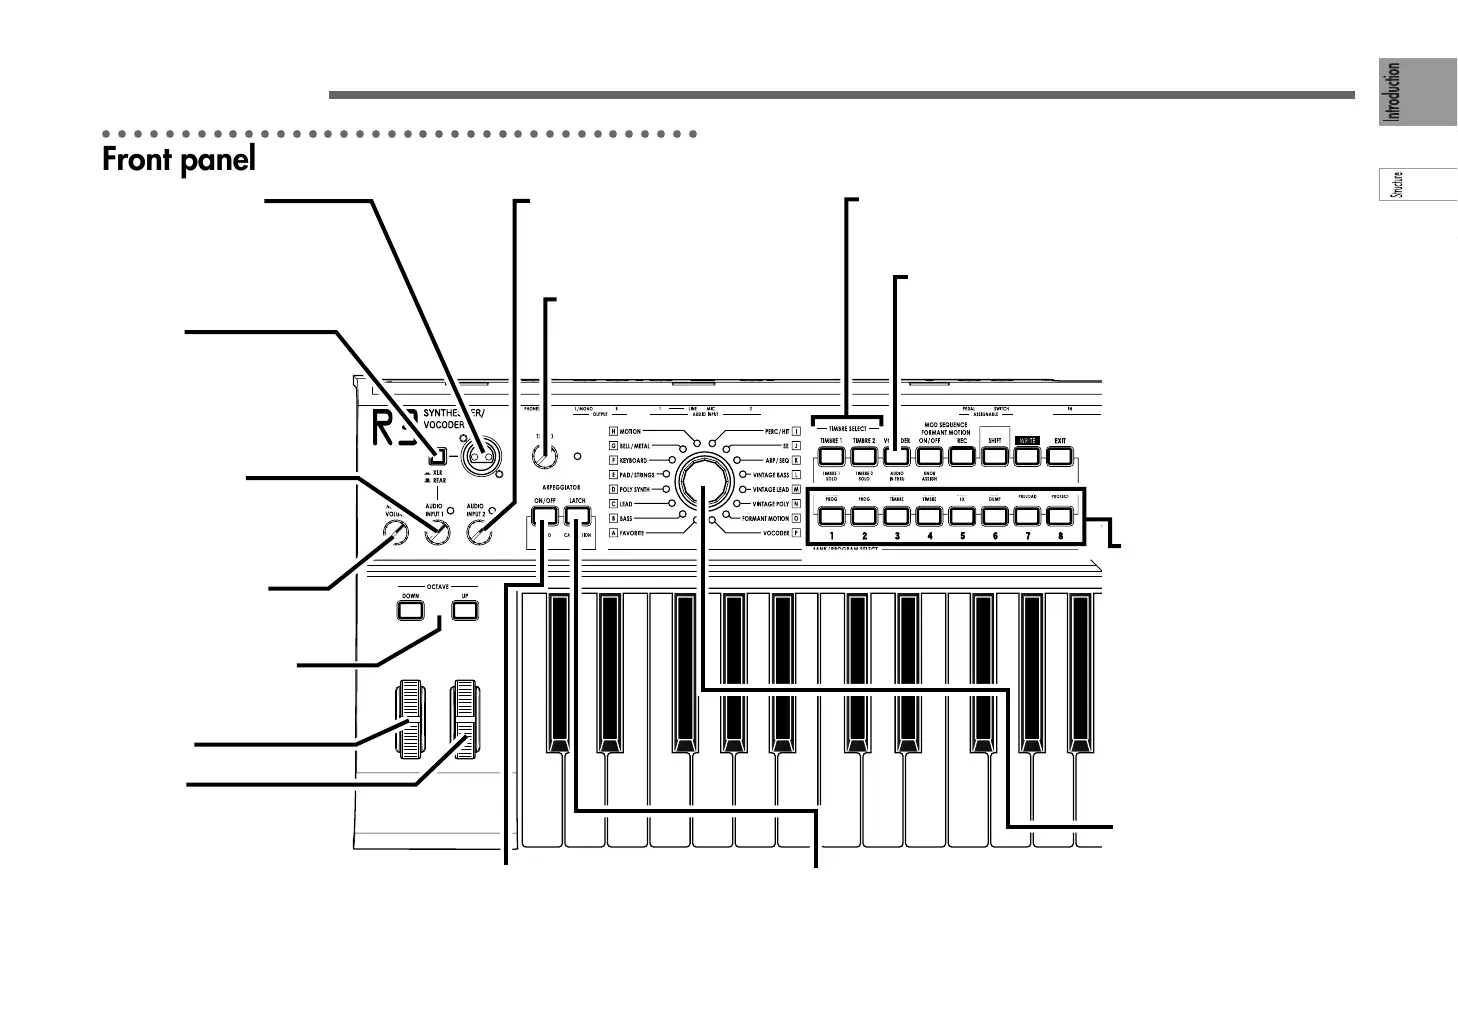
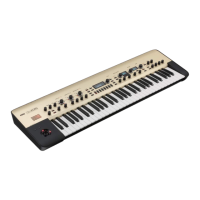
Front and rear panel
[PITCH] wheel
Controls the pitch.
[MOD] wheel
Controls the depth of modulation
(cyclic change).
OCTAVE [UP] [DOWN] buttons
Shift the pitch assigned to the keyboard
in one-octave steps over a range of ±3
octaves.
[BANK SELECT] dial
Selects the program bank (A–P).
When the R3 is shipped from the
factory, sounds are organized in
these banks by category.
[MASTER VOLUME] knob
Adjusts the output volume from the
OUTPUT jacks (L/MONO, R) and
headphone jack
[AUDIO INPUT 2] knob
Adjusts the input level from the rear panel [AU-
DIO INPUT 2] jack. The LED will light when
there is an input signal, and will light red if the
input is overloaded.
AUDIO INPUT1 [MIC] jack
Connect a mic to this input. Vocoder-type
programs use the audio signal from this mic
as the modulator.
The [MIC] switch specifies whether this jack
or the rear panel [AUDIO INPUT 1] jack will
be used.
[TEMPO] knob
Adjusts the tempo (speed) of the arpeggio,
LFO, or effect delay. The LED at the right will
blink in synchronization with the tempo.
PROGRAM SELECT [1] [2] [3]
[4] [5] [6] [7] [8] buttons
Select a program number within
the bank selected by the [BANK
SELECT] dial. (The selected but-
ton will light.) You can also use
these buttons to turn the eight
steps of an arpeggio on/off to vary
the arpeggio performance.
(☞p.15)
In addition, you can hold down the
[SHIFT] button and press one of
these buttons to access the corre-
sponding utility function (☞p.75
SHIFT function).
TIMBRE SELECT [TIMBRE1] (TIMBRE1 SOLO), [TIMBRE2] (TIMBRE 2 SOLO) buttons
Select the timbre(s) that you want to play or edit.
You can solo each timbre by holding down the [SHIFT] button and pressing one of
these buttons.
[MIC] switch
Selects the audio input source for
AUDIO INPUT 1. Select the XLR set-
ting if you're using the front panel
[MIC] jack.
Select the REAR setting if you're us-
ing the rear panel [AUDIO INPUT 1]
jack.
ARPEGGIATOR [LATCH] (CALIBRATION) button
Specifies how the arpeggiator behaves when you release
the keyboard.
You can execute the foot pedal calibration function by hold-
ing down the [SHIFT] button and pressing this button.
ARPEGGIATOR [ON/OFF] (DEMO) button
Switches the arpeggiator on/off (the button is lit
when on).
You can initiate demo playback by holding down the
[SHIFT] button and pressing this button.
[AUDIO INPUT 1] knob
Adjusts the input level from the front
panel [MIC] jack and the rear panel
[AUDIO INPUT 1]. The LED will light
when there is an input signal, and will
light red if the input is overloaded.
[VOCODER] (AUDIO IN THRU) button
Switches the vocoder on/off (☞p.55).
OFF (dark): Vocoder is off.
ON (lit): Vocoder is on.
EDIT (blinking): Vocoder parameters can be edited.
AUDIO IN THRU function
If you hold down the [SHIFT] button
and press this button, the signal
from the [AUDIO INPUT 1] (or MIC)
jack and the [AUDIO INPUT 2] jack
will be passed through to the OUT-
PUT [L/MONO] and [R] jacks
(☞p.79).
○○○○○○○○○○○○○○○○○○○○○○○○○○○○○○○○○○○○○○
Front panel