12 Servicing
12.2 Wear
12.2 Wear
12.2.1 Signs of wear
The following table lists signs of progressive wear of individual pump elements:
Finding Cause Elimination
Increased running noises Incipient damage to bearing
Replace the ball bearing.
Reduction in the delivery rate or
pressure under constant
operating conditions
Advanced wear of screws and
housing
Replace the pump.
Tab.11: Signs of wear
12.2.2 Magnetic coupling
When using the pump in lubrication oil applications with a minimum purity class of 21/18/13 according
to ISO4406, an inspection at the latest after 5 years (400000h) is sufficient.
12.3 Replacing the overflow valve
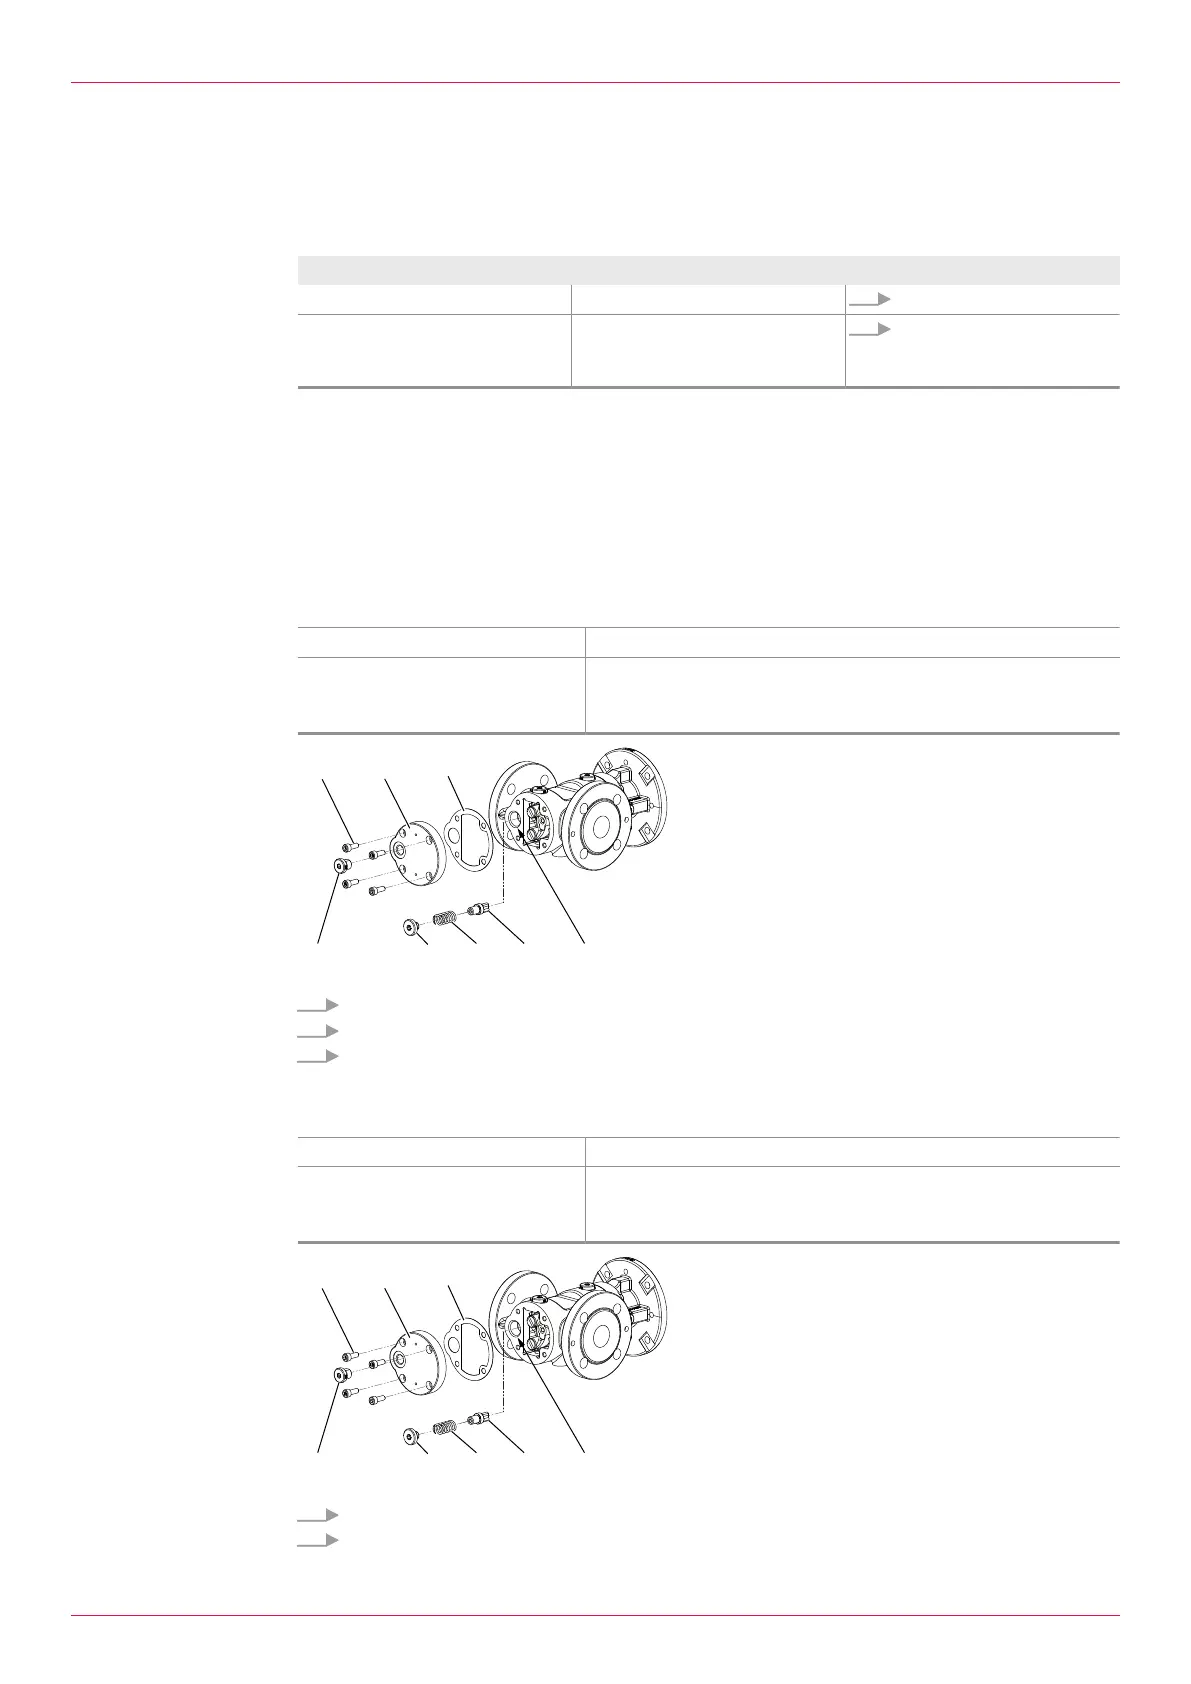
12.3.1 Removing the overflow valve
Personnel qualification: o Fitter
Personal protective equipment: o Work clothing
o Protective gloves
o Safety boots
1. Remove the screw plug1 and socket screws2.
2. Remove the end cover3 and flat gasket4 from the pump housing5.
3. Carefully screw out the adjusting screw8 and remove the pressure spring7 and valve body6
from the pump housing.
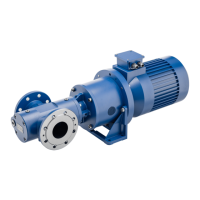
12.3.2 Installing the overflow valve
Personnel qualification: o Fitter
Personal protective equipment: o Work clothing
o Protective gloves
o Safety boots
1. Clean the fitting surface carefully and bond a new flat gasket4 to the fitting surface.
2. Insert the valve body6, pressure spring7 into the pump housing5 and secure the pressure
spring with the adjusting screw8.
30
OIK 09en-GB Edition 2019-11
Operating instructions