Kramer Electronics Ltd.
VIA Connect² – For Web Administrator: Gateway Management Pages
Certificate
A custom SSL certificate can be uploaded to VIA Connect² to better provide for the security needs
of your organization.
To prevent damage to the system, make sure you upload
files that can be used by the
system. If you are unsure of how to use this feature, contact technical support.
For information on how to create a certificate, see Creating an SSL Certificate for VIA,
available at:
www.kramerav.com/product/VIA Connect²
After obtaining your certificate, install it on your VIA device.
The uploaded files must stay in the format of “server.crt” & “server.key”.
To upload an SSL certificate:
1. On the Certificate tab in the VIA settings template (see Configuring VIA Settings
Template on page 44), copy and paste the web server certificate.
The web server certificate is uploaded.
Do not upload the key file until the certificate file is finished uploading.
2. Copy and paste the key file; The key file is uploaded.
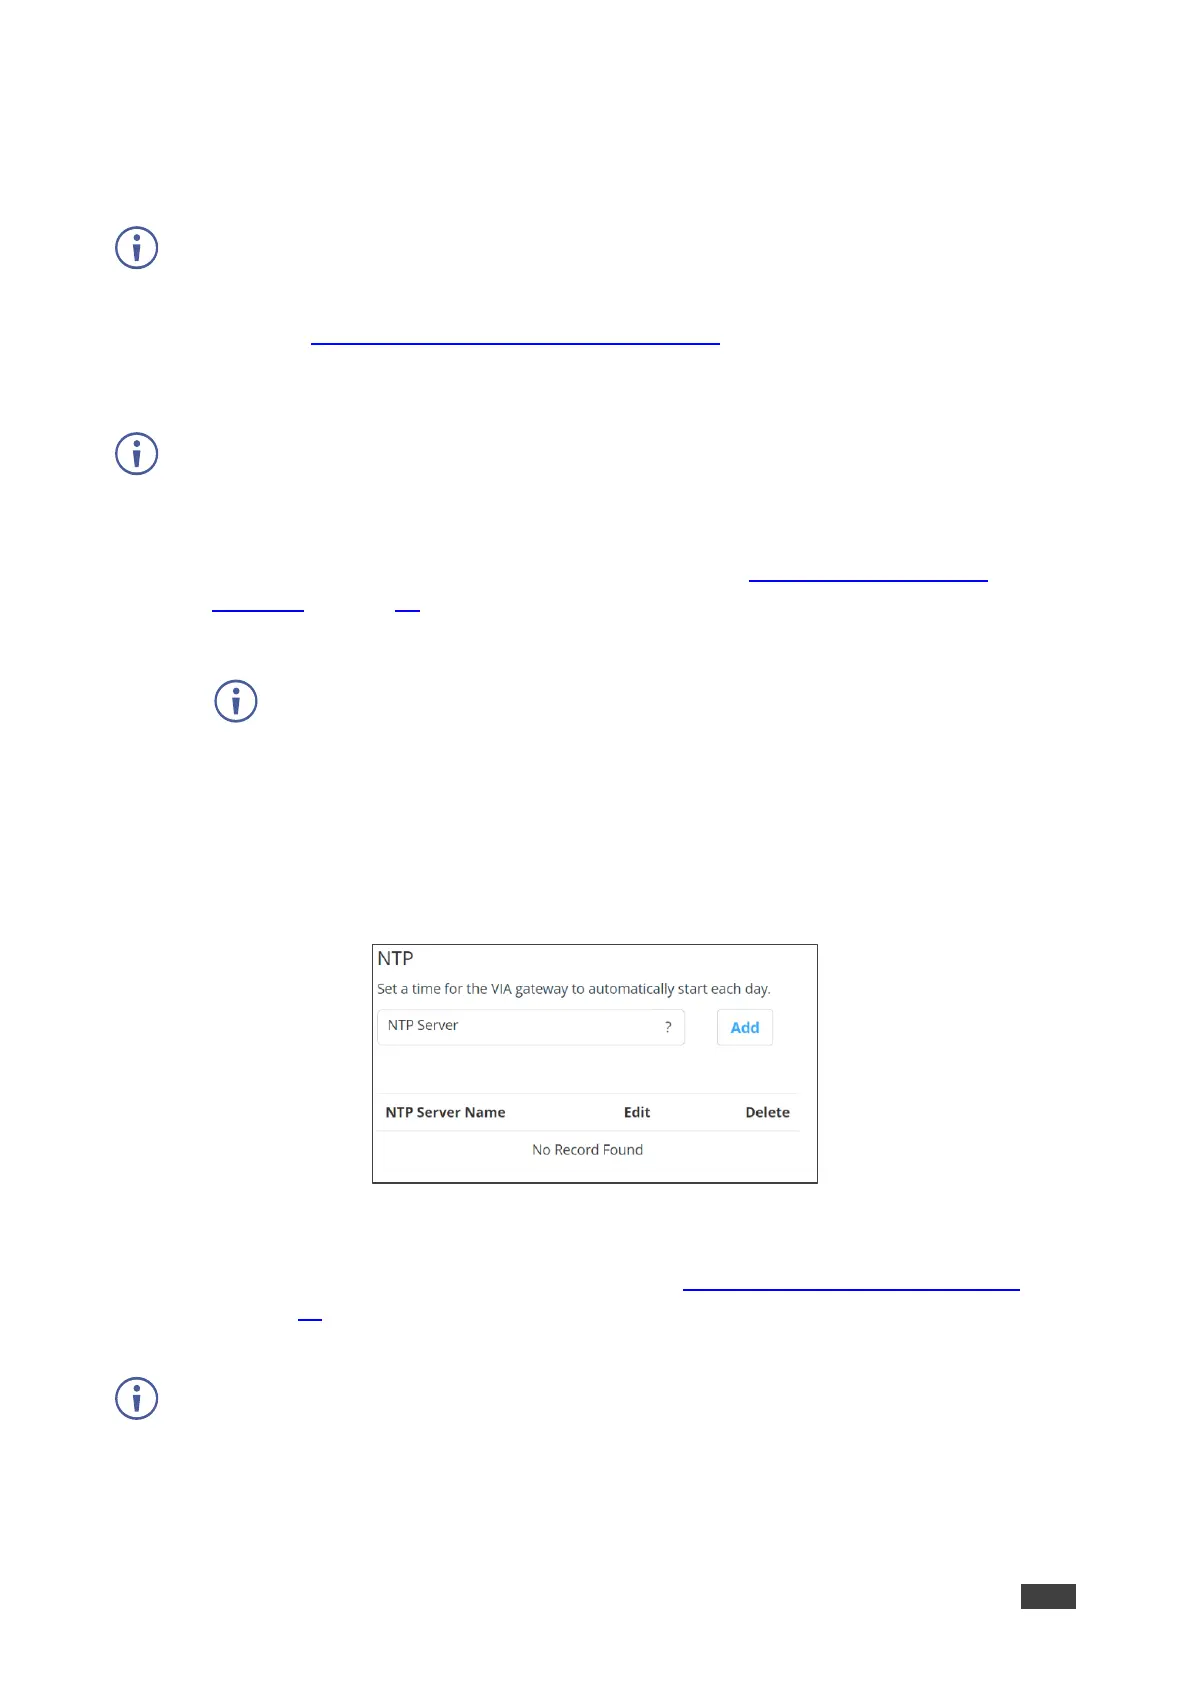
NTP
An NTP (Network Time Protocol) server can be used to synchronize the time on VIA Connect².
To add an NTP server:
Figure 66: NTP Server Setting Tab
• In the NTP tab in the VIA settings template (see Configuring VIA Settings Template
on page 44), enter the NTP server address and click Add. The new NTP server is saved
and appears in the NTP Server table.
To edit an NTP server name, click the icon in the Edit column.
To delete an NTP server name, click the icon in the Delete column.