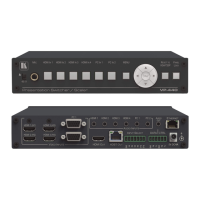
Operating the VP-440
The VP-440 can be controlled via:
• Front panel buttons (see Using the Front Panel buttons on page 12).
• OSD Menu (see Using the OSD Menu on page 14).
• Embedded web pages (see Using the Embedded Web Pages on page 20).
• Protocol 3000 commands via RS-232 and / or TCP control (see Protocol 3000
Commands on page 44).
Using the Front Panel buttons
The VP-440 includes the following front panel buttons:
• Input selector buttons for selecting the required input: HDMI (1 to 4) and PC (1 and 2).
• MENU, ENTER, and up, down, left and right arrow buttons (for navigating OSD Menu,
see Using the OSD Menu on page 14).
• RESET TO XGA/720P and PANEL LOCK buttons.
Auto Adjust Feature
The auto adjust feature may be implemented every time the input is switched to VGA or when
the input resolution changes, as set in the PICTURE>FINETUNE menu (see OSD Menu
on page 14).
Selecting the Microphone Type
We recommend keeping the switch down if a microphone is not connected to the VP-440.
To select the microphone type:
• Move the 48 V slide switch up to select a condenser type microphone or down to
select a dynamic type microphone.
Setting the Resolution to XGA/720p
Press to reset the video resolution to XGA or 720p.
To set the resolution from the front panel:
• Press and hold RESET TO XGA/720P for about 5 seconds to toggle the video
resolution between XGA and 720p.

 Loading...