VP-440 – Operating the VP-440
Using the OSD Menu
The control buttons let you control the VP-440 via the OSD menu. Press:
• MENU to enter the menu.
The default timeout is set to 10 seconds.
• ENTER to accept changes and to change the menu settings.
• Arrow buttons to move through the OSD menu, which is displayed on the video output.
On the OSD menu, select EXIT to exit the menu.
OSD Menu
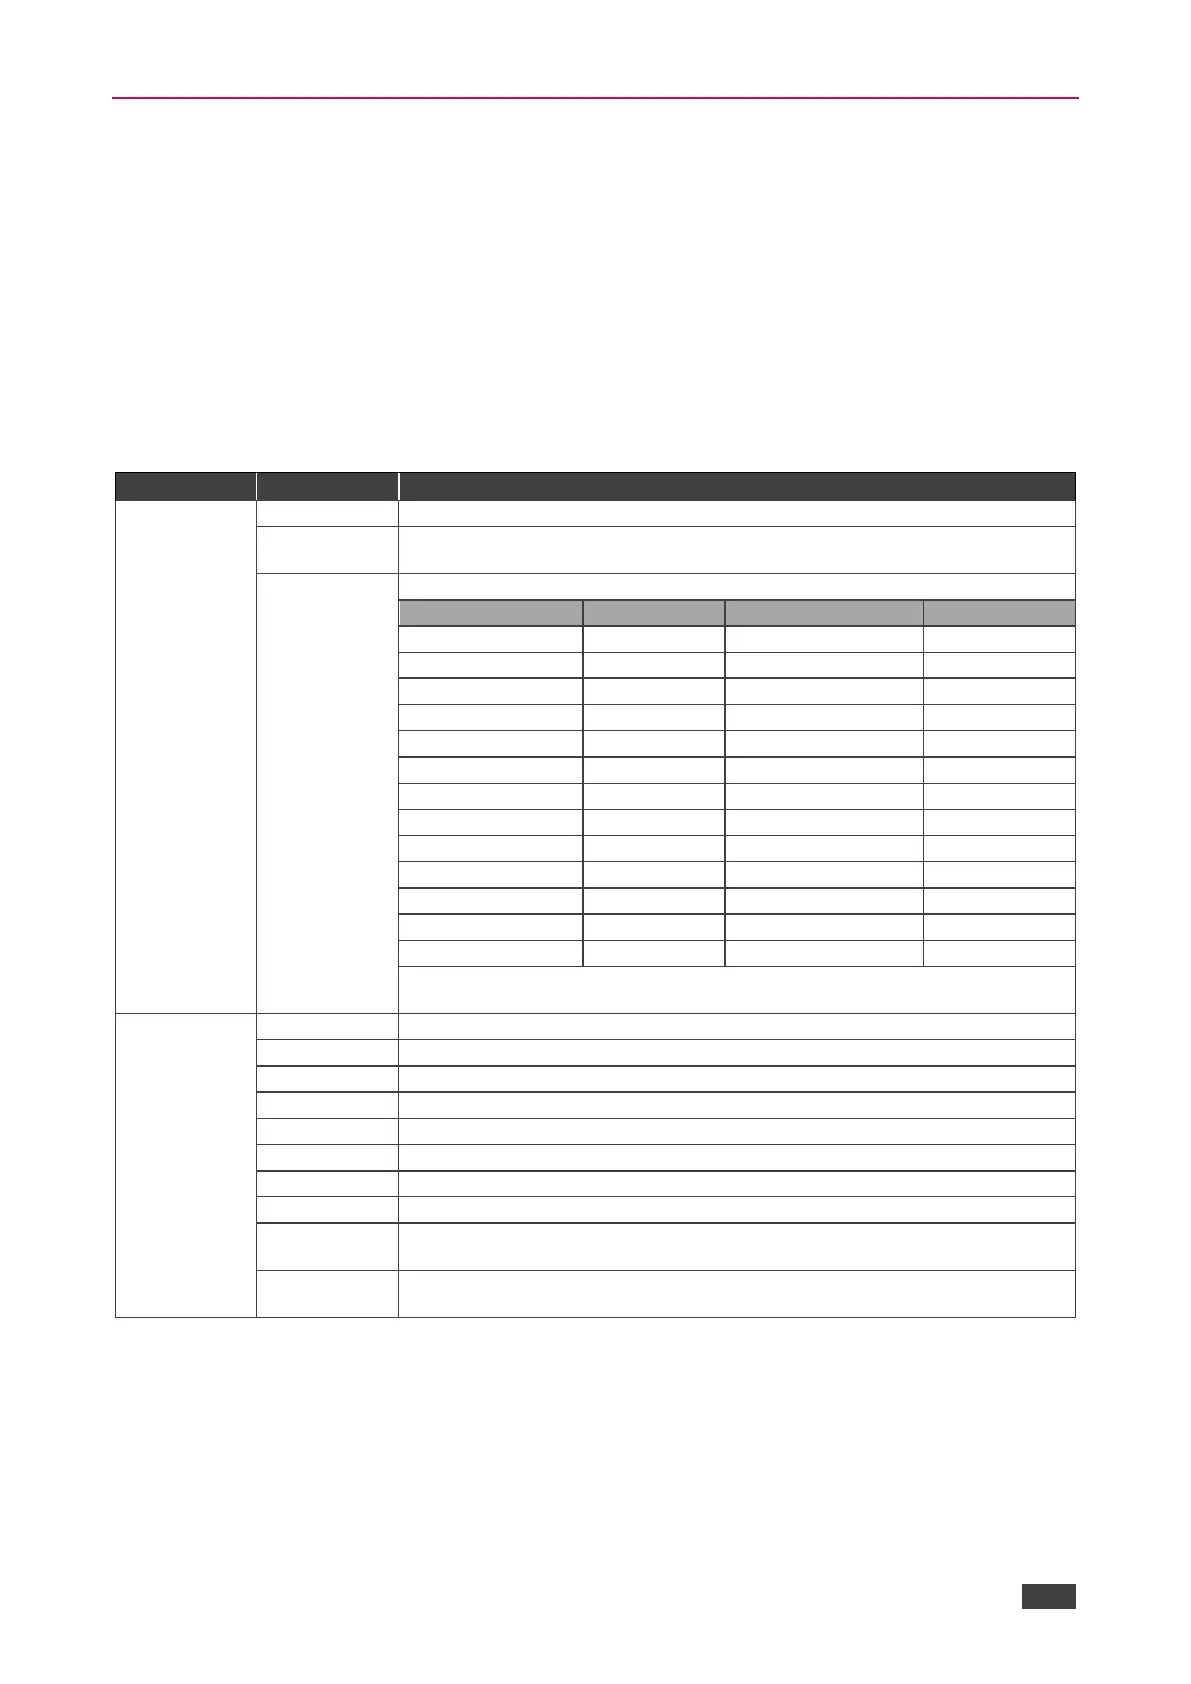
Select the input: HDMI 1, HDMI 2, HDMI 3, HDMI 4, PC1 or PC2.
Select the image size: FULL, OVER SCAN, UNDER 1, UNDER 2, LETTER BOX,
PAN SCAN or BEST FIT.
Select the output resolution from the menu:
NATIVE - Select NATIVE to select the output resolution from the EDID of the
connected HDMI monitor.
Set the contrast (the range and default values vary according to the input signal).
Set the brightness (the range and default values vary according to the input signal).
Set the color hue (not applicable for VGA inputs).
Set the color saturation (not applicable for VGA inputs).
Set the sharpness of the picture (not applicable for VGA inputs).
Select the noise reduction: OFF, LOW, MID (middle) and HIGH (not applicable for
VGA inputs).
Enabled for VGA: AUTO ADJUST (NO/YES), H-POSITION, V-POSITION, PHASE,
CLOCK, WXGA/XGA, RESET (NO/YES).