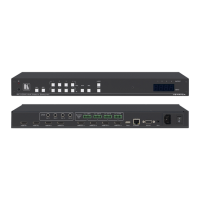
Kramer Electronics Ltd.
VS-44H2A – Operating VS-44H2A via Front Panel Buttons
Operating VS-44H2A via Front
Panel Buttons
The VS-44H2A front panel buttons enable performing the following functions:
• Powering On VS-44H2A on page 11.
• Understanding Illuminated Buttons and LEDs on page 11.
• Locking/Unlocking Control Panel Buttons on page 12.
• Routing an AV Output to an Input on page 12.
• Routing All Outputs to a Single Input on page 13.
• Muting an Output on page 13.
• Muting All Outputs on page 13.
• Storing and Recalling a Routing Setup on page 14.
• Copying an EDID on page 14.
Powering On VS-44H2A
After connecting the power cord, press the Power Switch to power on the device.
When powering on VS-44H2A, it undergoes a 10-second initialization process during which
the front panel displays the following:
• The 7-segment display LEDs are on.
• All the front panel buttons illuminate.
• The FPGA/EPLD version (P), the firmware version (F) and the build version (b) appear in
succession.
Understanding Illuminated Buttons and LEDs
Illuminated or flashing front panel buttons indicate signal and acceptor information.
• An illuminated IN button indicates an active signal connected to the input.
• An illuminated OUT button indicates an output connected to an acceptor.
• A flashing OUT button indicates a non-HDCP display connected to an output.
If an HDCP-encrypted input is routed through VS-44H2A to a non-HDCP acceptor, the video
is not presented and the non-HDCP acceptor displays black.
The LED Display indicates routing and muting information.
• A digit (from 1 to 4) indicates the input number that is currently routed to the output.
• “0” under an output number indicates a muted video signal.

 Loading...