HVM200 Reference Manual Powering the HVM200 2-2
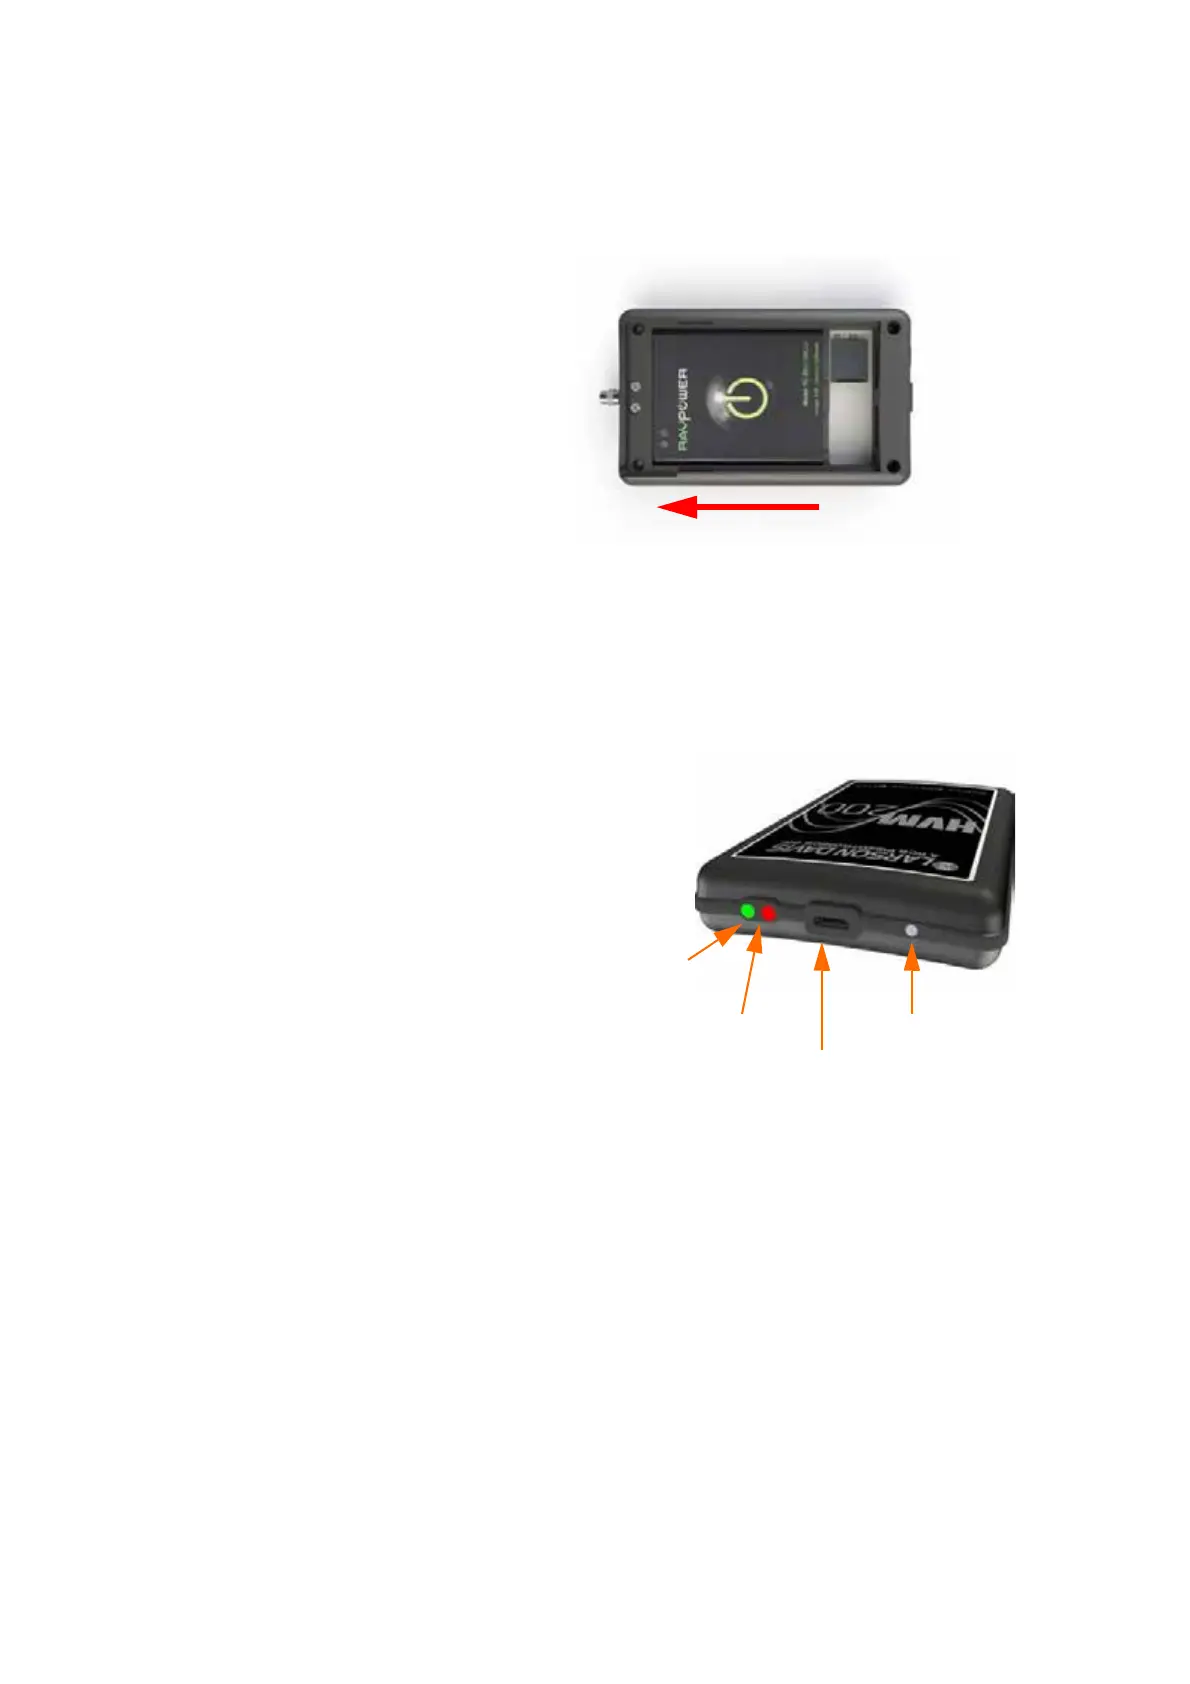
Step 2 Insert the supplied battery into the HVM200 by sliding the
battery contacts against the meter power contacts first and
then lowering the other end of the battery into the tray.
TAKE NOTE Make sure the battery
contacts are fully seated against the
power contacts in the meter and that
the battery lies flat in the tray.
FIGURE 2-2 Insert Battery
Step 3 Slide the back battery cover onto the HVM200.
TAKE NOTE The Power LED dis-
plays a yellow color while charging.
Step 4 Connect one end of the supplied USB cable to the HVM200
Micro-B USB port and the other end to the PSA035 charger.
TAKE NOTE Avoid leaving the bat-
tery drained for extended periods of
time in order to maximize overall
battery life.
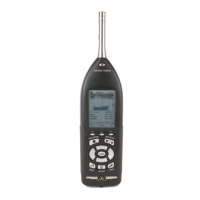
FIGURE 2-3 HVM200 Communication
LEARN MORE Refer to the back
label of your HVM200 for a descrip-
tion of each LED indication, or see
see “LED Indications” on page A-4.
Step 5 In order to get an accurate battery reading, the HVM200
must be fully charged prior to use. When fully charged, the
Power LED displays a solid green color. Charging time may
take from 3 to 6 hours.
Power LED
Status LED
Power Button
Micro-B USB port