HVM200 Reference Manual Overview 4-1
Module 4 Changing Features
4.1 Overview ...............................................................................................................4-1
4.2 Setting/Syncing Meter Time and Date ..................................................................4-1
4.2.1 Setting/Syncing Time via G4 LD Utility ....................................................4-1
4.2.2 Setting/Syncing Time via HVM200 Control app .......................................4-2
4.3 Turning Off/On WiFi Signal ...................................................................................4-3
4.3.1 Turn Off WiFi Signal .................................................................................4-3
4.3.2 Turn Back On WiFi Signal ........................................................................4-4
4.4 Upgrade Firmware and Options ............................................................................4-5
4.1 Overview
This module provides instructions for setting and disabling features, and
upgrading the HVM200.
4.2 Setting/Syncing Meter Time and Date
The HVM200 has a time feature that allows the meter’s internal clock to
be either manually set or synced with your PC or mobile device.
4.2.1 Setting/Syncing Time via G4 LD Utility
Step 1 Ensure the meter is powered on.
Step 2 Launch G4 LD Utility and connect meter either through
USB cable or IP address.
TAKE NOTE If you don’t see the
Time tab, you may be in a different
setting than Active. Only in the
Active setting can you set or sync the
time.
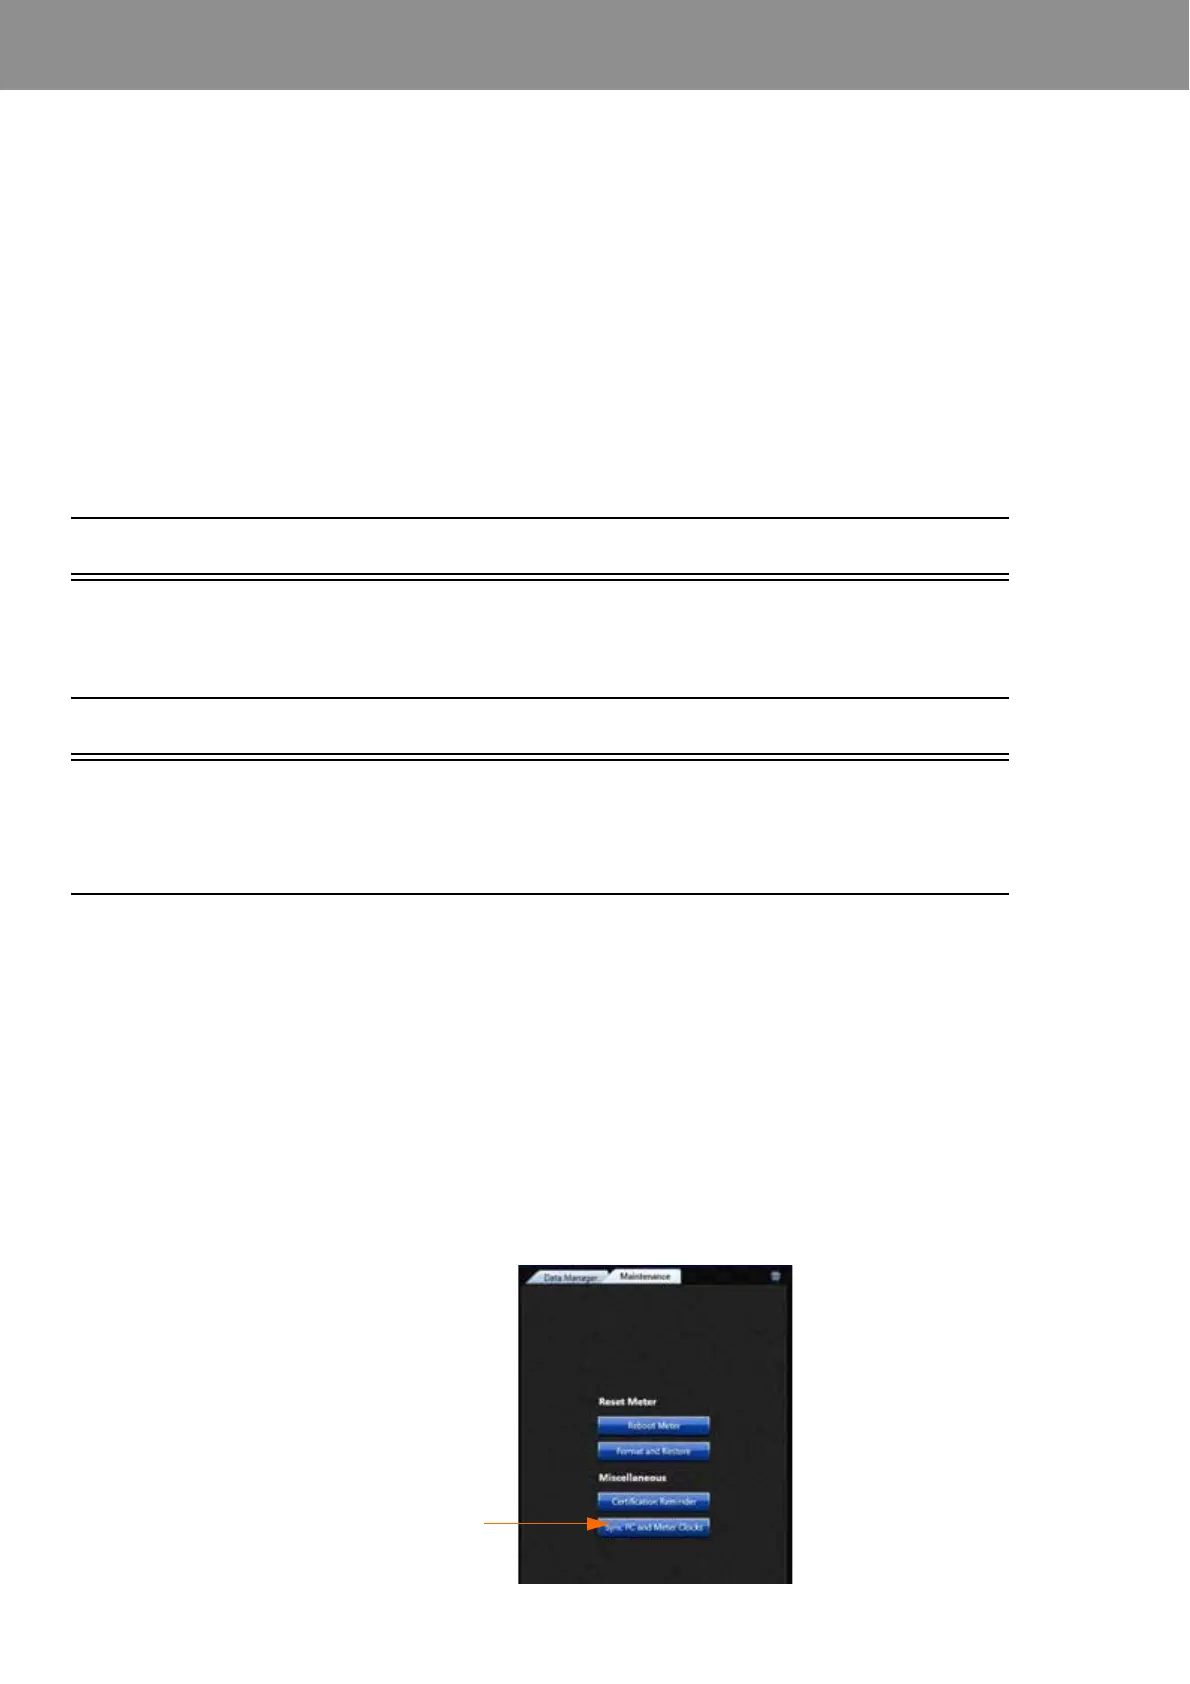
Step 3 Navigate Meter ManagerMaintenance.
FIGURE 4-1 Maintenance Tab
Select Sync PC
and Meter Clocks