PLMNL0286 REV. B, Effective Date: 06/06/19 29 FiberMINI
®
with Auto Focus (AF) Operation Manual
4.5 FiberMINI
®
Monitor Settings
The FiberMINI
®
Monitor software is
available for download. See Section
4.1 for details.
You MUST specify the settings listed
in this section before operating
FiberMINI
®
Monitor.
Before adjusting any settings:
You MUST install the software on your
PC. See Section 4.1 for more details.
You MUST connect the head and
control interface properly. See Section
3 for more details.
4.5.1 Unlock Settings
1. Click the Unlock Settings button
( ) in the toolbar.
In the pop up that appears,
enter the password:
minisetup
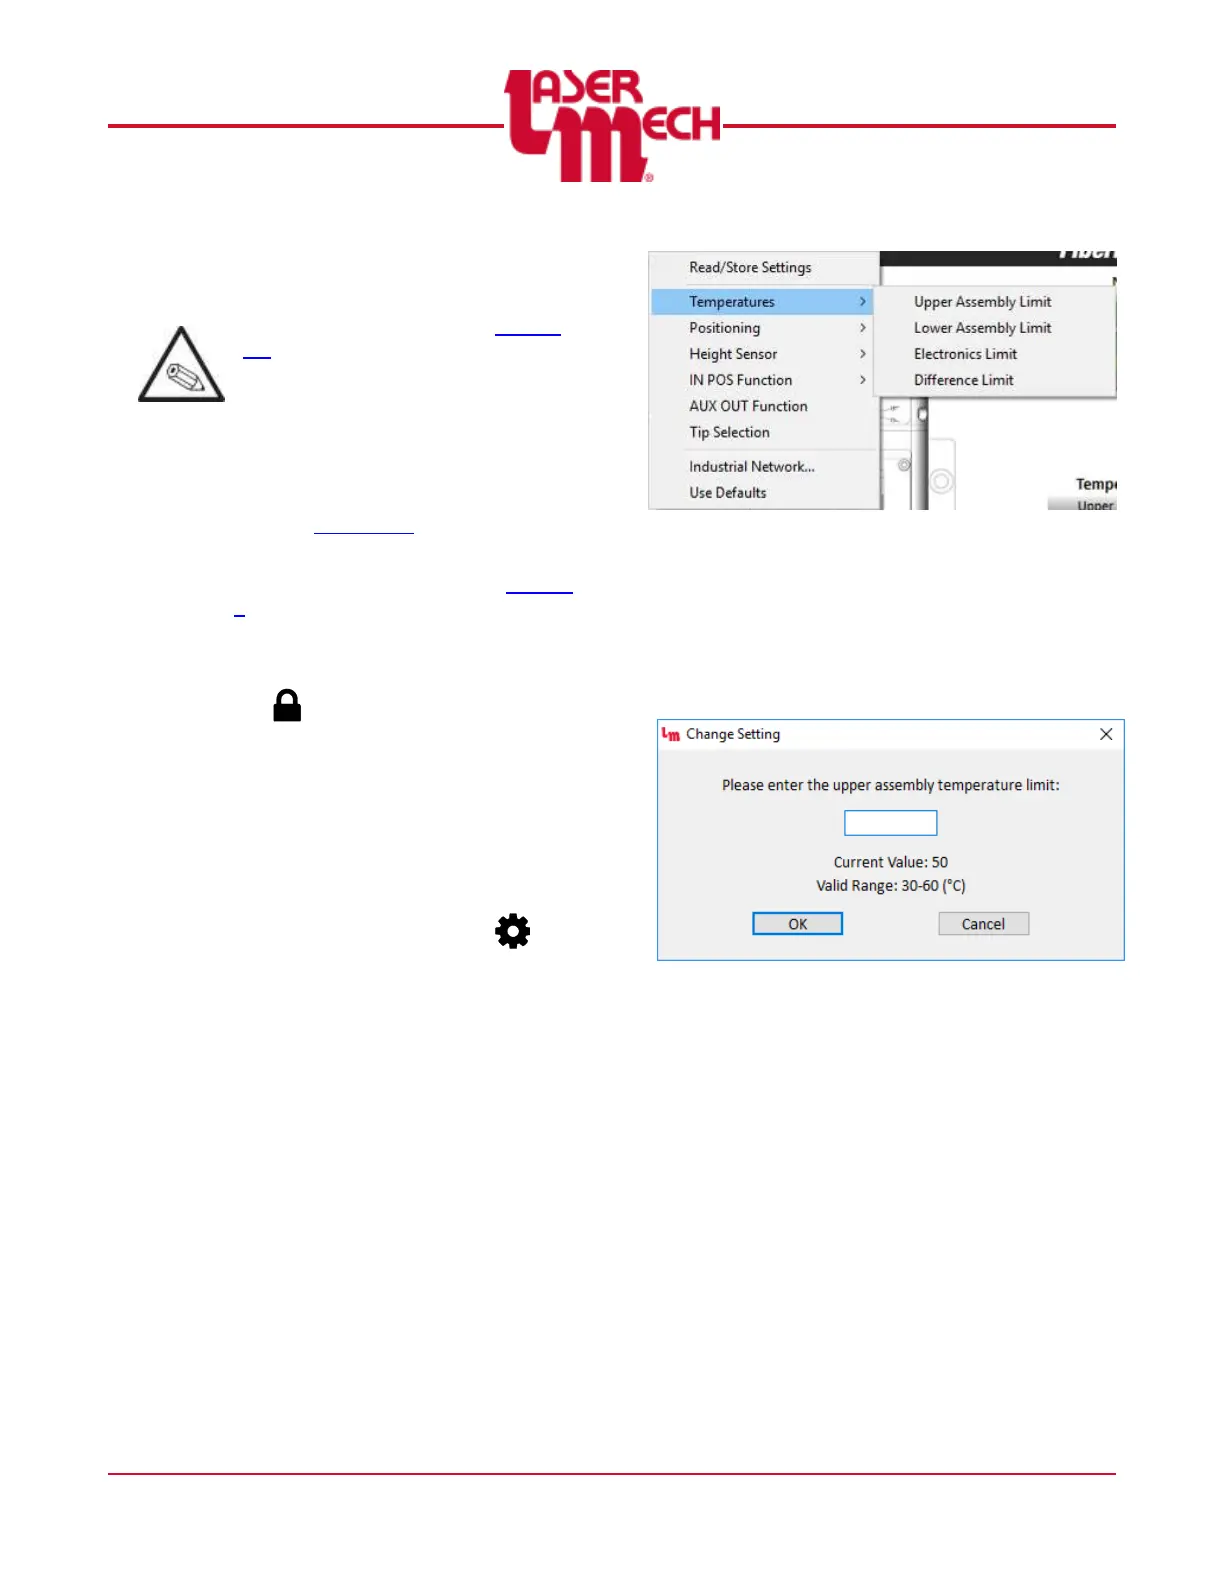
4.5.2 Temperatures
For steps 1 and 2, see Figure 29.
1. Click the Settings button ( ) in
the toolbar and hover over
Temperatures.
2. Click Upper Assembly Limit, Lower
Assembly Limit, Electronics Limit,
or Difference Limit, as desired.
Figure 29
For steps 3 to 6, see Figure 30.
3. A dialog box will appear with a field
to enter the new limit.
The current value and valid
range are also displayed.
Figure 30
4. Enter a valid new limit value in the
provided field.
5. Click OK to store the value and
update the thermometer or meter.
6. If necessary, click Cancel to exit
the screen.