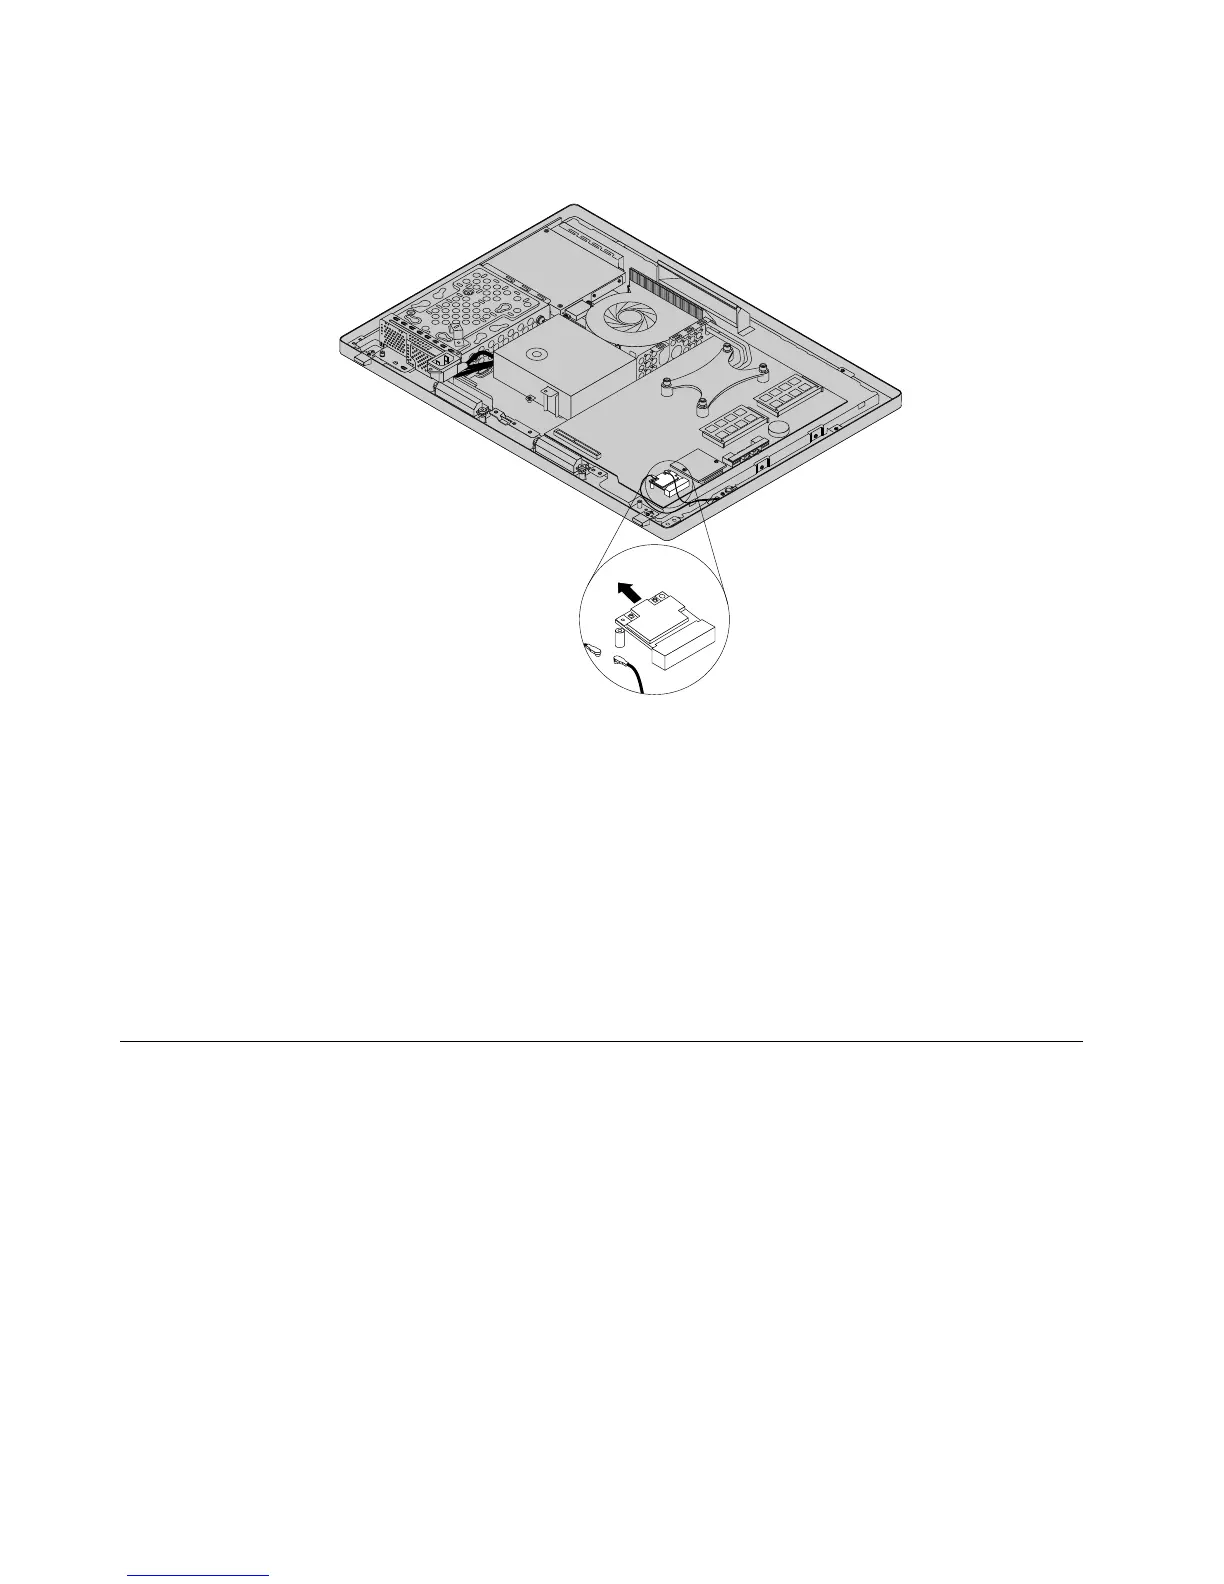
8.PivottheWi-FicardupwardandlifttheWi-FicardoutoftheminiPCIExpressslot.
Figure49.RemovingtheWi-Ficard
9.ToinstallthenewWi-Ficard,insertthenotchedendofthenewWi-FicardintotheminiPCIexpress
cardslotatanangleofabout20degrees.EnsurethattheWi-Ficardisinsertedrmlyandthenpivot
theWi-FicarddownwardsothatthescrewholeintheWi-Ficardalignswiththecorrespondinghole
inthesystemboard.
10.InstallthescrewtosecurethenewWi-Ficardtothesystemboard.
11.ConnectthetwocablestothenewWi-Ficard.
12.ReinstalltherearI/Oassembly.See“ReplacingtherearI/Oassembly”onpage84.
13.Reinstallthesystemboardshield.See“Removingandreinstallingthesystemboardshield”onpage83.
14.Goto“Completingthepartsreplacement”onpage108.
Completingthepartsreplacement
Aftercompletingtheinstallationorreplacementforallparts,youneedtoreinstallthecomputercover
andreconnectcables.
Toreinstallthecomputercoverandreconnectcables,dothefollowing:
1.Makesurethatallcomponentshavebeenreassembledcorrectlyandthatnotoolsorloosescrews
areleftinsideyourcomputer.See“LocatingmajorFRUsandCRUs”onpage66forthelocationsof
variouscomponentsinyourcomputer.
2.Makesurethatthecablesareroutedcorrectlybeforereinstallingthecomputercover.Keepcablesclear
ofthehingesandsidesofthecomputerchassistoavoidinterferencewithreinstallingthecomputer
cover.
108ThinkCentreE73zHardwareMaintenanceManual