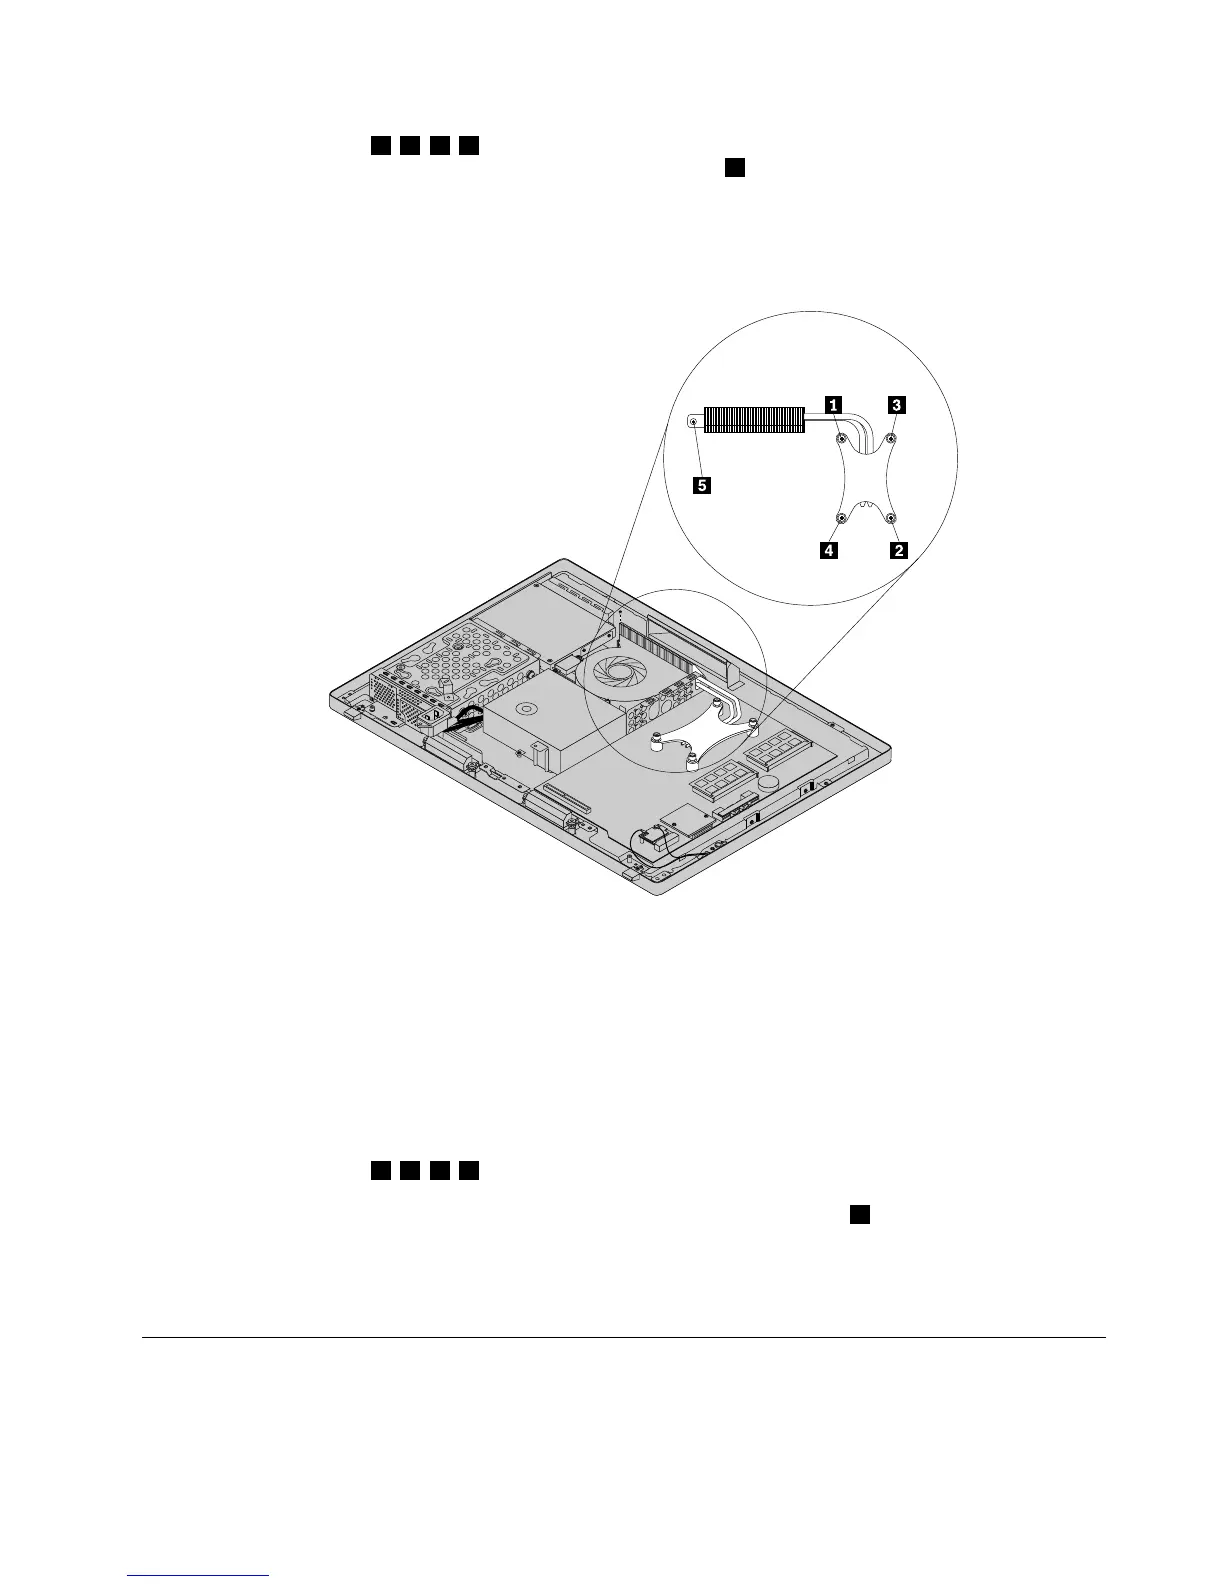
6.Followthesequence1,2,3,4ontheheatsinkassemblytoloosethefourscrewsthatsecurethe
heatsinkassemblytothesystemboard.Removethescrew5thatsecuretheheatsinkassembly
tothecomputer.
Note:Carefullyloosethefourscrewsfromthesystemboardtoavoidanypossibledamagetothe
systemboard.Thefourscrewscannotberemovedfromtheheatsinkassembly.
Figure27.Loosingthefourscrewsthatsecuretheheatsinkassemblytothesystemboard
7.Liftthefailingheatsinkassemblyoffthesystemboard.
Notes:
a.Youmighthavetogentlytwisttheheatsinkassemblytofreeitfromthemicroprocessor.
b.Donottouchthethermalgreasewhilehandlingtheheatsinkassembly.
8.Toreinstalltheheatsinkassembly,positionthenewheatsinkassemblyonthesystemboardsothatthe
fourscrewsarealignedwiththecorrespondingholesinthesystemboard.
9.Followthesequence1,2,3,4ontheheatsinkassemblytotightenthefourscrewstosecurethe
heatsinkassemblytothesystemboard,asshowninFigure27“Loosingthefourscrewsthatsecure
theheatsinkassemblytothesystemboard”onpage91.Installthescrew5tosecuretheheatsink
assemblytothecomputer.
10.Reinstallthesystemboardshield.See“Removingandreinstallingthesystemboardshield”onpage83.
11.Goto“Completingthepartsreplacement”onpage108.
Replacingthemicroprocessor
Attention:Donotopenyourcomputerorattemptanyrepairbeforereadingandunderstandingthe
“Importantsafetyinformation”onpage1
Chapter9.ReplacingFRUs91