4.Removethesystemboardshield.See“Removingandreinstallingthesystemboardshield”onpage83.
5.RemovetheVESAmountbracket.See“RemovingtheVESAmountbracket”onpage86.
6.Locatethepowersupply.See“LocatingmajorFRUsandCRUs”onpage66.
7.Disconnectthepowersupplycablesfromthesystemboard.See“Locatingpartsonthesystemboard”
onpage69.
8.RemovethepowercordconnectorfromtherearI/Obracket.See“ReplacingtherearI/Oassembly”
onpage84.
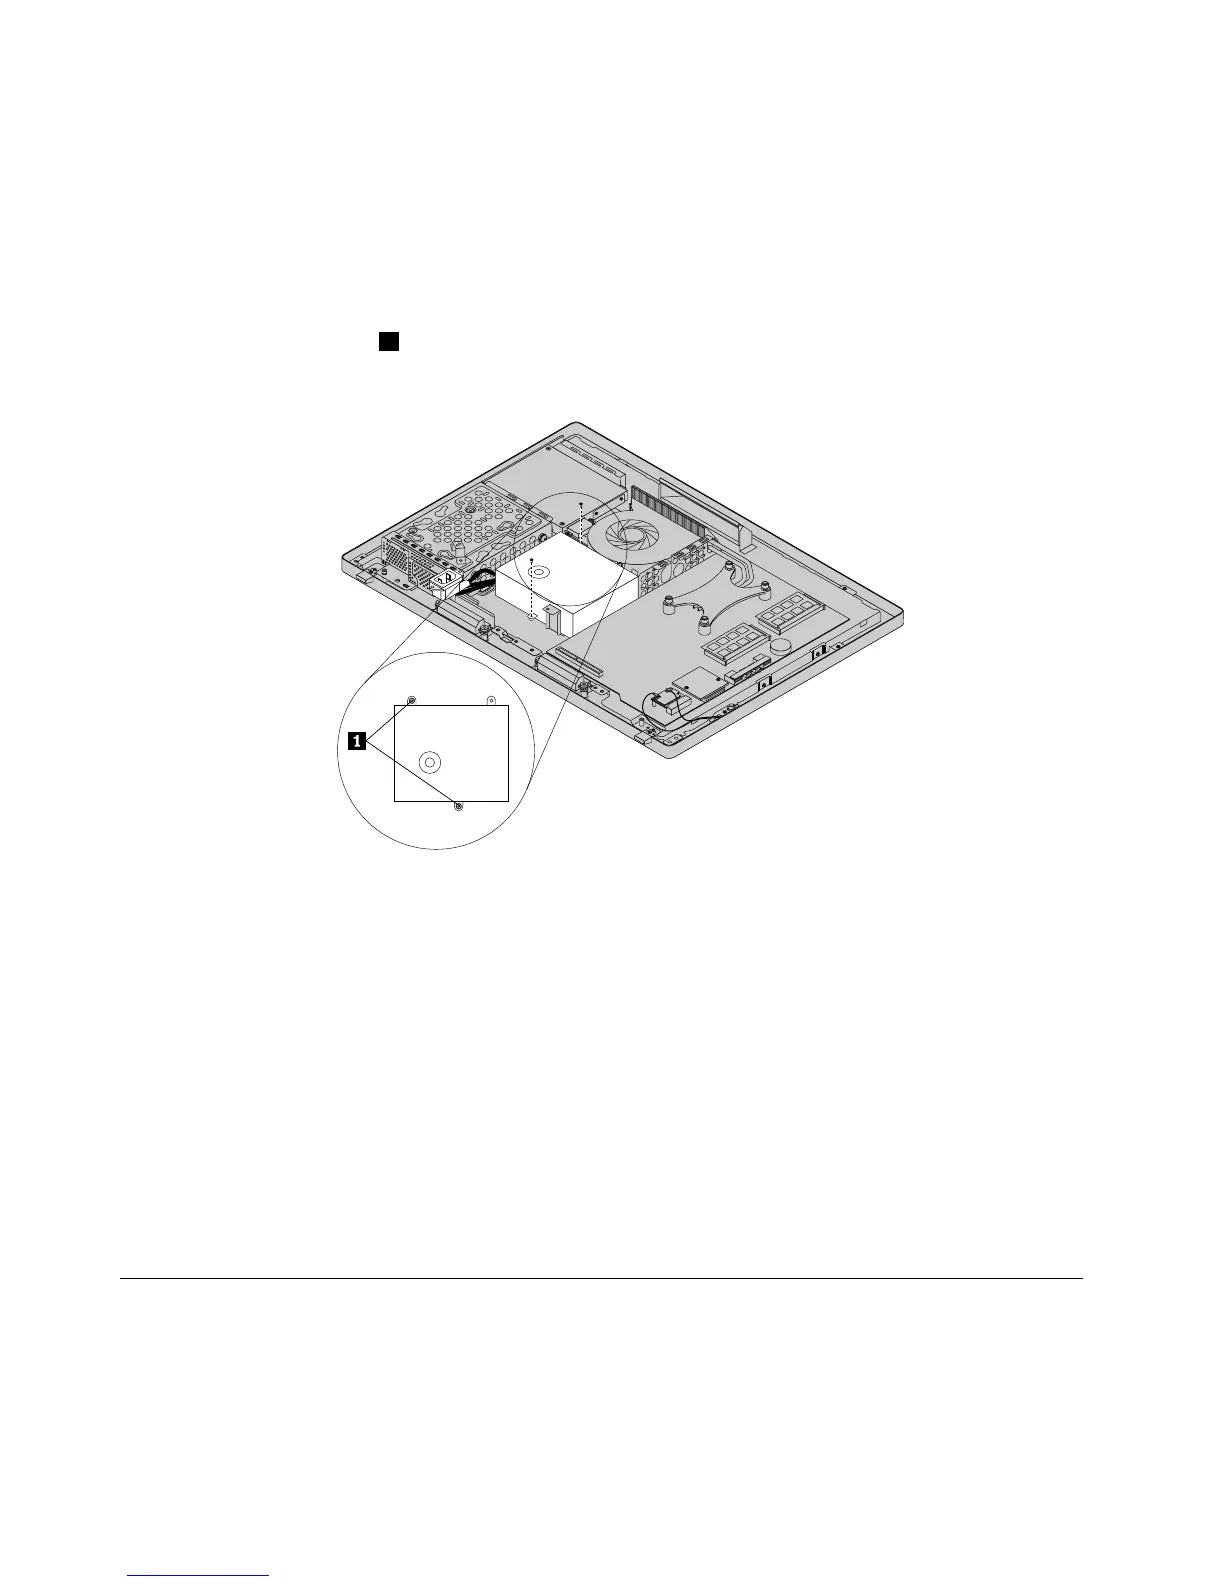
9.Removethetwoscrews1thatsecurethepowersupply,andthenremovethepowersupplyfromthe
computer.
Figure25.Removingthetwoscrewsthatsecurethepowersupply
10.Toreinstallthepowersupply,reinstallthepowercordconnectortotherearI/Obracket.See“Replacing
therearI/Oassembly”onpage84
11.Positionthenewpowersupplyinthecomputerandalignthetwoscrewholesinthenewpowersupply
withthoseinthecomputermainbracket.Installthetwoscrewstosecurethenewpowersupply.
12.Routethenewpowercordconnectorcable,andthenreinstalltherearI/Oassembly.See“Replacing
therearI/Oassembly”onpage84.
13.Connectthenewpowersupplycablestothepowersupplyconnectorsonthesystemboard.See
“Locatingpartsonthesystemboard”onpage69.
14.ReinstalltheVESAmountbracket.See“RemovingtheVESAmountbracket”onpage86.
15.Reinstallthesystemboardshield.See“Removingandreinstallingthesystemboardshield”onpage83.
16.Reinstallthecomputercover.See“Removingthecomputercover”onpage75.
17.Goto“Completingthepartsreplacement”onpage108.
Replacingthemicroprocessorfan
Attention:Donotopenyourcomputerorattemptanyrepairbeforereadingandunderstandingthe
“Importantsafetyinformation”onpage1
Thissectionprovidesinstructionsonhowtoreplacethemicroprocessorfan.
88ThinkCentreE73zHardwareMaintenanceManual