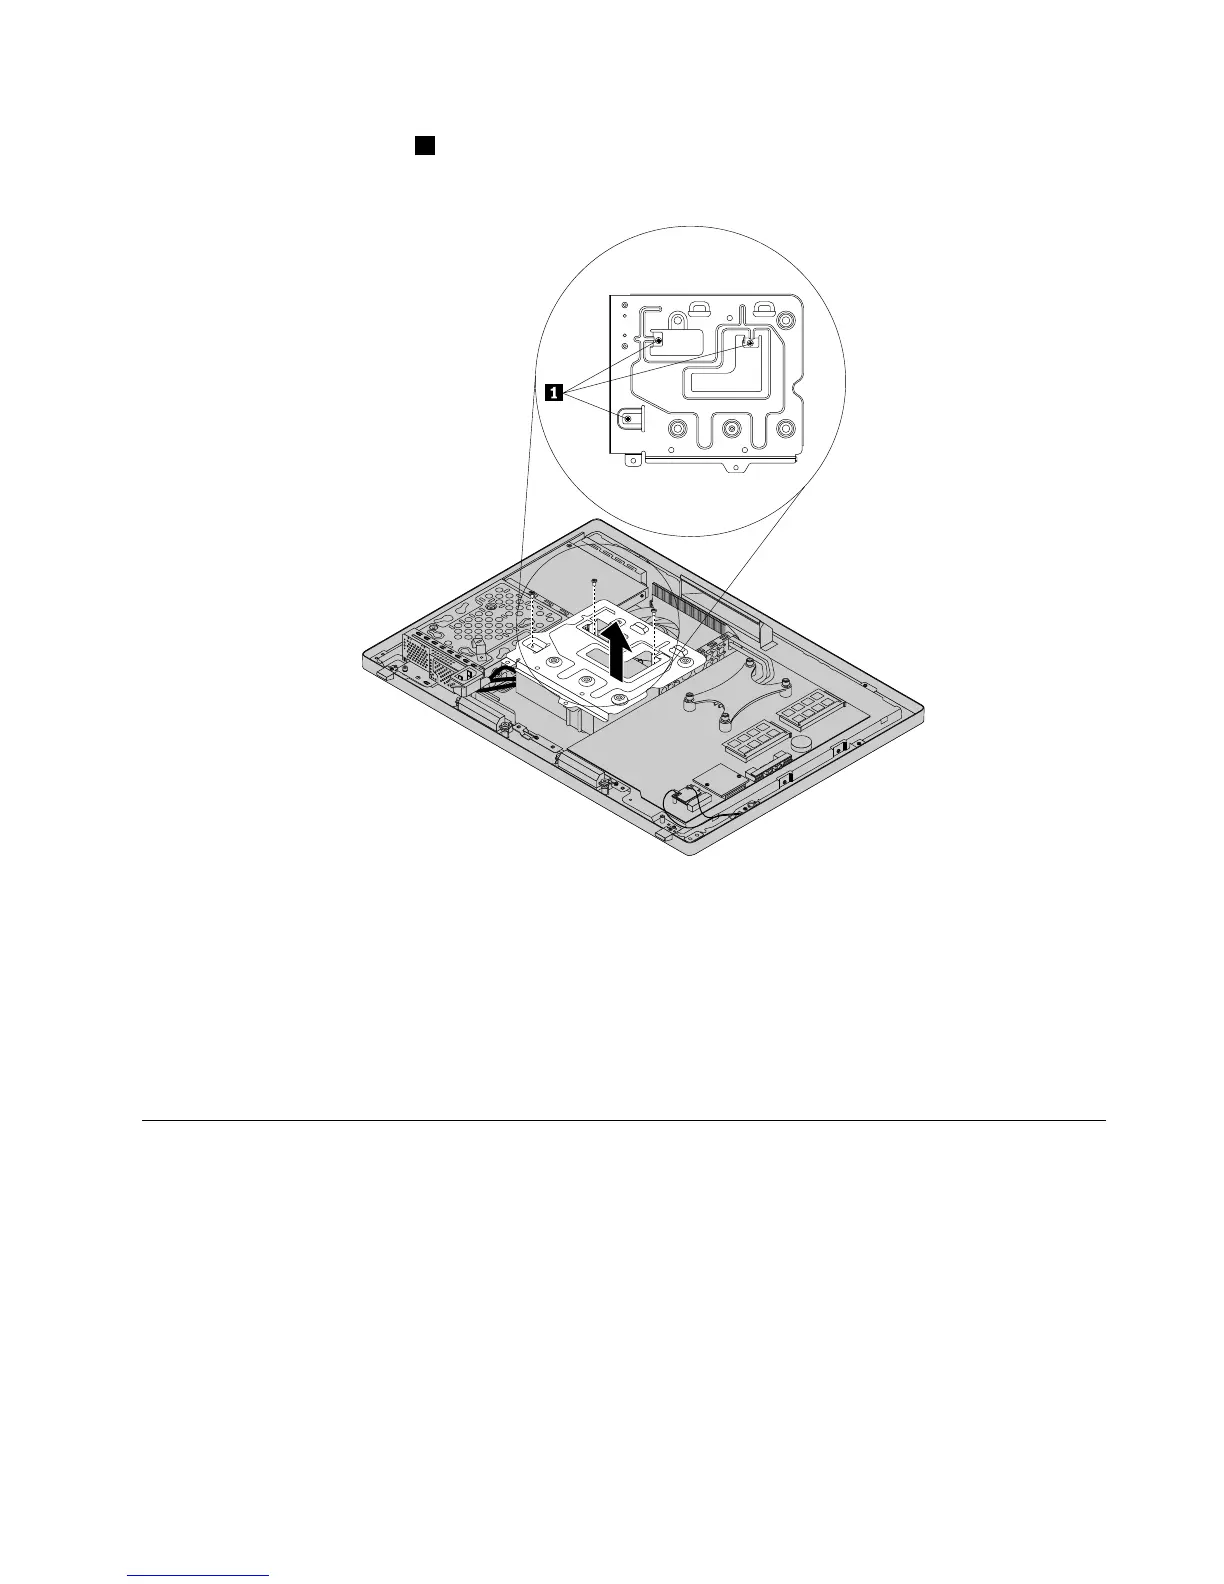
7.Removethethreescrews1thatsecuretheVESAmountbracketandlifttheVESAmountbracket
outofthecomputer.
Figure24.RemovingtheVESAmountbracket
8.ToreinstalltheVESAmountbracket,positiontheVESAmountbracketintothecomputersothatthe
screwholesalignwiththoseinthecomputer.ReinstallthethreescrewstosecuretheVESAmount
bracket.
9.ReinstalltherearI/Oassembly.See“ReplacingtherearI/Oassembly”onpage84.
10.Reinstallthesystemboardshield.See“Removingandreinstallingthesystemboardshield”onpage83.
11.Goto“Completingthepartsreplacement”onpage108.
Replacingthepowersupply
Attention:Donotopenyourcomputerorattemptanyrepairbeforereadingandunderstandingthe
“Importantsafetyinformation”onpage1
Thissectionprovidesinstructionsonhowtoreplacethepowersupply.
Toreplacethepowersupply,dothefollowing:
1.Removeallmediafromthedrivesandturnoffallattacheddevicesandthecomputer.Then,disconnect
allpowercordsfromelectricaloutletsanddisconnectallcablesthatareconnectedtothecomputer.
2.Placeasoft,cleantowelorclothonthedeskorotheratsurface.Holdthesidesofyourcomputerand
gentlylayitdownsothatthescreenisagainstthesurfaceandthecoverisfacingup.
3.Removethecomputercover.See“Removingthecomputercover”onpage75.
Chapter9.ReplacingFRUs87