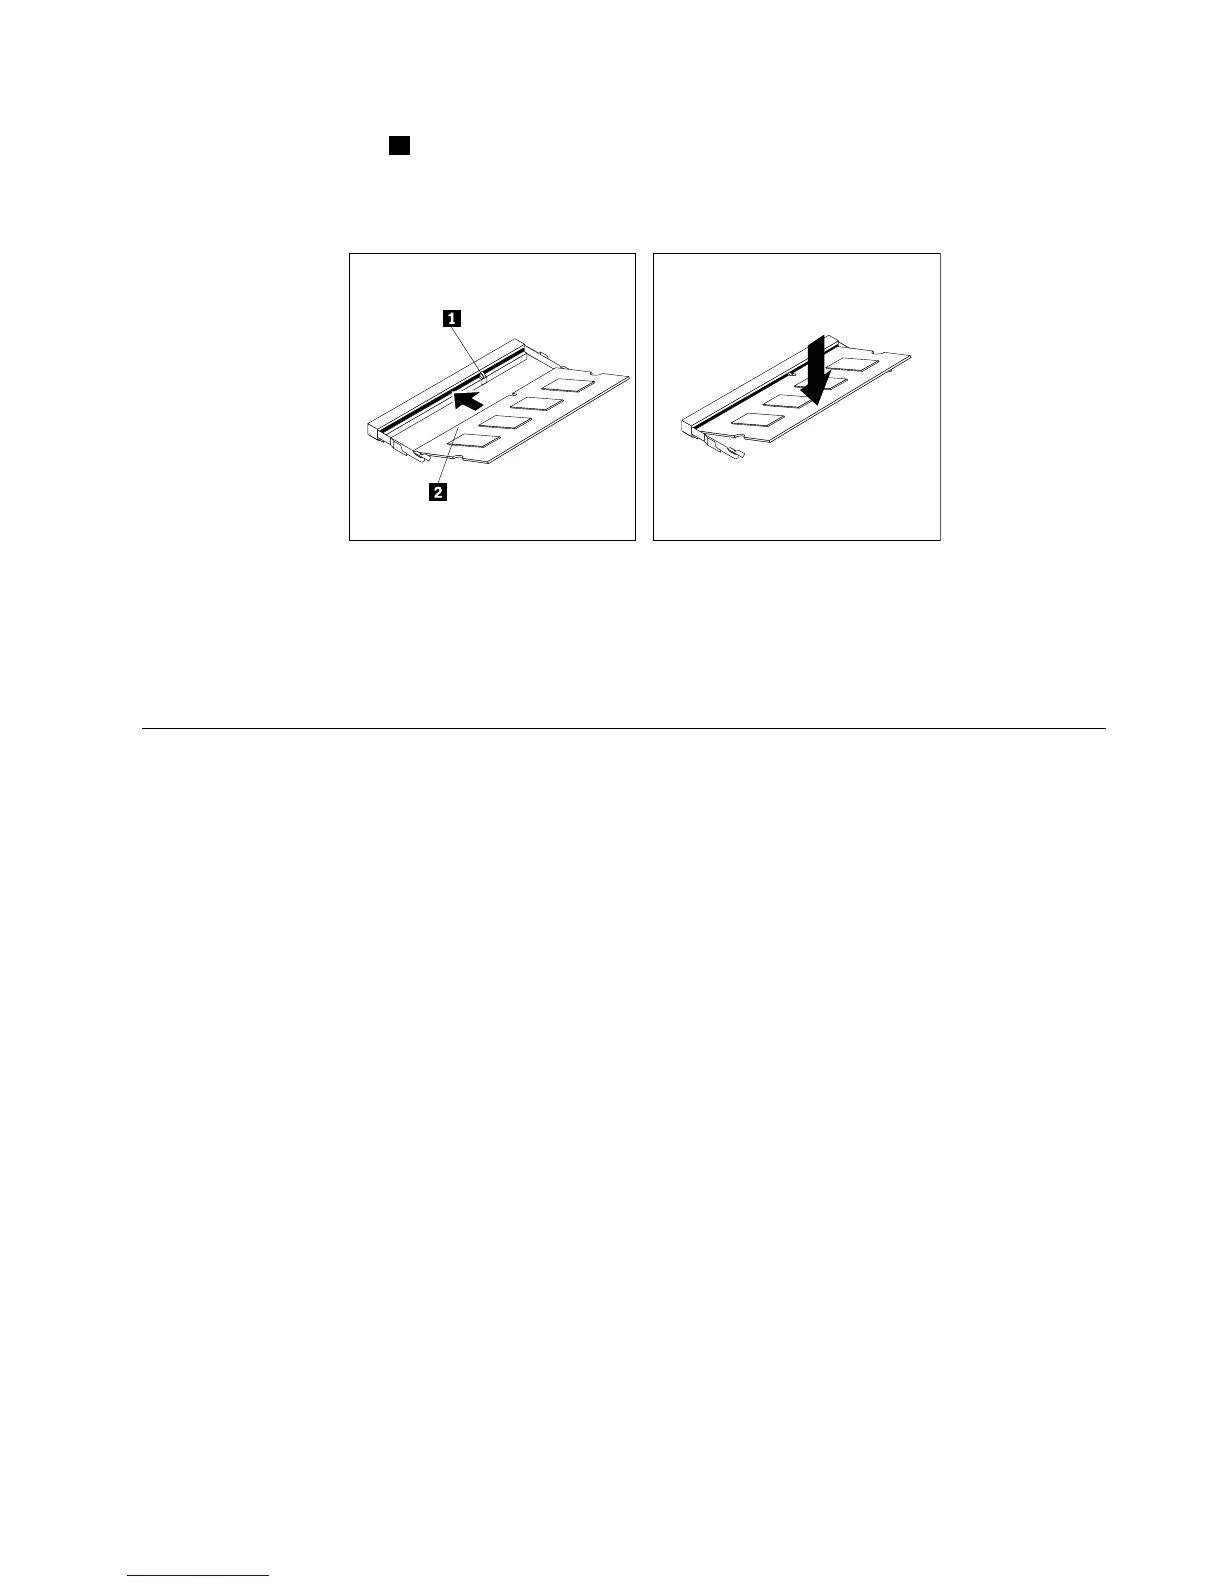
8.Insertthenotchedend1ofthenewmemorymoduleintotheslot.Pressthememorymodulermly
andpivotthememorymoduleuntilitsnapsintoplace.Ensurethatthememorymoduleissecured
intheslotanddoesnotmoveeasily.
Figure37.Installingamemorymodule
9.Reinstallthesystemboardshieldorclosethesystemboardshieldwindow.See“Removingand
reinstallingthesystemboardshield”onpage83.
10.Goto“Completingthepartsreplacement”onpage108.
Replacingtheinternalspeakers
Attention:Donotopenyourcomputerorattemptanyrepairbeforereadingandunderstandingthe
“Importantsafetyinformation”onpage1
Thissectionprovidesinstructionsonhowtoreplacetheinternalspeakers.
Toreplacetheinternalspeakers,dothefollowing:
1.Removeallmediafromthedrivesandturnoffallattacheddevicesandthecomputer.Then,disconnect
allpowercordsfromelectricaloutletsanddisconnectallcablesthatareconnectedtothecomputer.
2.Placeasoft,cleantowelorclothonthedeskorotheratsurface.Holdthesidesofyourcomputerand
gentlylayitdownsothatthescreenisagainstthesurfaceandthecoverisfacingup.
3.Removethecomputercover.See“Removingthecomputercover”onpage75.
4.Locatetheinternalspeakersinthecomputer.See“LocatingmajorFRUsandCRUs”onpage66.
5.Removethesystemboardshield.See“Removingandreinstallingthesystemboardshield”onpage83.
6.Notethelocationoftheinternalspeakercableconnectionandtheroutingoftheinternalspeakercables.
Disconnecttheinternalspeakercablesfromthesystemboard.
Chapter9.ReplacingFRUs99