21.ReinstalltherearI/Oassembly.See“ReplacingtherearI/Oassembly”onpage84.
22.Reinstallthesystemboardshield.See“Removingandreinstallingthesystemboardshield”onpage83.
23.Reinstallthefootstands.See“Removingandreinstallingthefeetstand”onpage75.
24.Connectallthecablesthatweredisconnected.See“Locatingpartsonthesystemboard”onpage69.
25.Goto“Completingthepartsreplacement”onpage108.
ReplacingtheWi-Ficard
Attention:Donotopenyourcomputerorattemptanyrepairbeforereadingandunderstandingthe
“Importantsafetyinformation”onpage1
ThissectionprovidesinstructionsonhowtoreplacetheWi-Ficard.
Note:TheWi-Ficardisavailableonlyinsomemodels.
ToreplacetheWi-Ficard,dothefollowing:
1.Removeallmediafromthedrivesandturnoffallattacheddevicesandthecomputer.Then,disconnect
allpowercordsfromelectricaloutletsanddisconnectallcablesthatareconnectedtothecomputer.
2.Placeasoft,cleantowelorclothonthedeskorotheratsurface.Holdthesidesofyourcomputerand
gentlylayitdownsothatthescreenisagainstthesurfaceandthecoverisfacingup.
3.Removethecomputercover.See“Removingthecomputercover”onpage75.
4.Removethesystemboardshield.See“Removingandreinstallingthesystemboardshield”onpage83.
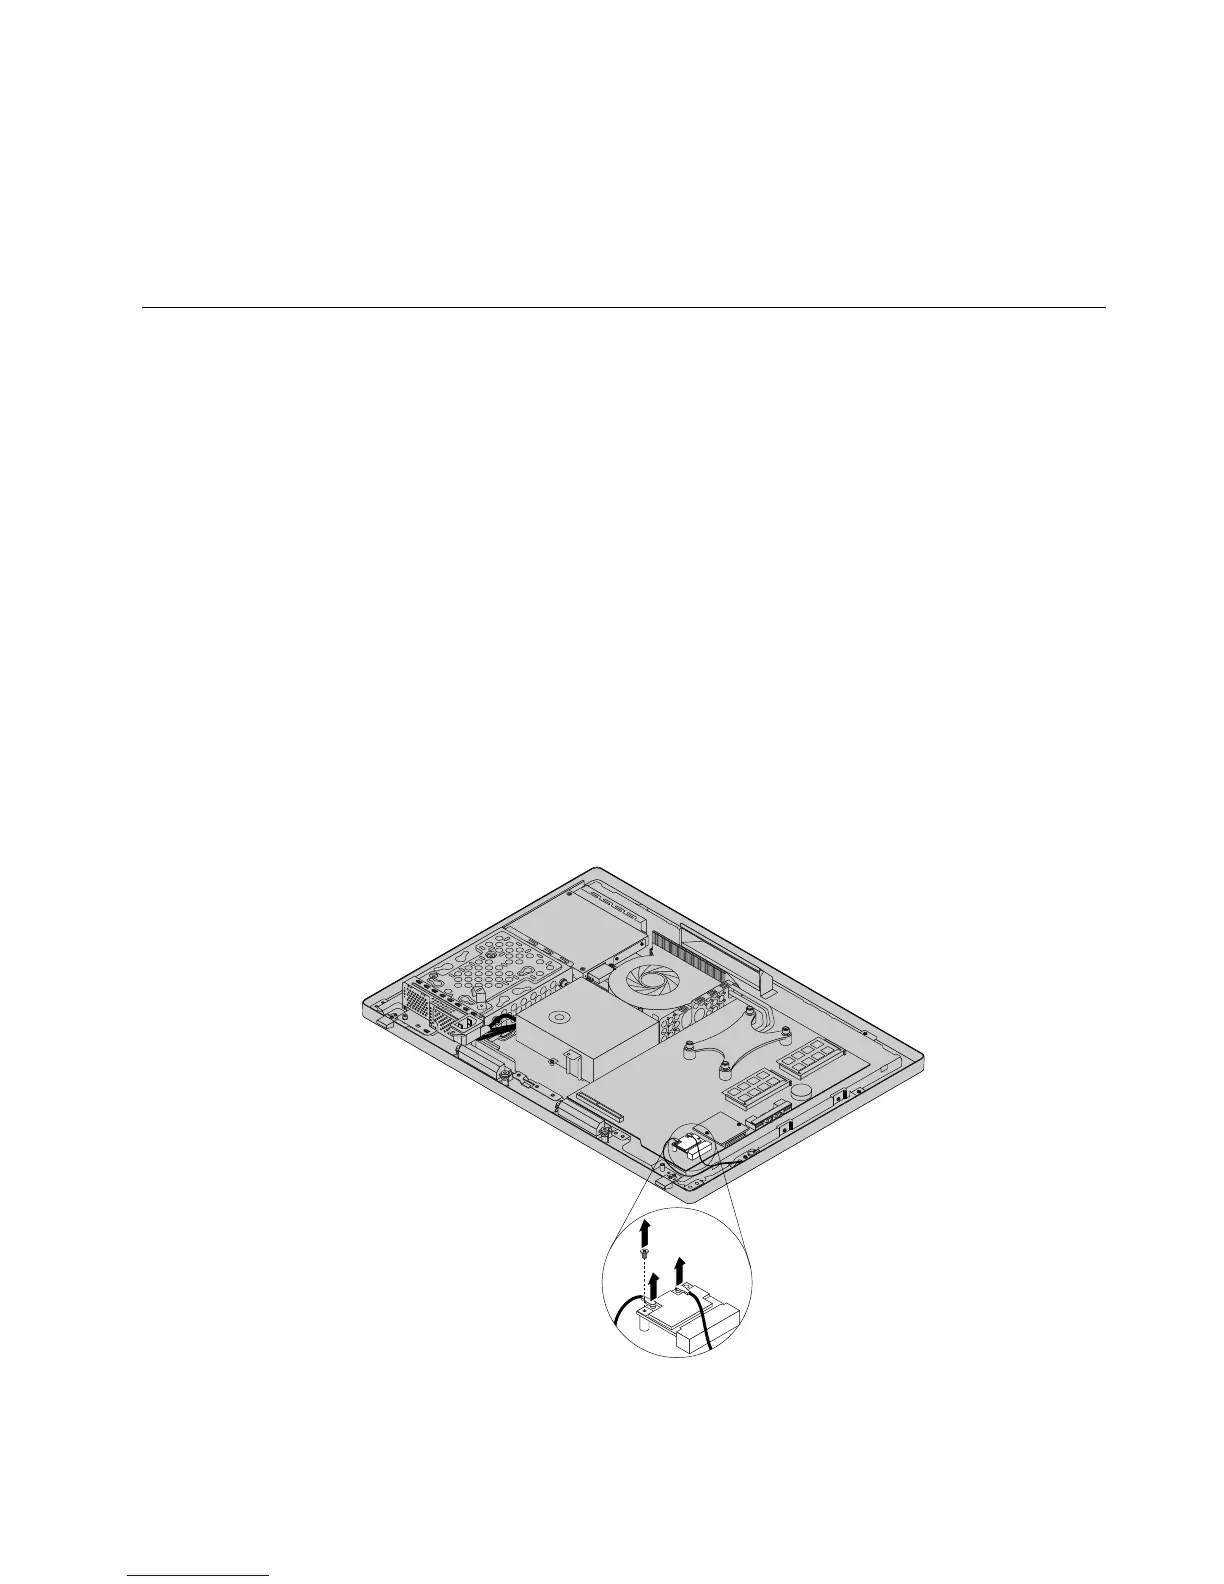
5.LocatetheWi-Ficardonthesystemboard.See“LocatingmajorFRUsandCRUs”onpage66.
6.RemovetherearI/Oassembly.See“ReplacingtherearI/Oassembly”onpage84.
7.DisconnectthetwocablesfromtheWi-Ficard,andthencarefullyremovethescrewthatsecures
theWi-Ficardtothesystemboard.
Figure48.RemovingthescrewthatsecurestheWi-Ficardtothesystemboard
Chapter9.ReplacingFRUs107