Chapter 5: Printer Options
86
Printer Options
Installing the Tractor 2 Feeder
The Tractor 2 Feeder is easy to install. No special tools or training are needed.
Note: Before installing the Tractor 2 Feeder, make sure continuous
forms are loaded on the other tractor feeder. (When Tractor 2 is
installed, you must remove it from the printer to load continuous
forms on the other tractor feeder.) For help loading continuous
forms on the other tractor feeder, see “To load continuous forms:”
on page 63.
1 Make sure the PC and the printer is Off and unplugged.
2
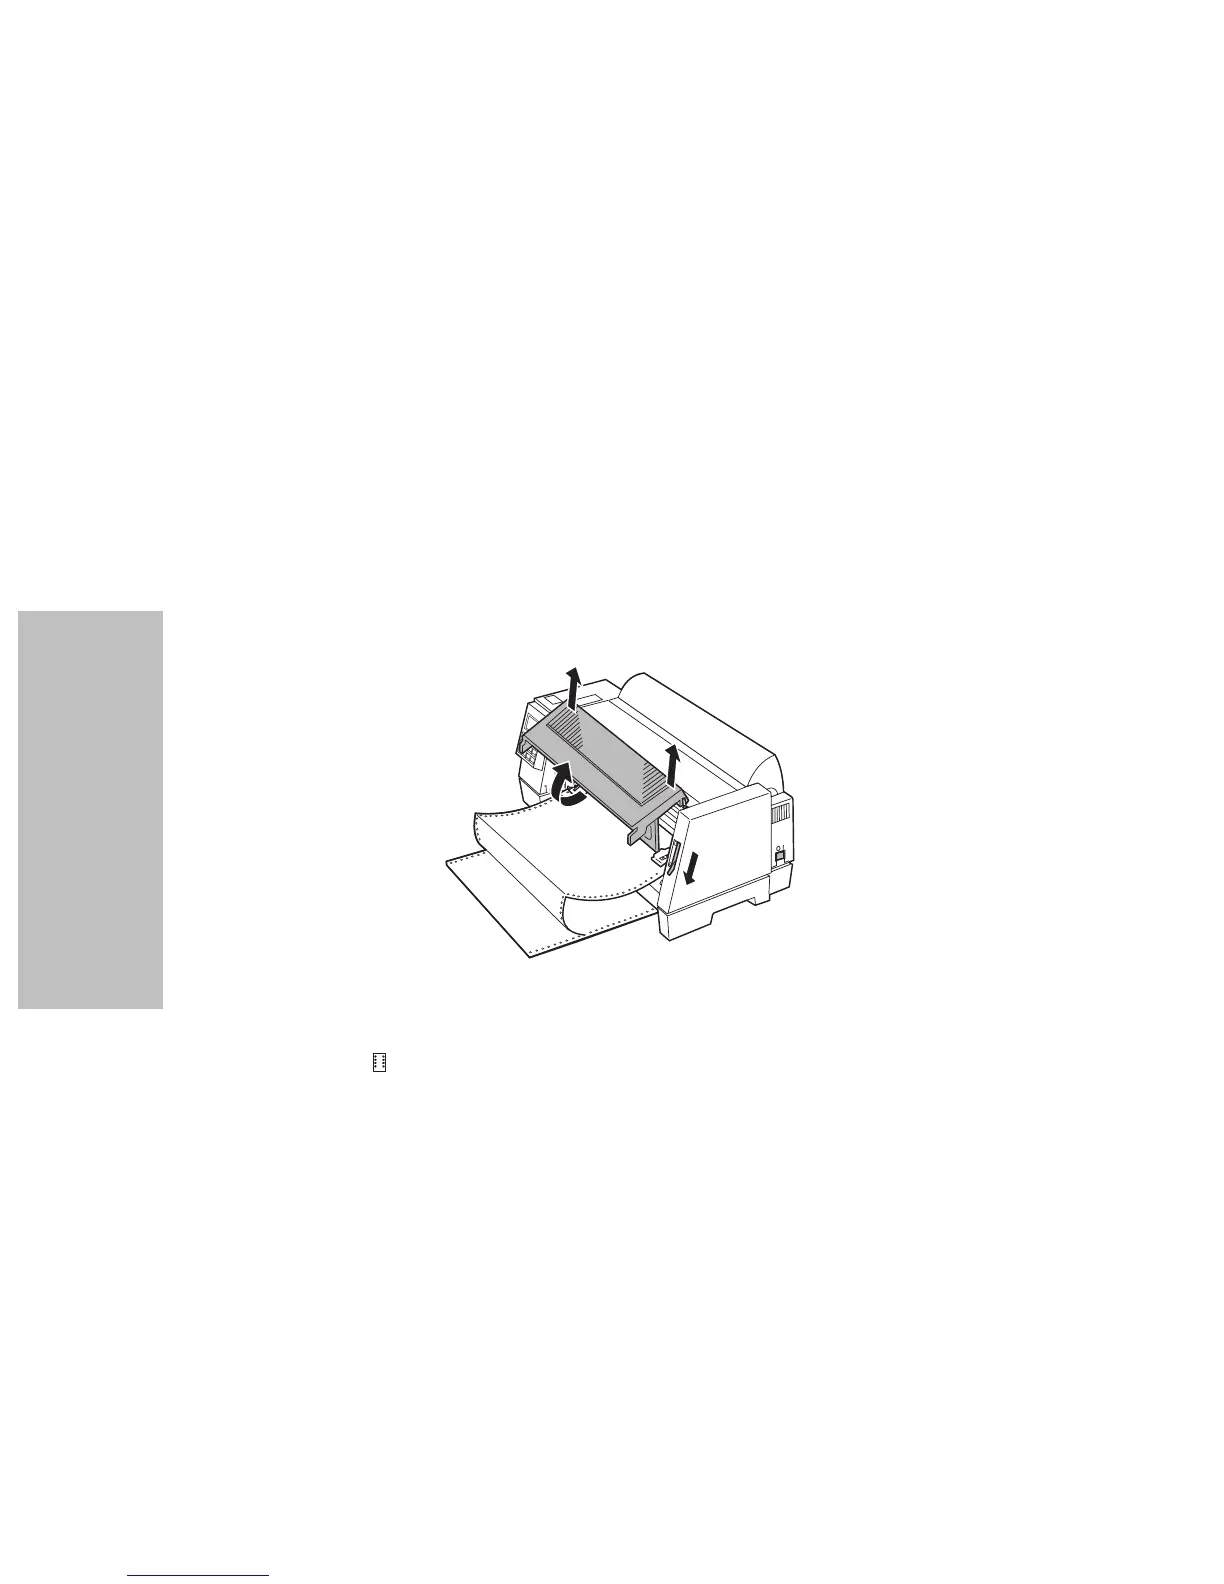
Open, pull up, and remove the front cover.
3
If necessary, push the paper select lever down to the continuous
forms position.
4 Remove all tape from the Tractor 2 Feeder including the tape that
holds the Tractor 2 Feeder cable to the Tractor 2 Feeder.
5 Grasp the Tractor 2 Feeder using the right and left side panels.