Actions Yes No
Step 6
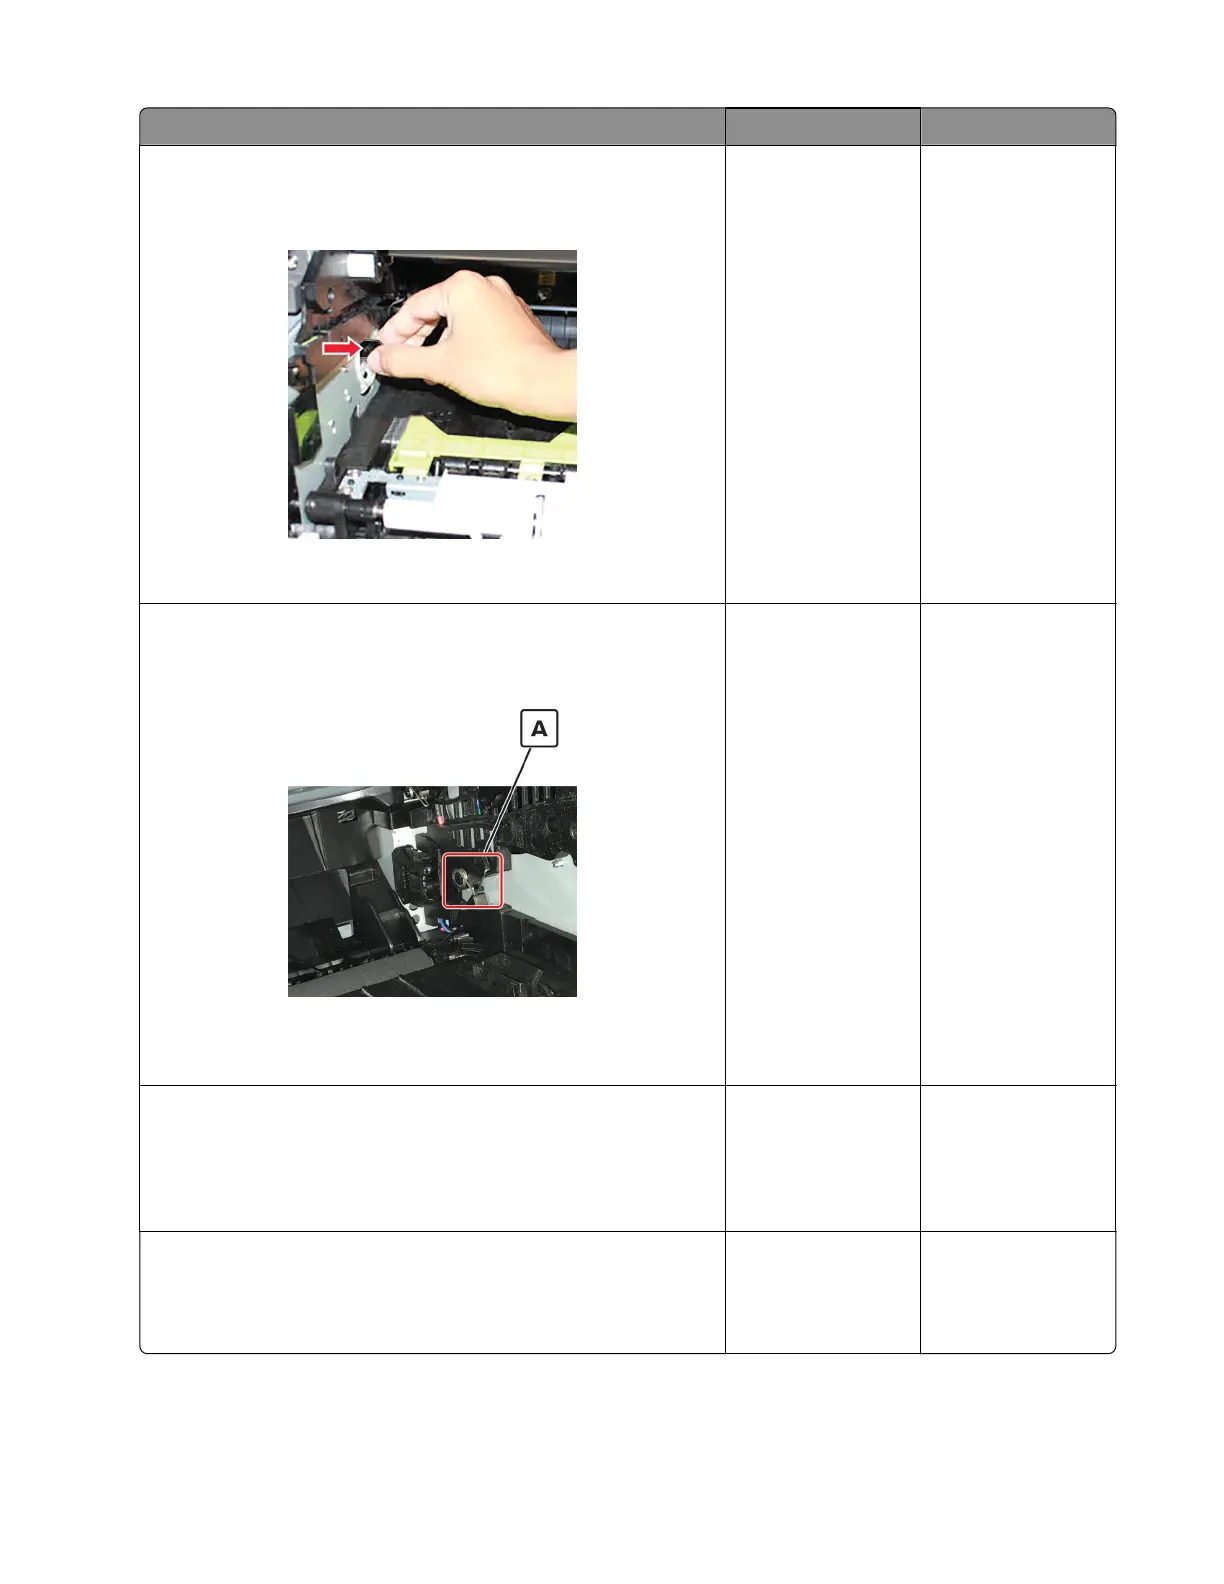
Reach inside the printer and manually reposition the coupler in the
direction of the red arrow as shown.
Does the problem remain?
Go to step 7. The problem is
solved.
Step 7
Check if the imaging unit contact (A) is bent, damaged, or not in
proper contact with the imaging unit.
Are the contacts free from damage, not bent and in proper contact
with the imaging unit?
Go to step 8. Contact the next
level of support.
Step 8
Check all connections in the power supply. If necessary, replace
the power supply.
Does the problem remain?
Go to step 9. The problem is
solved.
Step 9
Reseat cable JPS1 on the controller board.
Does the problem remain?
Go to step 10. The problem is
solved.
4514-6xx
Diagnostics and troubleshooting
46