Lexmark T65x and X65x Mono Product Study Guide Rev 1.47
For Training Purposes Only 6/3/2009
12
Polygon & Oscillating printhead assembly adjustment
Do the printhead mechanically registration adjustment whenever you remove or replace the printhead or
loosen the mounting screws.
Install the new printhead with the mounting screws centered in the slots in the printhead frame assembly.
Leave the screws loose enough to allow the printhead to move from side to side within the slots. It is
necessary to perform a mechanical registration adjustment before locking down the three printhead
mounting screws.
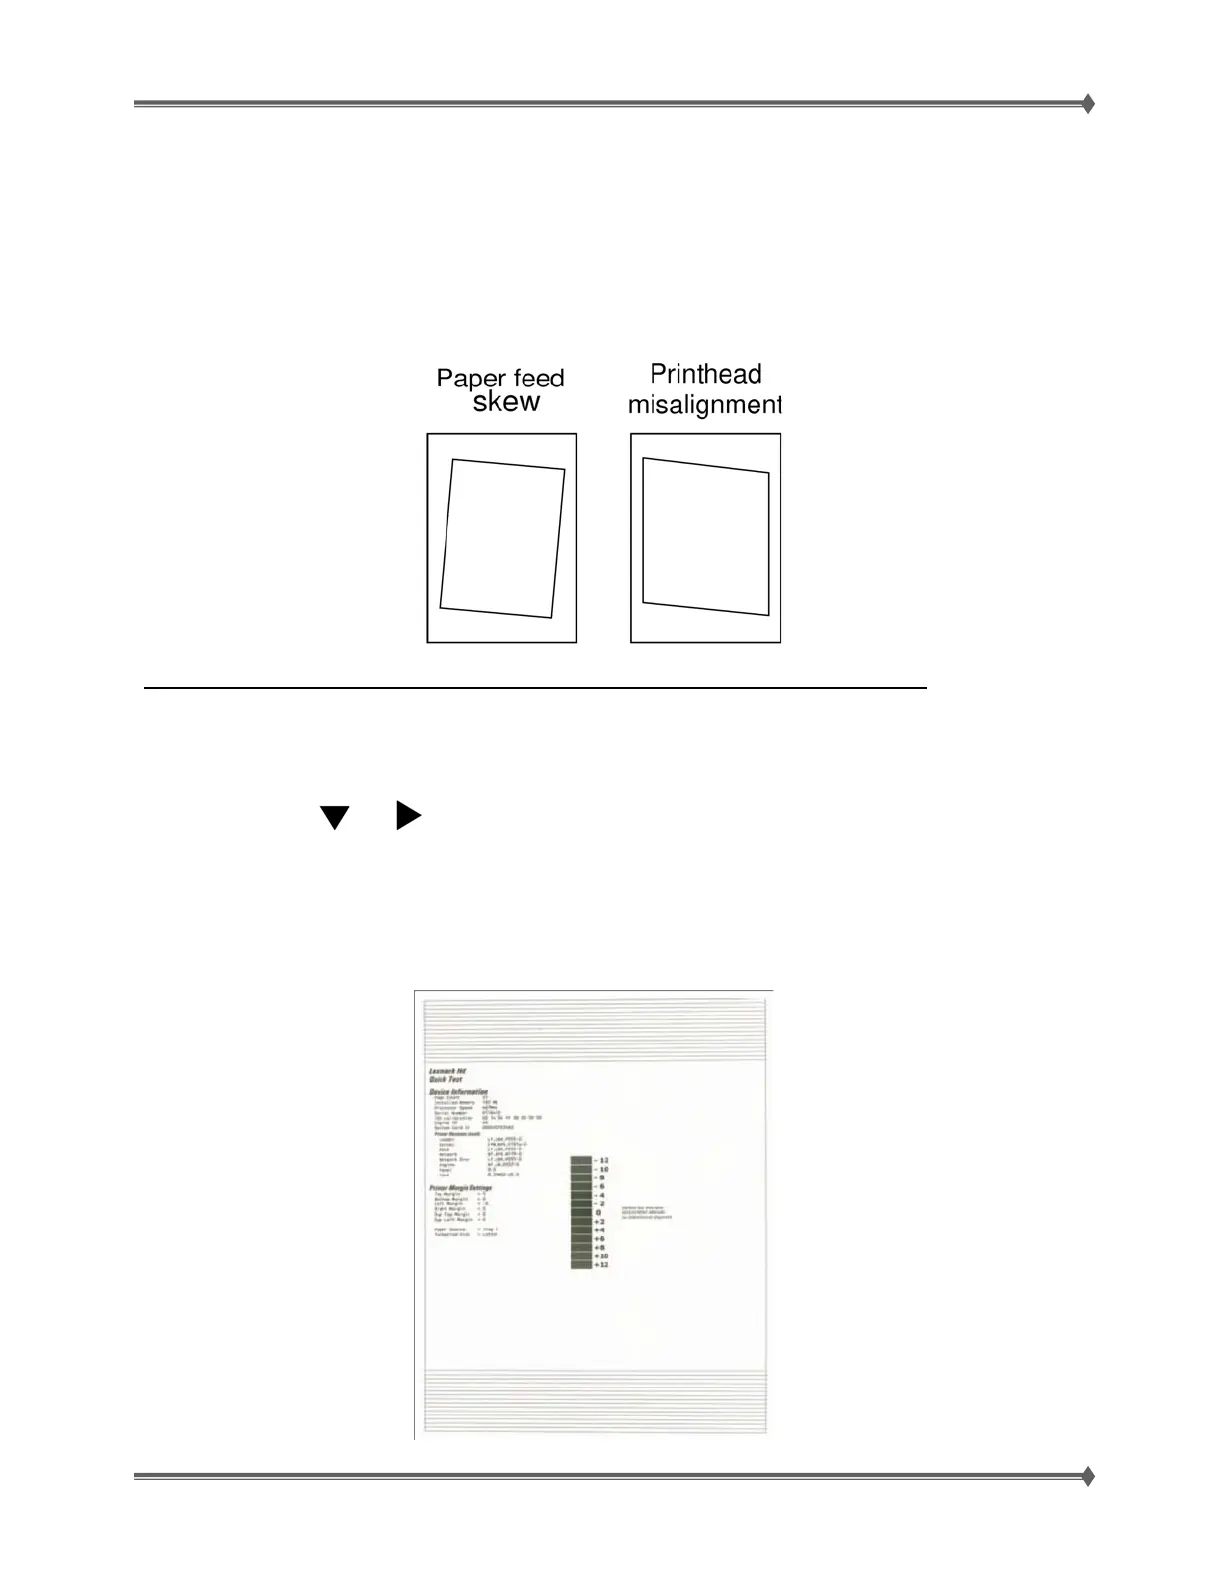
In case of paper feed skew, go to “Alignment assembly – skew adjustment” [Page 15]
To perform the mechanical registration adjustment of the printhead:
1. Turn the printer off.
2. Press and hold
and to enter the diagnostic mode.
3. Turn the printer on, and release the buttons when Performing Self Test displays.
4. Select Registration from the menu.
5. Select Quick Test Page. The test page should only be printed on letter or A4 paper from Tray 1. The
Quick Test Page consists of alignment diamonds, horizontal lines that can be used for mechanical
registration adjustment. An example of the printhead alignment printout is shown below:
 Loading...