Site Preparation and Installation
17 Liebert
®
Mini-Mate2
™
Using a suitable lifting device that is rated for the weight of the unit (see 5.2 - Ceiling Unit
Weights), raise the unit and pass the threaded rods through the four mounting holes in the flanges
that are part of the unit base.
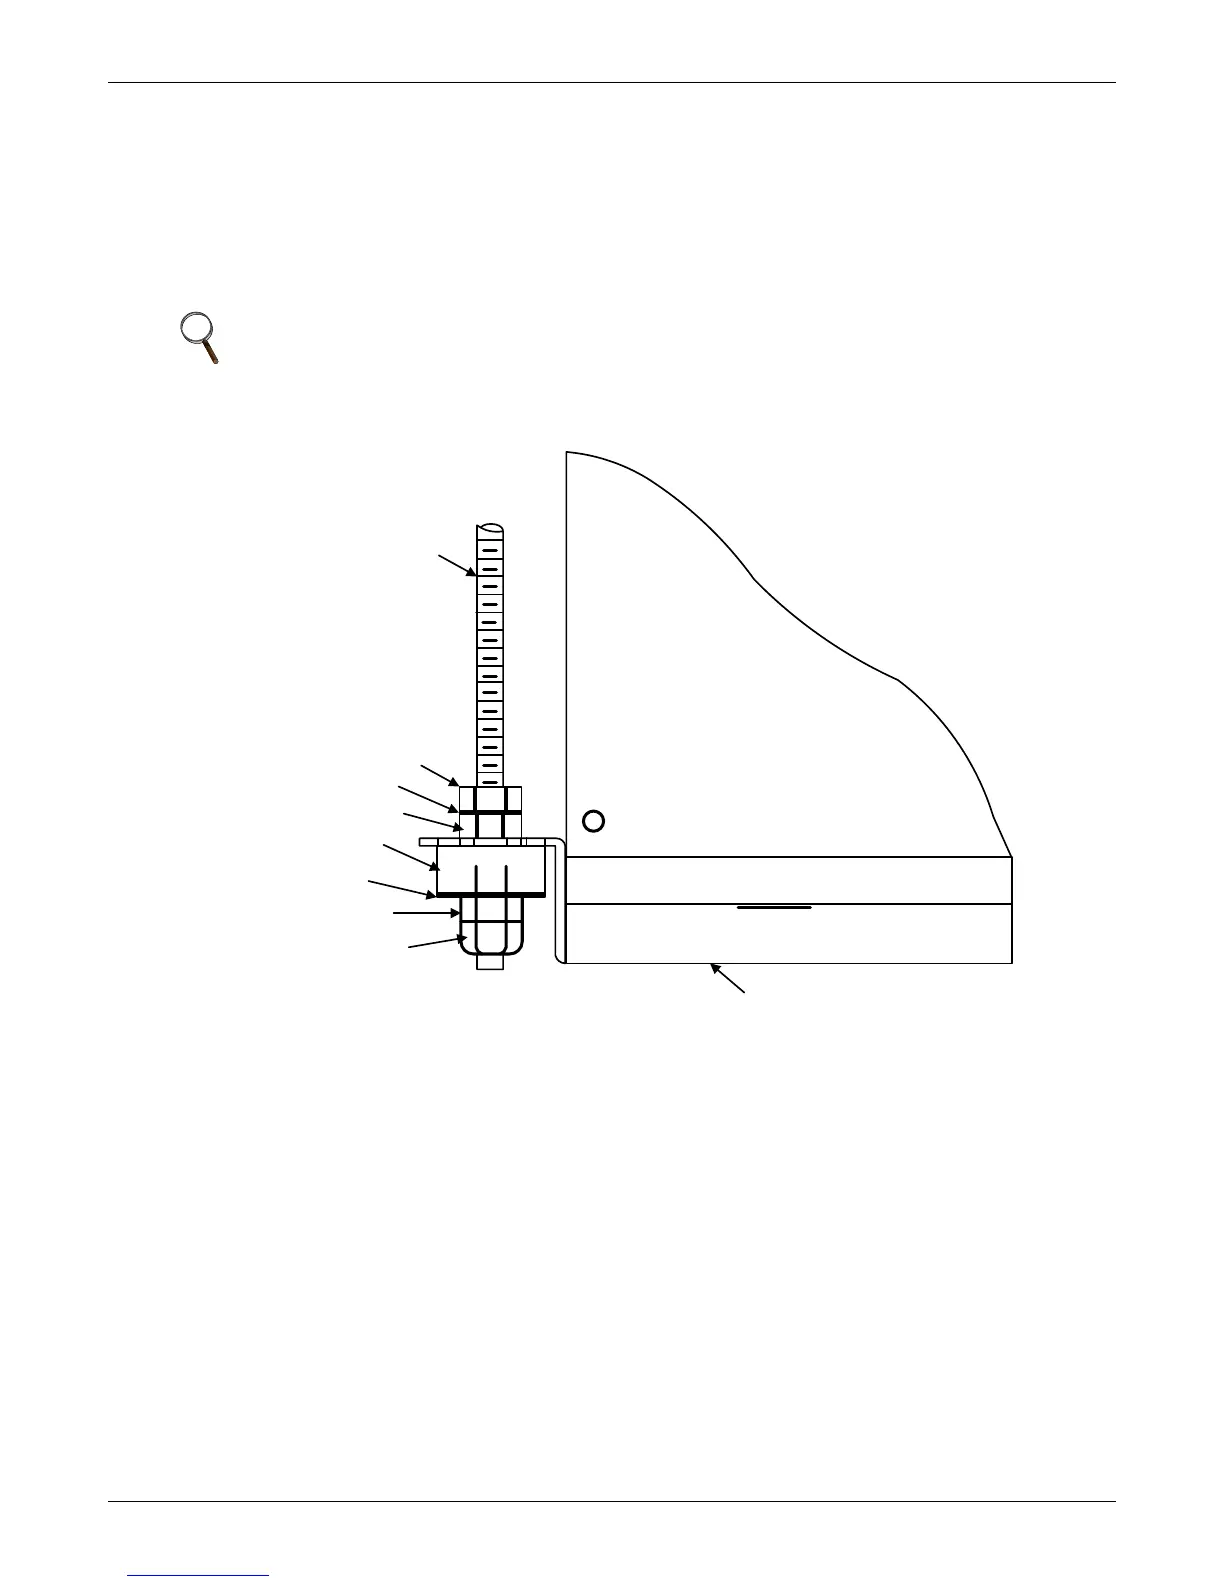
Attach the threaded rods to the unit flanges using the supplied nuts and grommets. (See Figure 11).
The rubber grommets provide vibration isolation.
1. First, use the plain nuts to hold unit in place. Adjust these nuts so that the weight of the unit is
supported evenly by the four rods, does not rest on the ceiling grid, and to ensure the unit is level.
2. Second, use the shake-proof nuts to “jam” the plain nuts.
Figure 11 Threaded rod and hardware kit installation
5.5.1 Close-Coupled Installations
If the evaporator and indoor condensing units are to be mounted back-to-back (close-coupled), hang
each unit before connecting them together. Align four bolt holes in the condensing unit with cage nuts
in the evaporator. Insert rubber spacers and secure with provided hardware. Align the refrigerant
connections and tighten them as described in 5.5.3 - Piping Connections and Coolant
Requirements (see Figure 17).
Close-coupled installations may take advantage of a single-point power kit to allow one power feed to
provide input for both evaporator and condensing units. Kit should be mounted in evaporator unit
before raising unit into ceiling area.
5.5.2 Evaporator Air Distribution
Filter Box
The optional filter box is available for the unit and mounts directly to the return air opening of the
evaporator. The 2 and 3 ton filter box is supplied with a MERV 8 filter (per ASHRAE 52.2-2007)
measuring 20 in. x 20 in. x 4 in. (508x508x102mm).
NOTE
The units must be level in order to drain condensate properly.
3/8" Threaded Rod
(field-supplied )
3/8" Hex Nut
3/8" Washer
Sleeve
Isolator
3/8" Fender Washer
3/8" Hex Nut
3/8" Hex Nut Nylock
Unit Base Pan (ref)