DDNS Setup (Advanced)
19
To set up remote connectivity with your system, you must:
1. Port forward the HTTP port (default: 80) and Client port (default: 35000) on your router
to your system’s IP address.
2. Create a DDNS account.
3. Enable DDNS on the system.
4. Test the remote connection by entering your DDNS address in the client software.
19.2.1 Step 1 of 4: Port Forwarding
You must port forward the HTTP port (default: 80) and Client port (default: 35000) on your
router to your system’s IP address before you can remotely connect to your system. There
are several methods to port forward your router:
• Use the Auto Port Forwarding Wizard (PC only) to port forward the required ports
(see www.lorextechnology.com for details). For instructions, see the Auto Port Forward
Wizard manual on www.lorextechnology.com.
• Manually port forward the required ports on your router to your system’s IP address by
following your router manufacturer’s instructions. For more information on port forward-
ing, see the reference guides on www.lorextechnology.com.
NOTE
If the above ports are not forwarded on your router, you will not be able to access your system remotely.
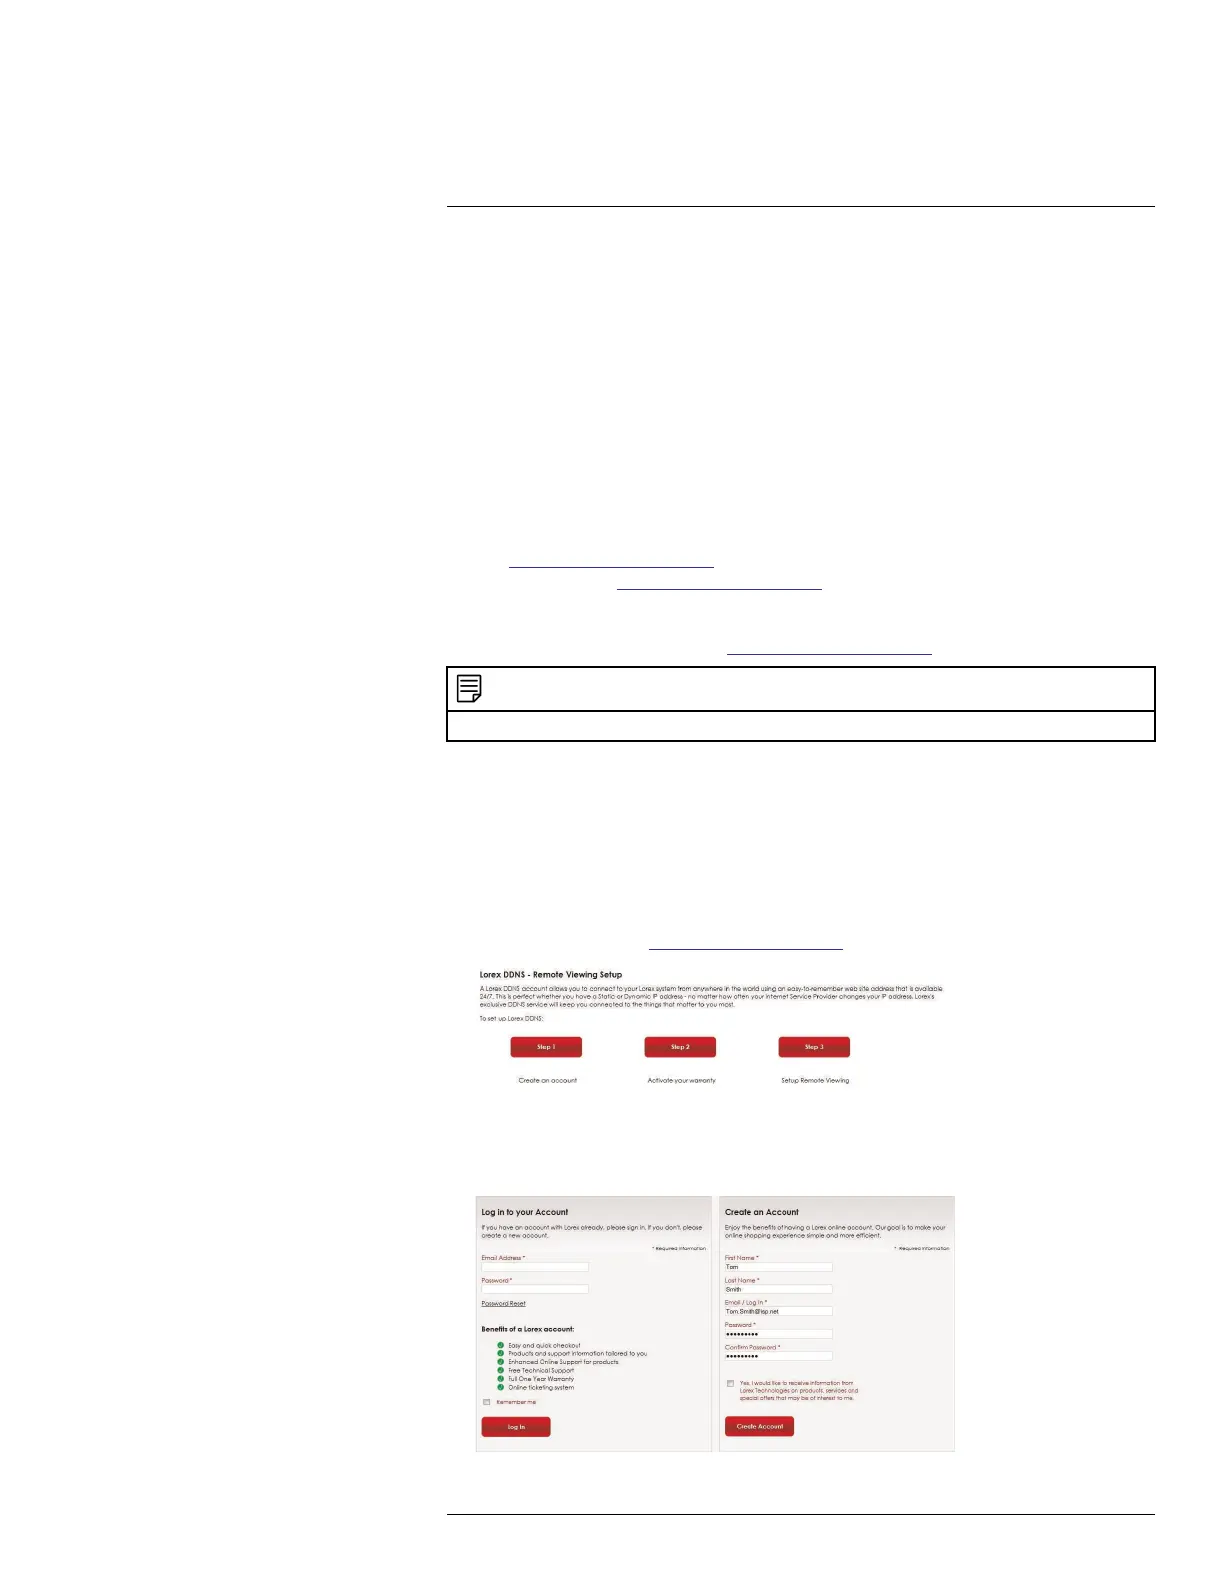
19.2.2 Step 2 of 4: Create a DDNS Account
Lorex offers a free DDNS service for use with your system. A DDNS account allows you to
set up a web site address that points back to your local network. This allows you to con-
nect to your system remotely. You must create a DDNS account in the same network as
your system.
To setup your free Lorex DDNS account:
1. In your browser, go to http://www.lorexddns.net and click Step 1.
2. The My Lorex account login screen opens (if you are already logged in, skip to step 4).
Create a new account or log into an existing account. To create a new account, fill in
the required fields on the right and click Create Account.
#LX400060; r.35927/36038; en-US
174