Page 20
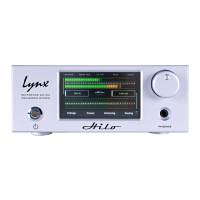
In Addition to the rear panel jack pack, there is one remaining cable connection on the Hilo front panel. The PHONES jack is a
standard ¼” TRS connector, and is capable of driving the full range of stereo headphones available.
4.4 Initial Setup
It is important to set up Hilo in the proper order to avoid any speaker damage calamities. Follow these steps for the best results:
Connect the AC power cord to Hilo and to a quality, surge-protected AC power source. Check the Power and Safety section
of this manual for additional information.
Connect cables from Hilo to whatever audio devices Hilo will be connected to. These could include powered speakers,
mixing consoles, power amps, microphone pre-amps, effects processors, etc.
Make sure volumes are turned down on connected equipment to avoid excessive level being sent to the equipment during
setup.
4.5 Dante Connections
Dante is not just a means for an audio device to communicate with a computer, but also a means for an audio device to communicate
directly to other Dante-enabled devices. A design principle with Dante, is that ANY Dante devices will be able to interact, regardless
of manufacturer. Clocking is managed automatically between devices, and device names, states and settings are stored on the chip
within every Dante device on the market. These chips are manufactured by the company that developed the Dante system, Audinate.
For this reason, there is nothing about these essential connections that is unique to Lynx Products. If you know how to configure one
manufacturer’s device for Dante, you’ll be able to do the same for any other manufacturer’s device. Creating a Dante network
involves some IT principles that can be un-charted terrain for musicians and recording engineers; managed switches versus
unmanaged switches, multicast versus unicast, flows, packets, etc. When setting up a Dante system it is wise to study the wealth of
information that is available on the internet, particularly on www.audinate.com
Of particularly benefit is information on selecting and configuring a network switch that will be the center of your Dante ecosystem.
Rather than re-invent the wheel, we recommend that Hilo-Dante users consult with the following resources when designing and
configuring their system:
https://www.audinate.com/resources/technical-documentation: resources for using Audinate software, technical docs, and setup guides
https://www.audinate.com/resources/faqs: an extensive collection of Dante FAQs, covering all aspects of latency, clocking, computer
integration, etc.
https://www.audinate.com/resources/networks-switches: information on network considerations, and switch selection and
configuration.
https://www.audinate.com/products/manufacturer-products/dante-brooklyn-ii: Information about the Brooklyn II chip used in Hilo-
Dante
Unlike most multi-component audio systems, we recommend letting the Hilo receive its clock from the Dante network whenever
possible. For this reason, DANTE will become the default SYNC SOURCE in the Hilo when connected to a Dante network. The
Dante controller software will allow the use of external clocking if that is necessary, but otherwise it is good practice to allow all
devices in the network to receive clock through their Dante connections. Details about Dante clocking practices can be explored in the
support resources above.
4.5.1 Dante computer Set Up
There are several ways that Dante hardware can be used with computers. As an audio-adapted networking protocol, the computer is
just another node in the network, not unlike computers in a business network. Some Dante contexts (live sound for instance) may only
use a computer for initial configuration, and never again. With other systems, the computer can be integral to the system as a
recording and play device. There are three primary ways to integrate Dante devices in a computer:
4.5.1.1 Dante Controller Software
Dante controller is an application that allows control and configuration of Dante devices. This powerful tool allows users to route
signals from any Dante source to any Dante destination on the network. Each device can be configured in terms of clocking, latency,
device name, and transmission characteristics. Routing is achieved through a grid system, where “flows’ are defined between a
transmitter and a receiver.
With Dante Controller installed onto an OS X Mac, or Windows PC, devices in the Dante network will automatically appear, there are
no drivers or utilities to install for this to happen. When Hilo is connected to the system, it will appear in Dante Controller as LT-
DANTE (this can be easily changed from the Device Config page of DCS). Complex systems with dozens of devices in multiple
rooms can be managed here, as well as simple home recording setups.
Dante Controller can be downloaded from the Audinate website at: www.audinate.com > products > software: dante controller. In
addition to the file download there is a vast array of information here, including documentation and tutorial videos. We strongly