Page 15
clicks, pops or distortion in the audio. This is the result of buffer under-runs, when the audio buffer is momentarily depleted because
the computer cannot deliver samples quickly enough to keep it filled.
Why is latency important? It isn’t in every case. Here are the main conditions where low latency is important:
Software input monitoring. This is where you are monitoring through your audio software the input signals to be recorded. The
software is re-directing the input signal back out to a play device. If the buffer is too high here the performer will hear a
noticeable delay between the notes they are playing and hearing the sound back through the computer. Note that with the LT-TB,
zero latency hardware monitoring is available as an alternative to software monitoring. See section 5.3.4: Routing.
Virtual Instruments. Generally this would involve using a software synthesizer or other virtual sound source as an alternative to
dedicated hardware like a keyboard or tone module. Frequently one would play these instruments with some sort of MIDI
controller. The delay between a key being struck and hearing the resulting note from the virtual instrument is a function of
latency.
Mix Automation. Virtually all DAW applications feature some sort of Mix Automation, and most allow an external Mix surface or
MIDI controller to facilitate mixing within the software environment. Whether using onscreen faders or a MIDI surface of some
sort, latency will determine the delay between manipulating a fader or knob, and that move being reflected in the project.
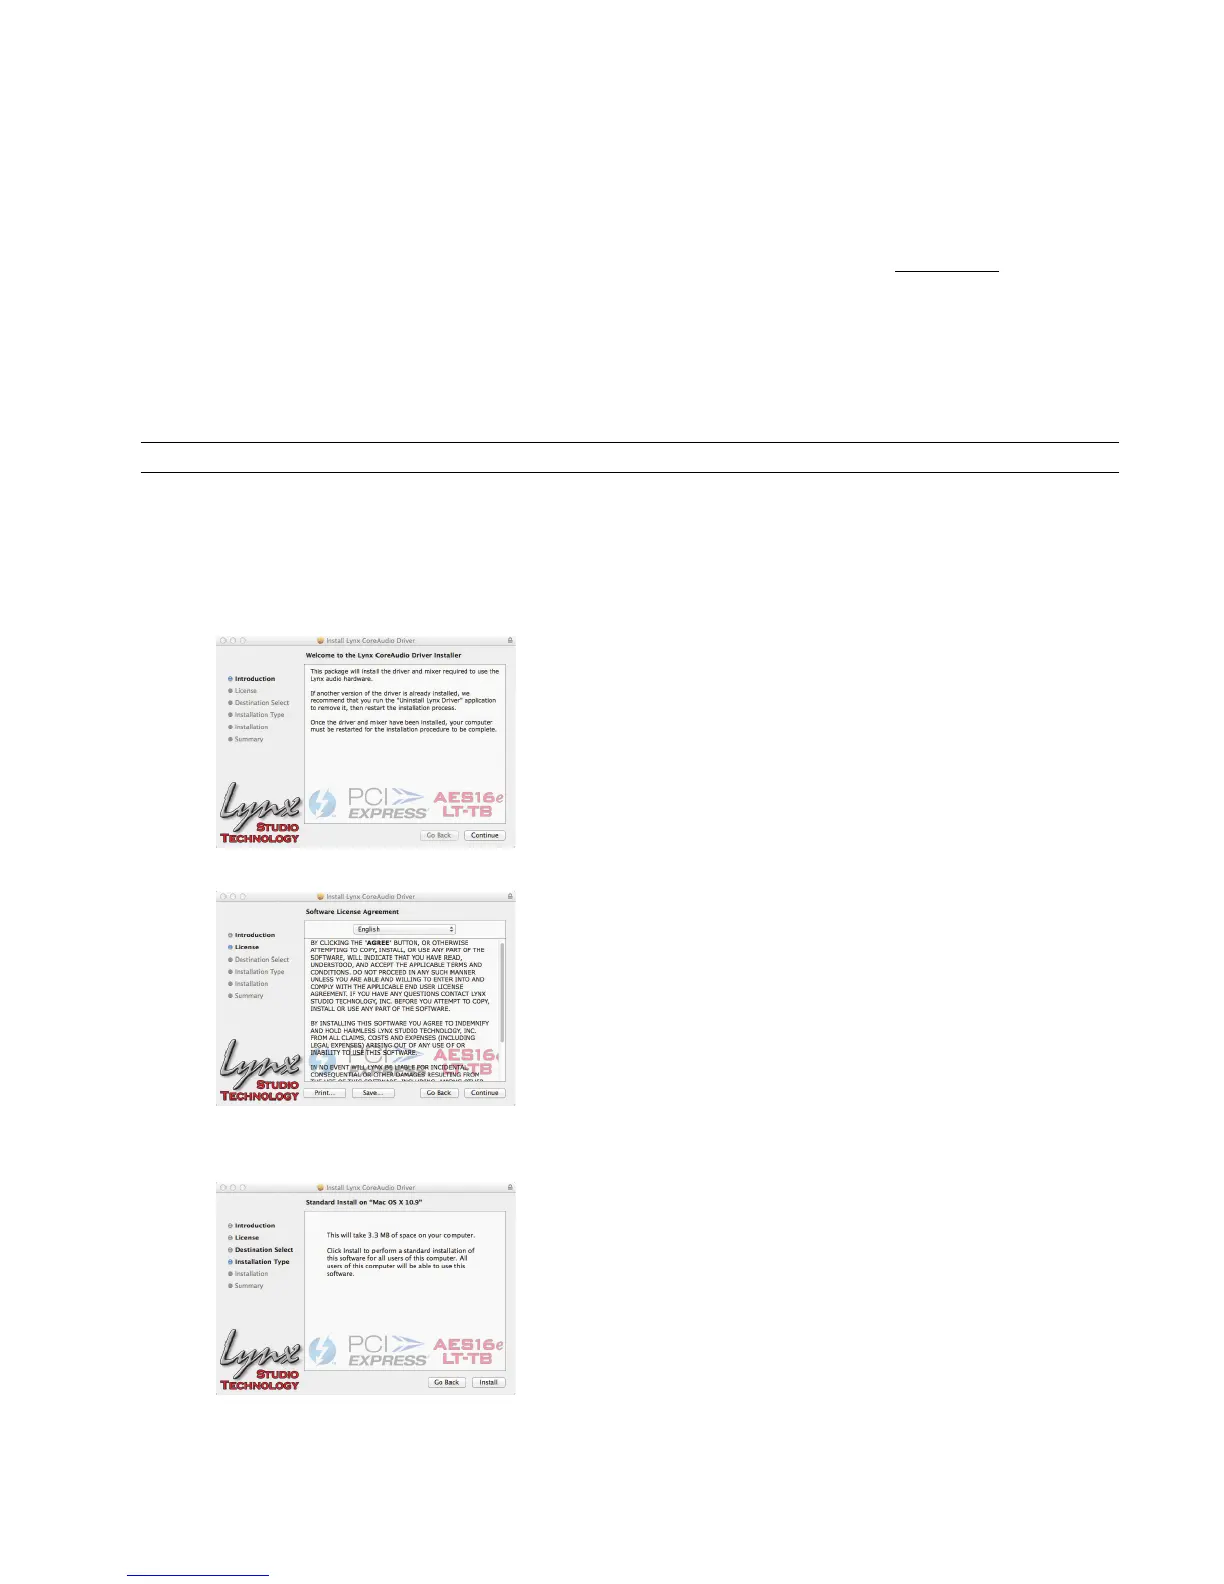
3.5.3 Installation for Macintosh OS X
1. Power up the Hilo and connect it to the computer with a Thunderbolt cable.
2. Locate the LT-TB driver from your downloaded files. The file name will be Lynx_OSX_##.zip (where ## is the version
number of the driver). Double-click to expand the installer package.
3. Double-click “Lynx_OSX.pkg” that was expanded from the step above. This will start the driver installation.
4. Click “Continue” at the “Install Lynx CoreAudio Driver Installer” dialog box.
5. Click “Continue” for the Software License Agreement after reading it.
6. Click “Agree” from the next Window
7. Click “Install” in the Standard Install Window
8. Type in Password and click “Install”
9. Click “Continue Installation” for prompt about restarting computer after the installation