Page 11
Battery In
DC 4-pin XLR battery pack connector. Supports 9-18 volts DC. See Appendix 5.1 for more information.
IEC Power connector
Use the included AC power cord
In Addition to the rear panel jack pack, there is one remaining cable connection on the Hilo front panel. The PHONES jack is a
standard ¼” TRS connector, and is capable of driving the full range of stereo headphones available.
3.4 Initial Setup
It is important to set up Hilo in the proper order to avoid any speaker damage calamities. Follow these steps for the best results:
Connect the AC power cord to Hilo and to a quality, surge-protected AC power source. Check the Power and Safety section
of this manual for additional information.
Connect cables from Hilo to whatever audio devices Hilo will be connected to. These could include powered speakers,
mixing consoles, power amps, microphone pre-amps, effects processors, etc.
Make sure volumes are turned down on connected equipment to avoid excessive level being sent to the equipment during
setup.
If the context of use is as a standalone AD/DA converter that will not be connected to a computer, skip ahead to section 5,
and, in particular, section 5.3.4: Routing.
If using Hilo with a Mac or PC computer, follow the installation procedure below.
3.5 Computer Set Up
Lynx Drivers and firmware updaters are updated regularly. The most current versions can be easily downloaded from the Lynx
Website: www.lynxstudio.com > Support> Downloads. Make sure that you choose LT-TB or Hilo Thunderbolt as the “Product”.
If you are updating an existing driver, it is recommended to remove it before installing the new driver. In Windows, this is done from
Start > Programs > Lynx Studio Technology > Uninstall Lynx Driver. From OS X, this is done by running the uninstaller that comes
in the folder with the downloaded driver installer. Reboot when prompted after the Uninstall is complete. When installing drivers,
make sure that all software programs, especially audio applications, are closed.
3.5.1 Driver Installation for Windows 7/8/10
1. Power up the Hilo and connect it to the computer with a Thunderbolt cable.
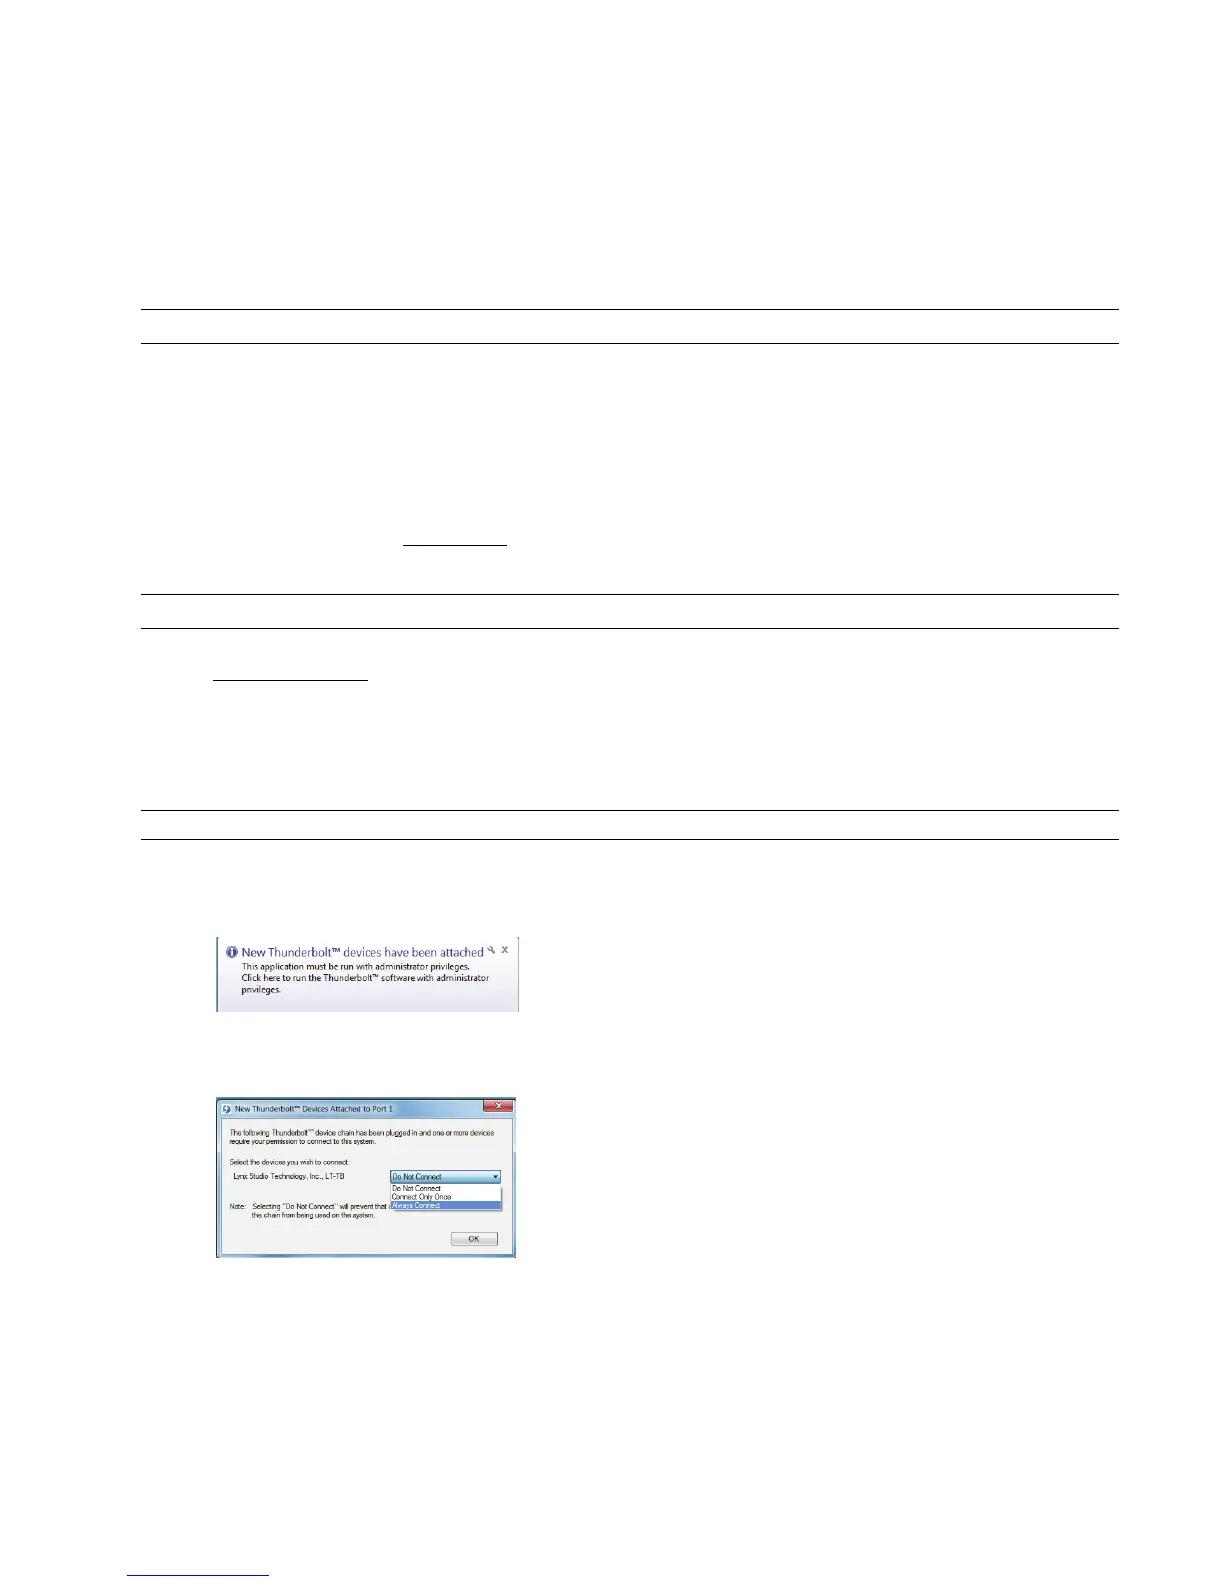
2. On first connection, you may receive a prompt that New Thunderbolt Devices have been attached. Click this window to
have the system connect to the Hilo as a Thunderbolt Device
3. When the Select Device to Connect Window comes up, Choose “Always Connect”. If there are multiple Thunderbolt
devices connected at install time, you will need to do this for each unit. (If this is a reinstall, you will not see this dialog box.
Just continue on with the subsequent steps).
4. Locate the LT-TB driver from your downloaded files. The file name will be V2Setup###.exe (where ### is the version
number of the driver)
5. Double-click the installation file to start the driver installation.
6. Accept the License Agreement by clicking “Accept”