Page 22
5 Using Hilo
Hilo’s Touch Screen gives it a key advantage over other converters. As all of the functions are controlled by the software that runs the
touch screen, Hilo is not locked into just one way to work. We can add features. We can change the graphics. We can offer completely
different user interfaces for different types of users. The Hilo user interface from three years ago is radically different than today’s
Hilo. In short, it has evolved. It will continue to evolve.
Hilo was designed for ease of use, without navigational clutter on the front panel.
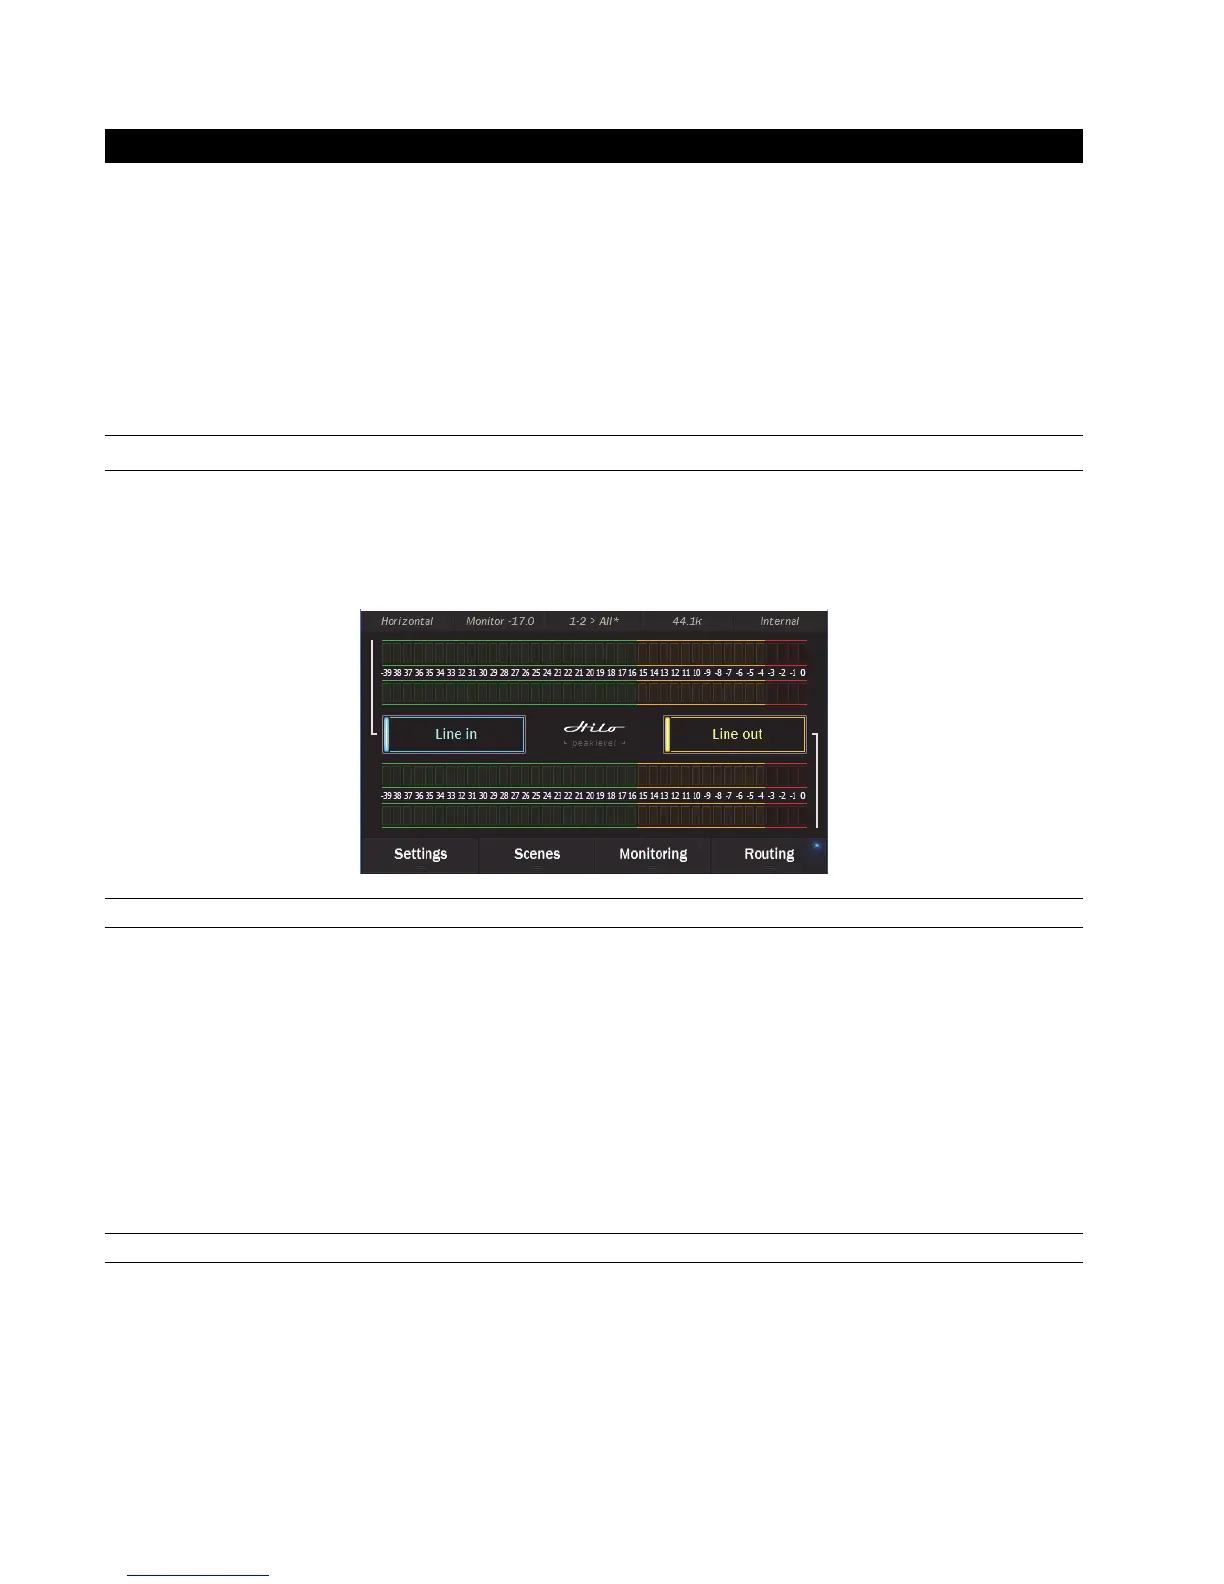
The heart of the Hilo system is the 480 x 272 pixel front panel touch screen. This is where settings, routing, volume control and meters
are displayed and managed. The Hilo screen is responsive to pressure. It may take a little getting used to the amount of pressure and
accuracy required for the on-screen buttons to respond. Also, like any such device, Hilo employs navigational conventions that,
although designed to be intuitive and require little or no explanation, may require a small learning curve initially.
5.1 On Power Up
The first time you power up the Hilo you will be greeted by the Calibration page. Calibration is a necessary process to insure that the
Hilo touchscreen is properly responsive. Calibration involves touching DOTs in the four corners of the touch screen one at a time. The
calibration dots are rather small, so some find it helpful to use a pencil eraser or something similar.
After calibration, the first screen that you will see will be the METER page. The dual Horizontal Meter set is shown below.
5.1.1
Headphone and Monitor Out Volume Control
If you turned Hilo off using the STANDBY switch on the front panel, all of your previous settings will be recalled. Your Headphone
and Monitor Out levels will be the same as when you last used them.
Caution: Be sure to check the volume level of the Headphone and Monitor before playing audio. You can do this by simply turning the
Rotary Control. A level indicator will appear at the top of the screen.
The Hilo PHONES Output has “jack sense”, so that the headphone volume controls are only available when headphones are plugged
in. If headphones are not plugged in, then the Rotary Encoder will only control the Monitor Out level. If headphones are plugged in,
then pushing in the Rotary Control knob will allow you to toggle between Headphone and Monitor Out Volume Controls by default.
If you wish to have the rotary control toggle between outputs other than Monitor Out and Phones Out, then this can be changed from
the ROTARY CONTROL SETTINGS button on the Settings: System page. Any combination of outputs can be selected here,
including a MASTER OUT that would control levels for ALL of the outputs at one time.
5.1.1 Menu Screen conventions:
When you engage a button, it “lights up”, just as if you are pushing a button on a console. The last button touched or changed will
always light up when that Menu page is selected.
Most buttons have a dual purpose. First they display the control’s current setting. Second by touching them, you can select a different
setting.